Backup and Restore to Kyndryl Cloud Uplift on Azure using Mksysb
This guide is provided “as-is”. Information and views expressed in this document, including URL and other Internet website references, may change without notice and usage of the included material assumes this risk.
This document does not provide you with any legal rights to any intellectual property in any product. You may copy and use this document for your internal, reference purposes.
Table of Contents
- Prechecks
- Backing up On-Prem System using Mksysb Backup Execution
- Transferring Mksysb to Kyndryl Cloud Uplift
- Restore In Kyndryl Cloud Uplift
- Setup New LPAR and restore the Mksysb
- Savevg Backup and Restore in Kyndryl Cloud Uplift
Prechecks
- Error logs for any OS level issues.
- Check Software inconsistencies using # lppchk -v.
- Resolve any operating system level issue to take a healthy system backup.
- Enough free space to backup all files in a filesystem.
Backing up On-Prem System using Mksysb Backup Execution
- Populate the /tmp/exclude.rootvg file for excluding the file systems from the backup.
-
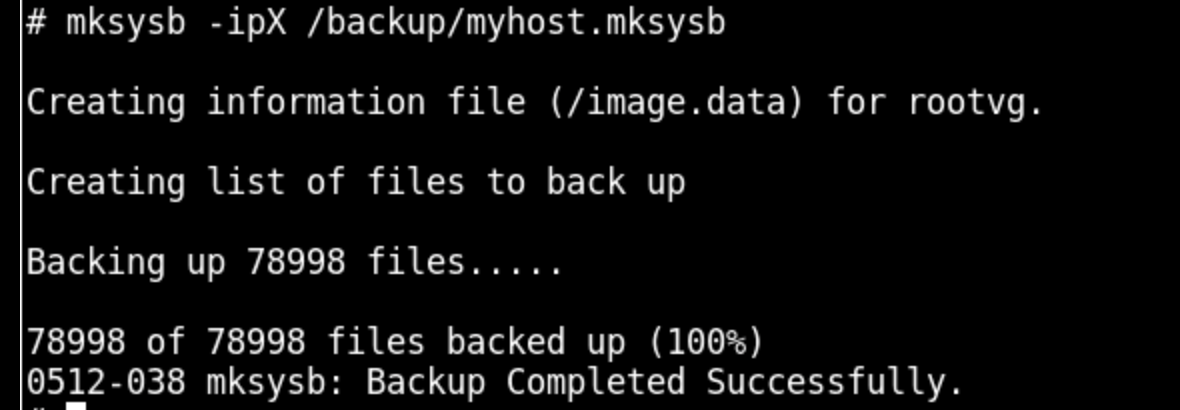
Use command # mksysb -ipX /<FS>/<hostname>.mksysb.
 ){}
){}
Note: It may take some time to complete the backup
-
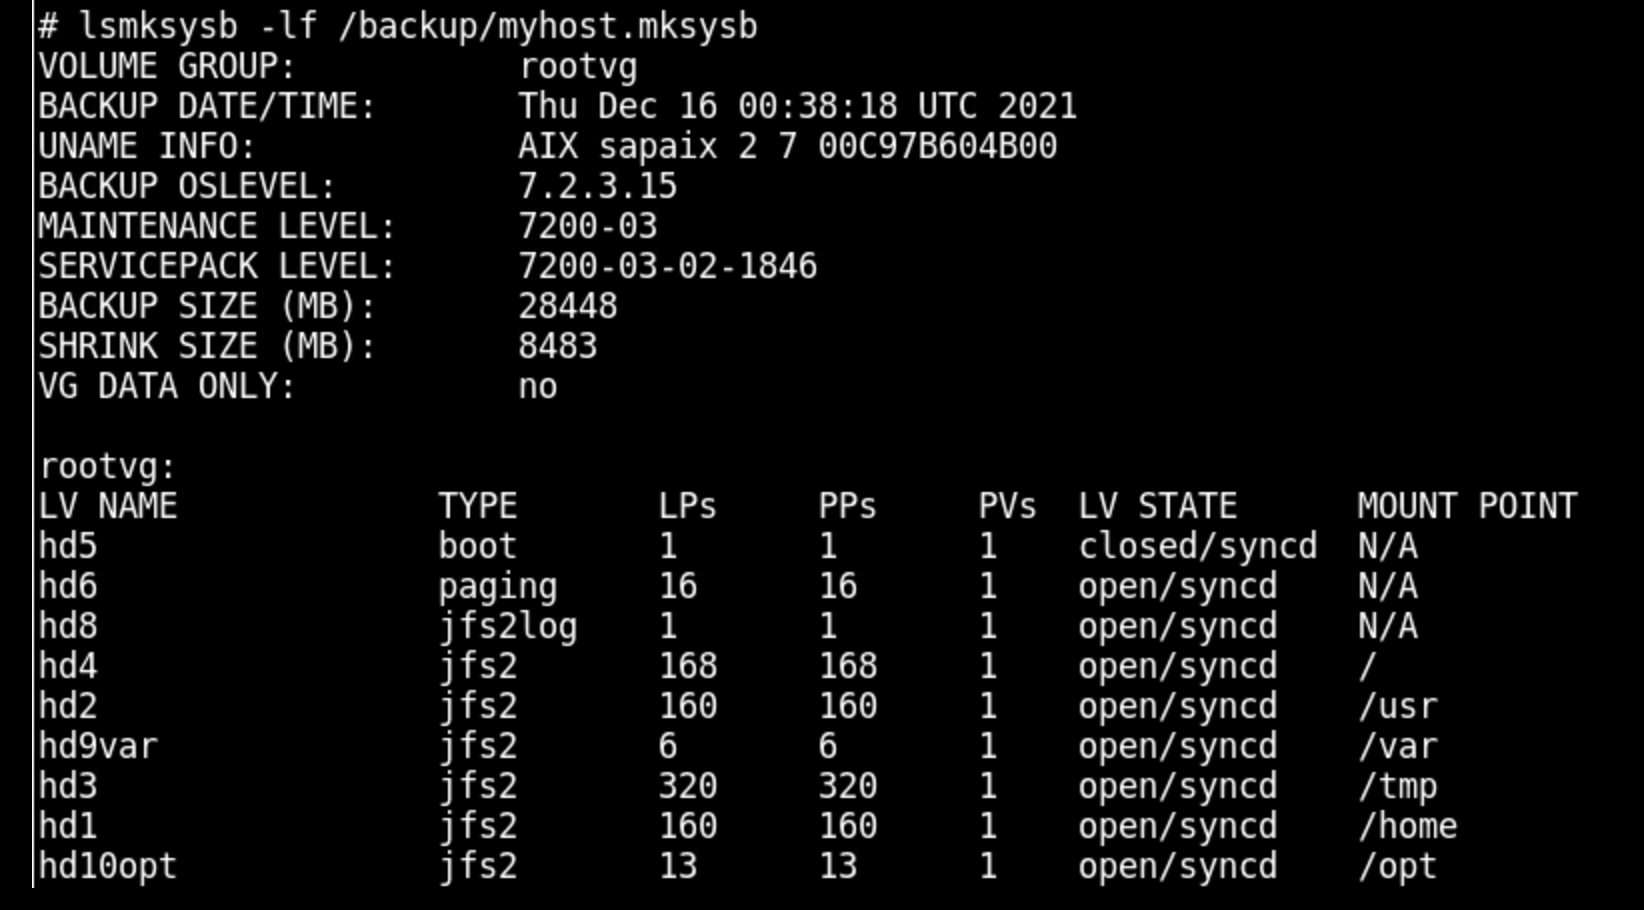
Verify content of mksysb using # lsmksysb -lf > /<FS>/<hostname>.mksysb.
 ){}
){}
Transferring Mksysb to Kyndryl Cloud Uplift
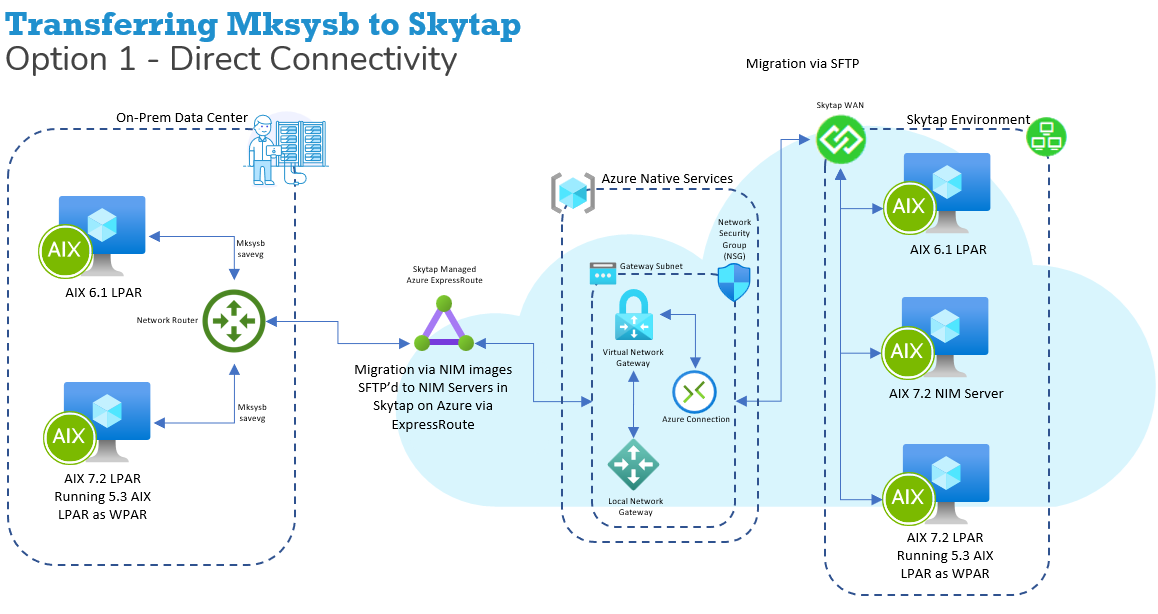
Option 1 - Direct Connectivity
Pros:
- VPN or ExpressRoute
- Network planning is required ahead of time
- Secured and fast data transfer
-
Future proof
 ){}
){}
Option 2 - Published Service
Pros:
- Fastest and cheapest to deploy
- Native Kyndryl Cloud Uplift support
- Only the NIM server in Kyndryl Cloud Uplift is required to start data transfer
- Encrypted data transfer over public Internet
-
Only recommended for proof-of-concept
 ){}
){}
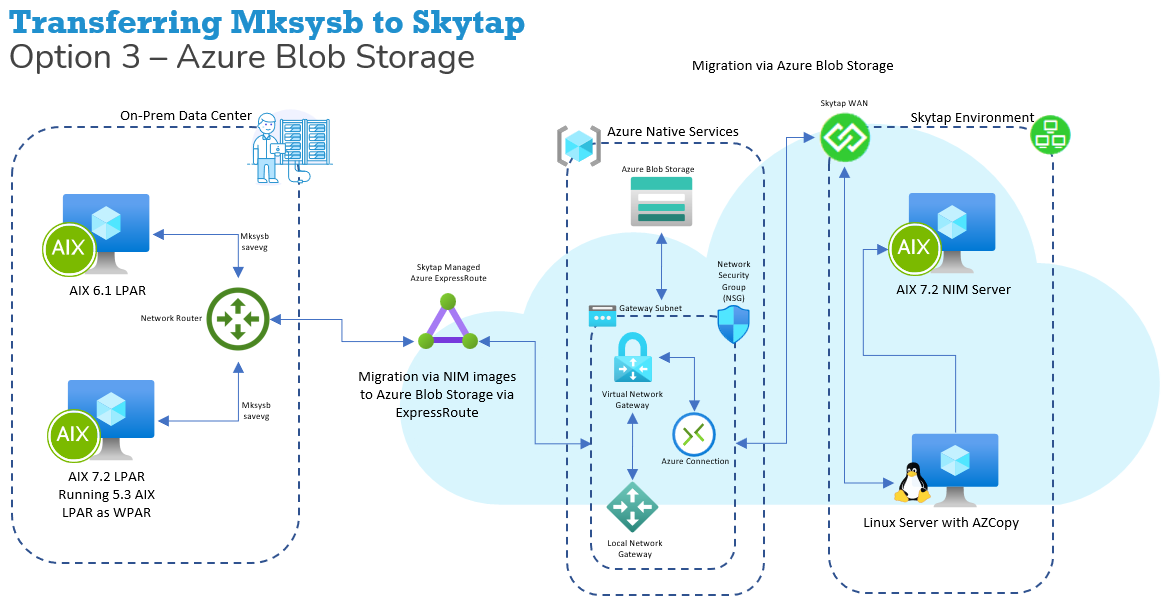
Option 3 - Azure Blob
Pros:
- Azure Blob Storage
- Secured and fast data transfer
- Additional VM for AZ copy required
- Future proof
-
Data can be copied over even before Kyndryl Cloud Uplift service is started
 ){}
){}
Restore In Kyndryl Cloud Uplift
Initiate a NIM server in Kyndryl Cloud Uplift
-
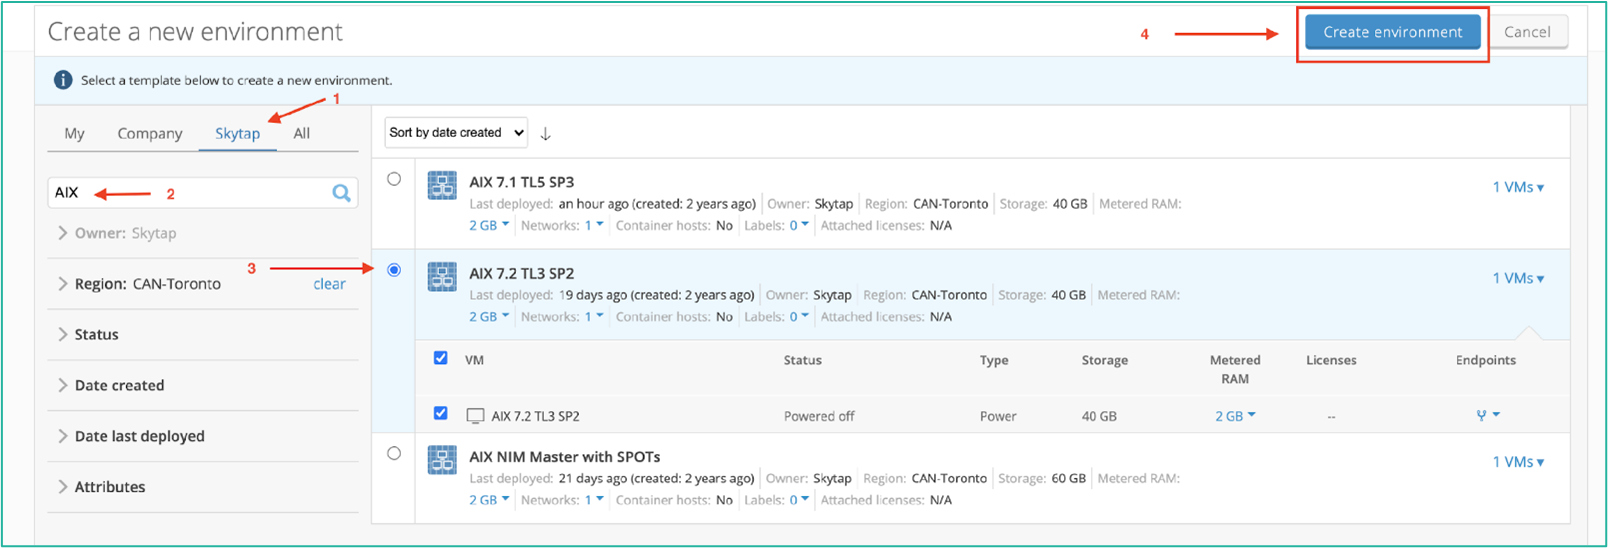
Deploy a new NIM AIX template using public templates (latest AIX level recommended).
 ){}
){} -
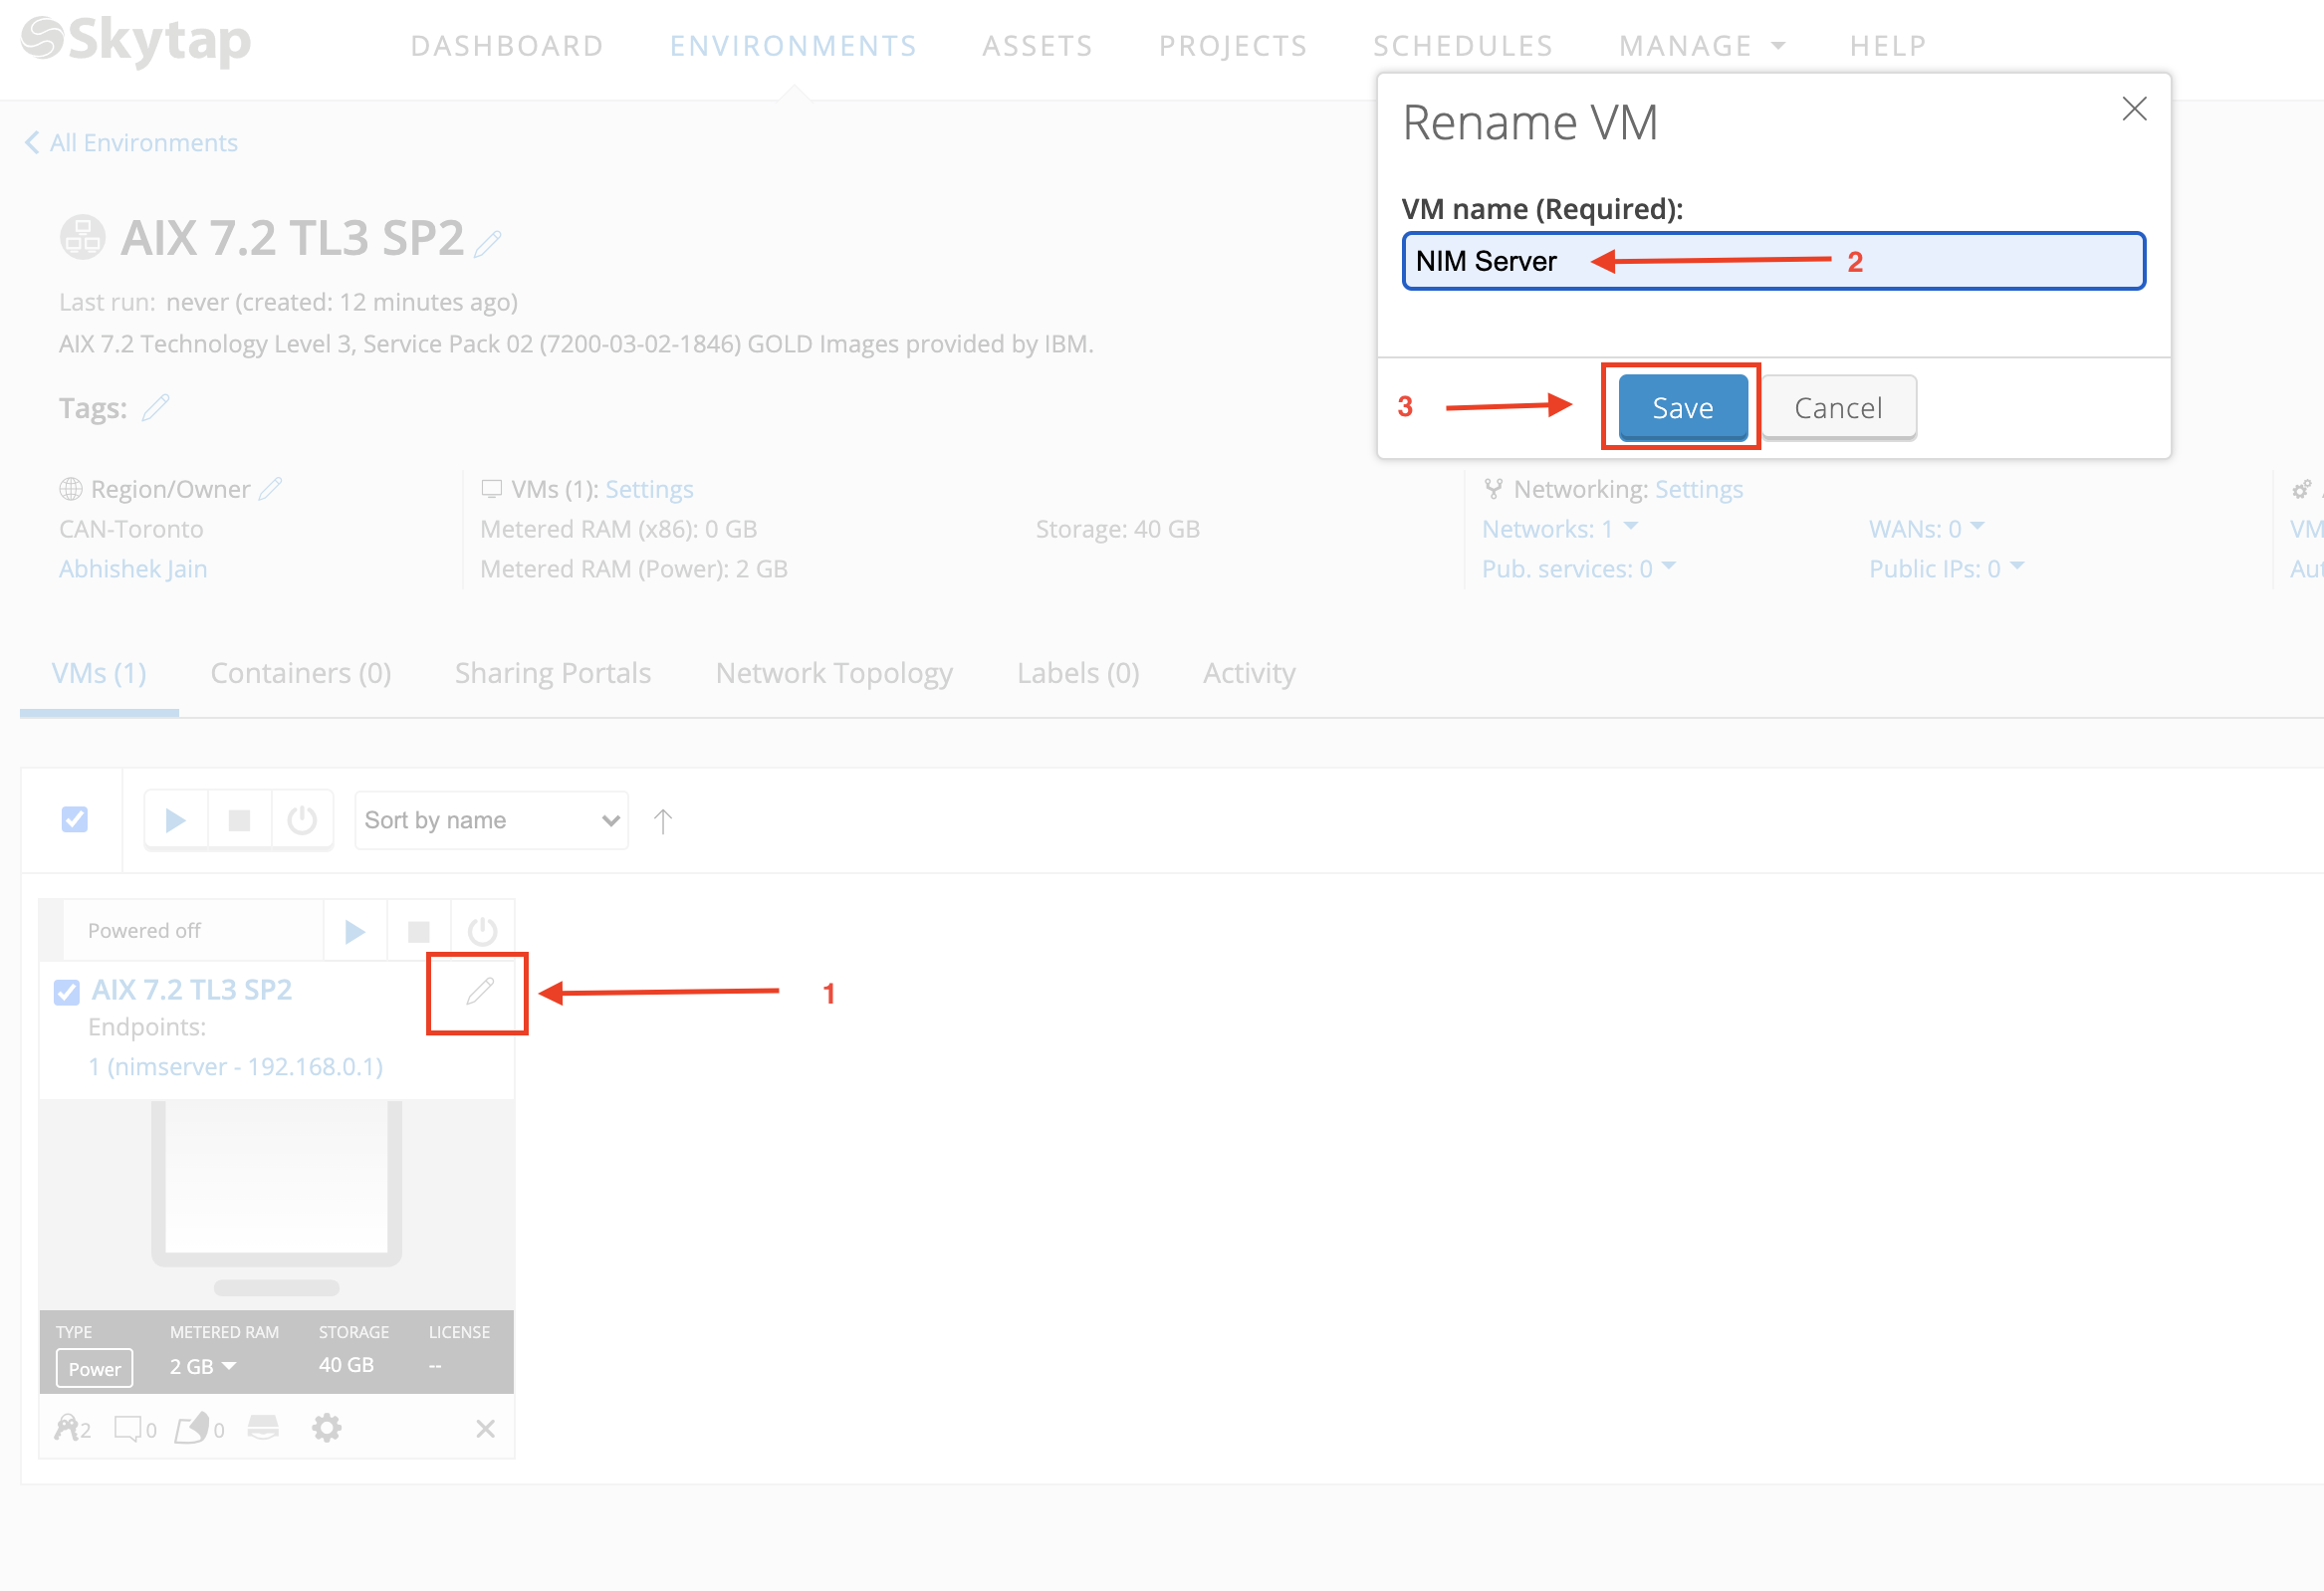
Rename the LPAR to NIM server.
 ){}
){} -
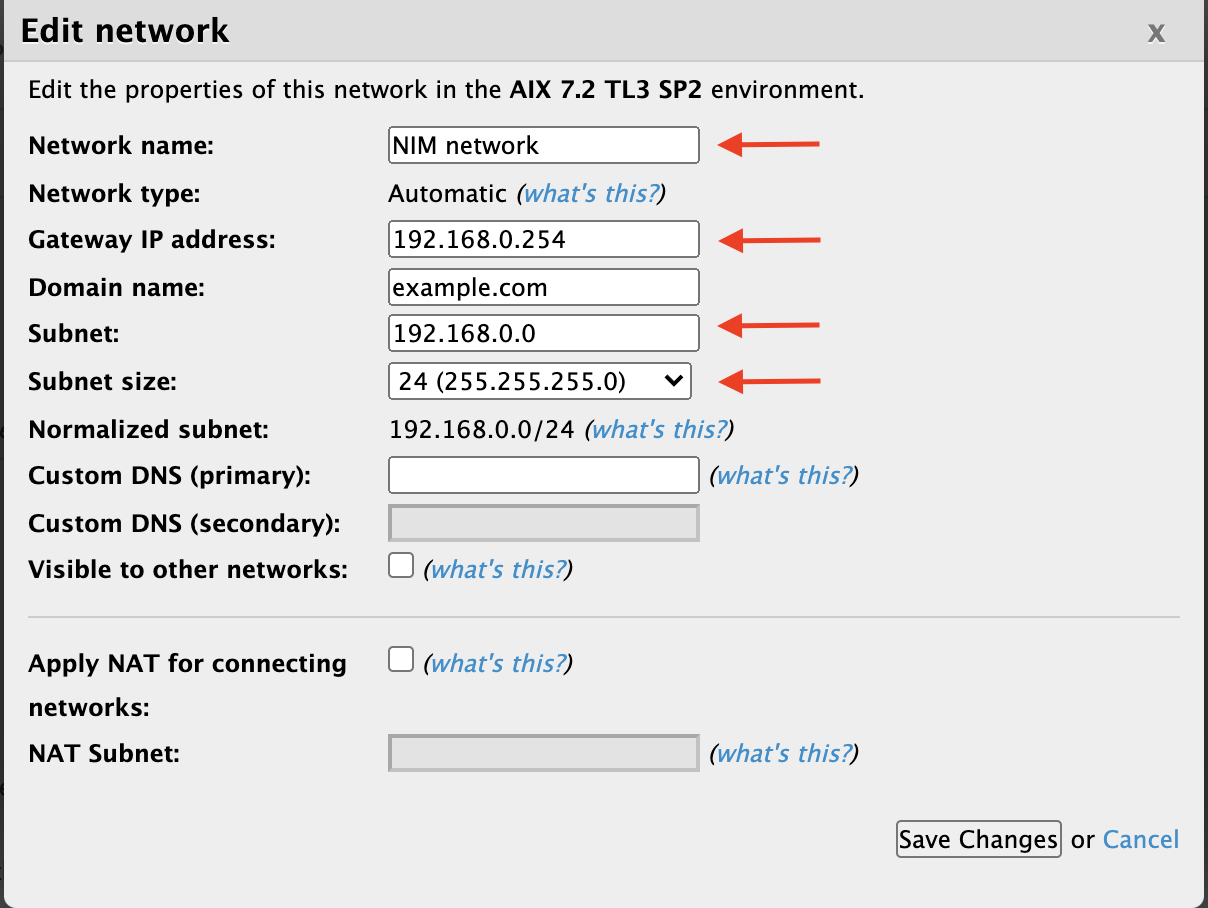
Set up the desired network and attach the network to the LPAR.
 ){}
){} -
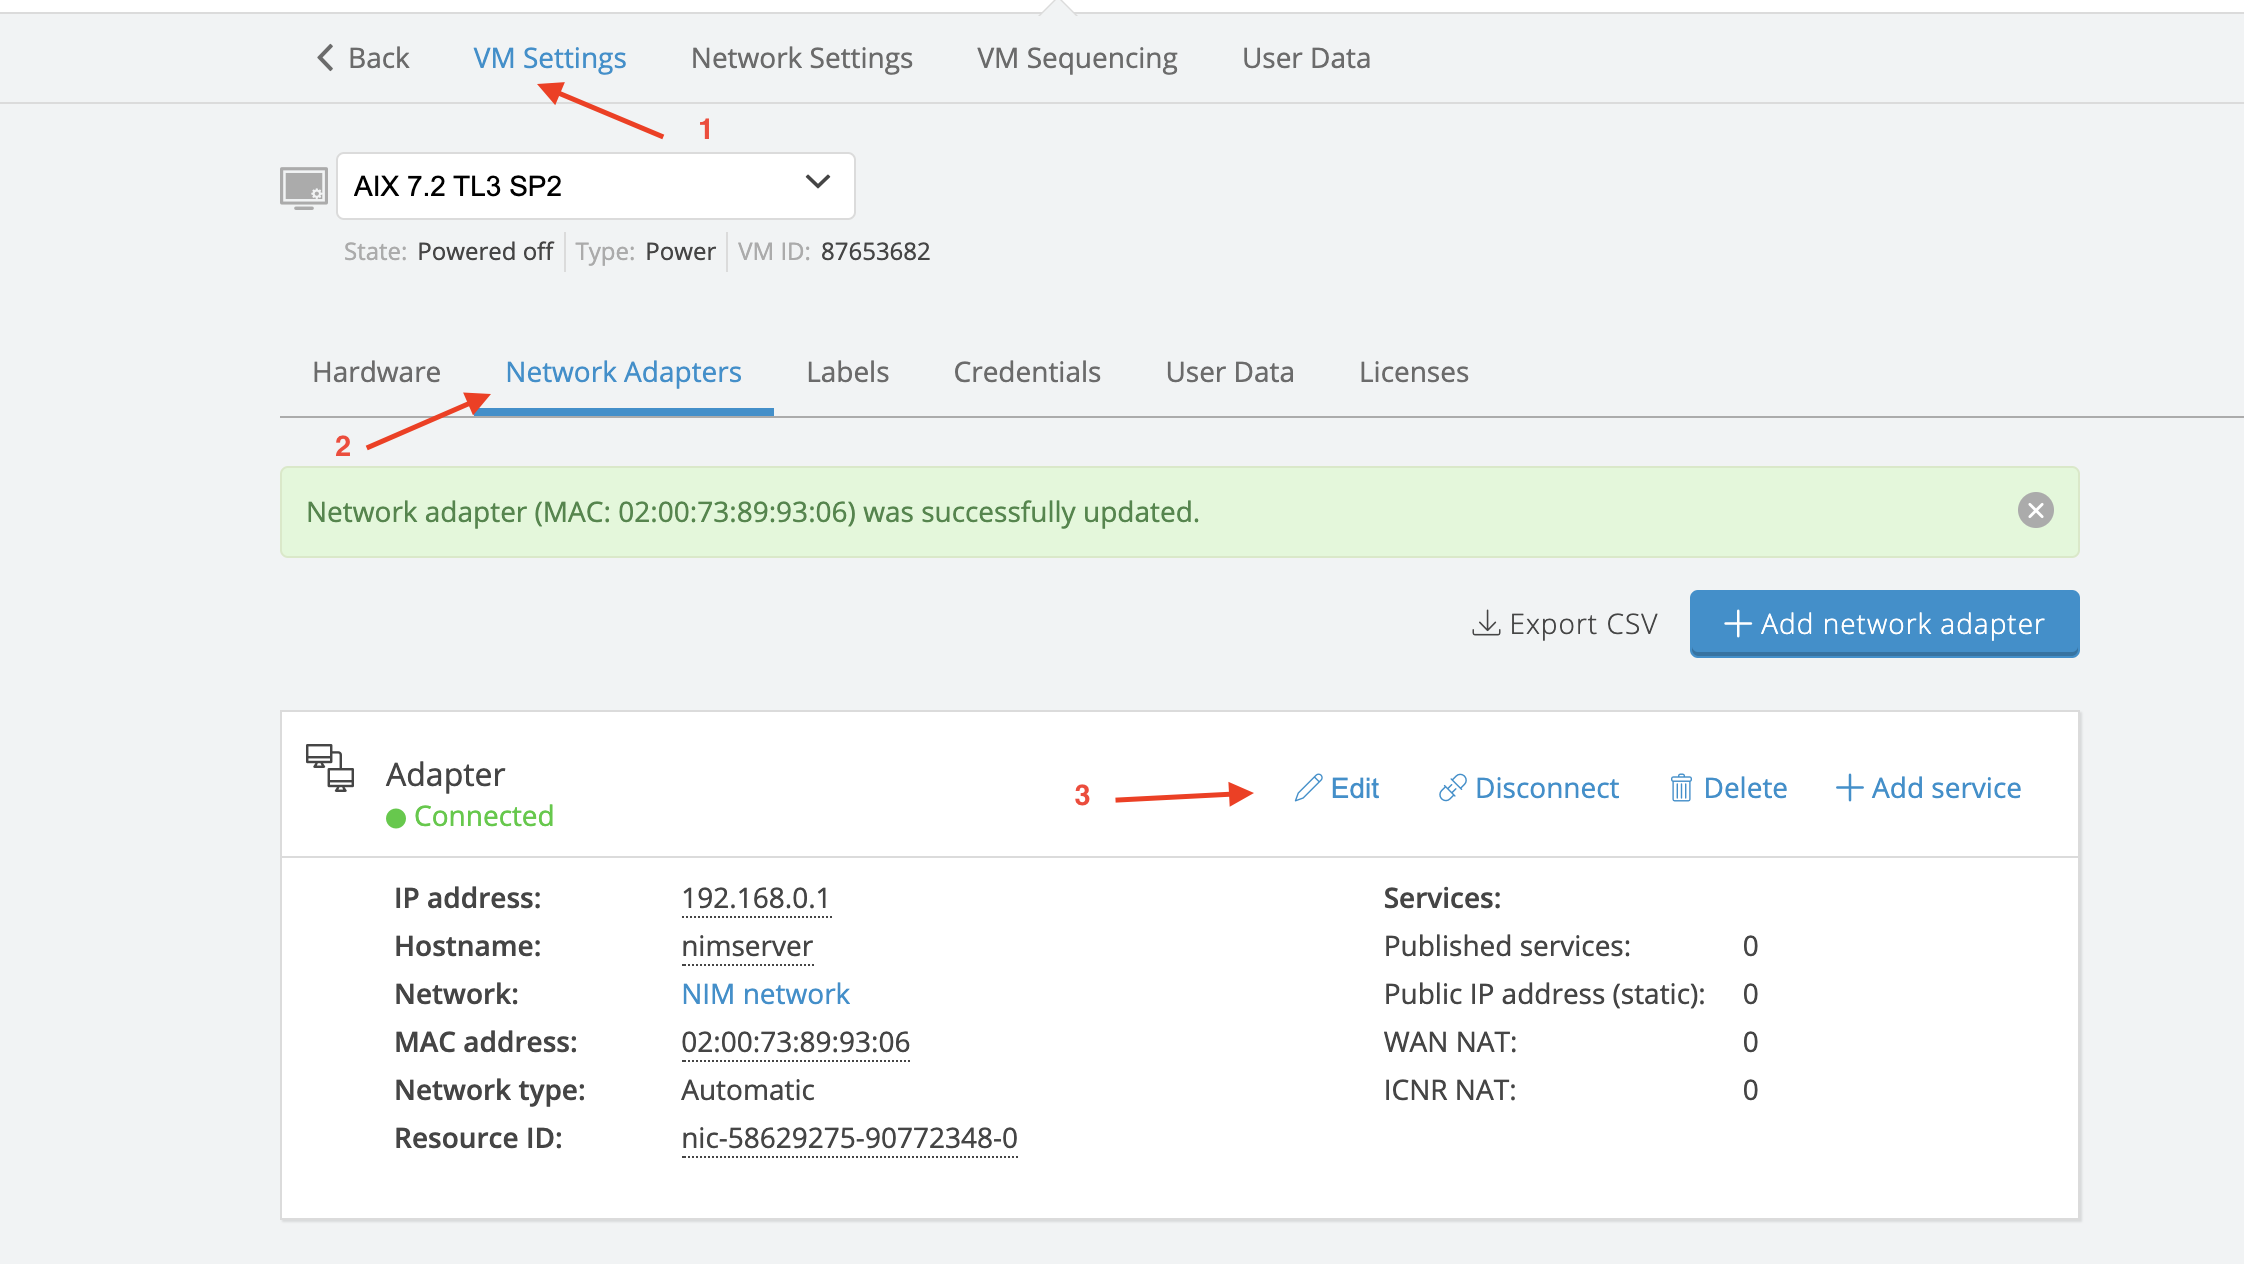
Set the desired hostname in Adapter setting.
 ){}
){}
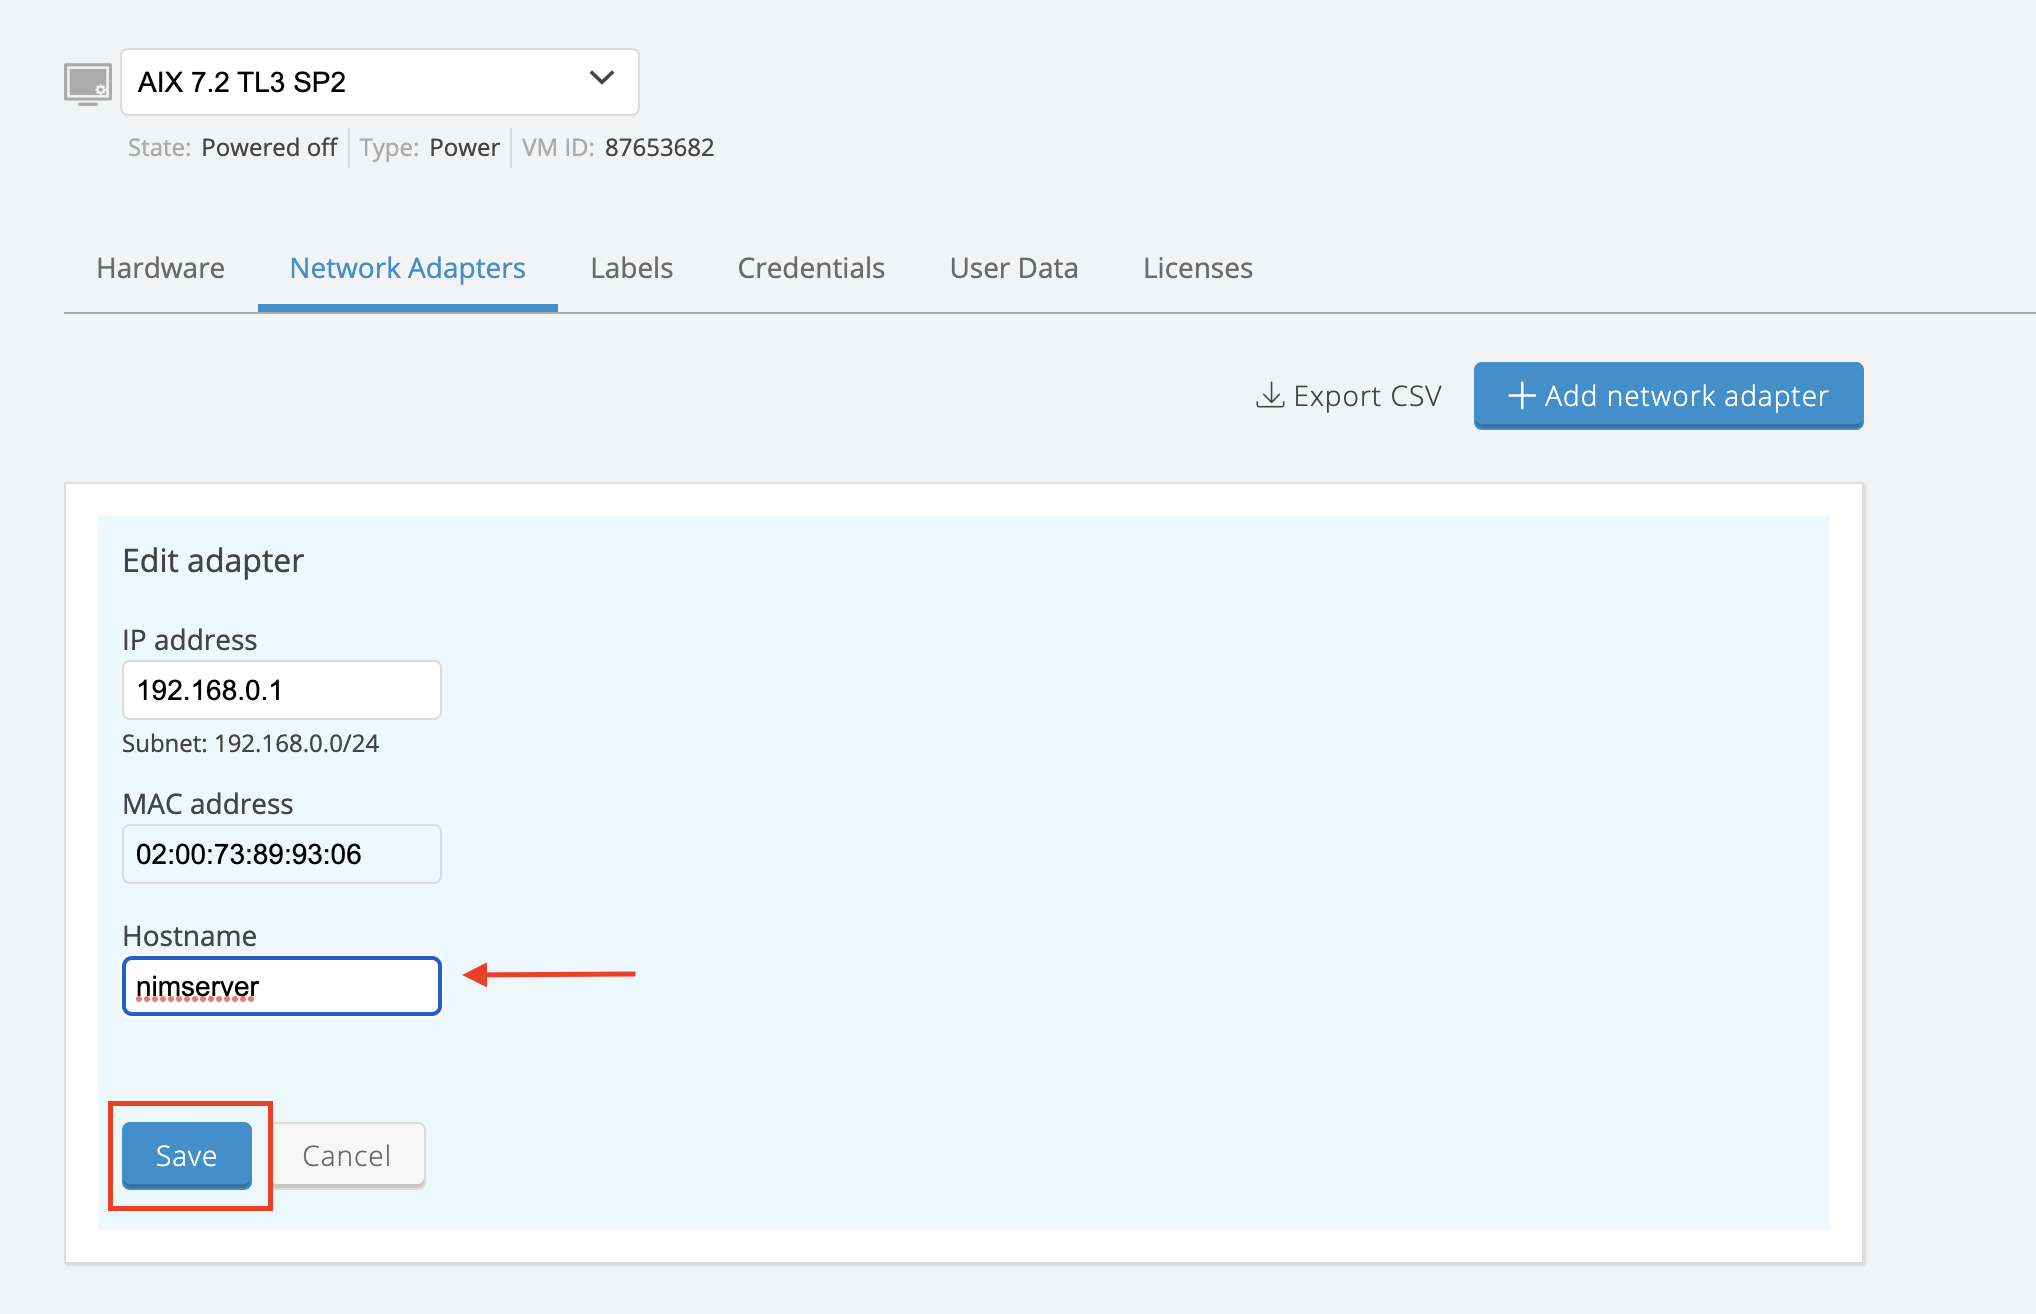 ){}
){} -
Power on the LPAR and logon with root access.
Set up Client on NIM Server to Restore Mksysb
-
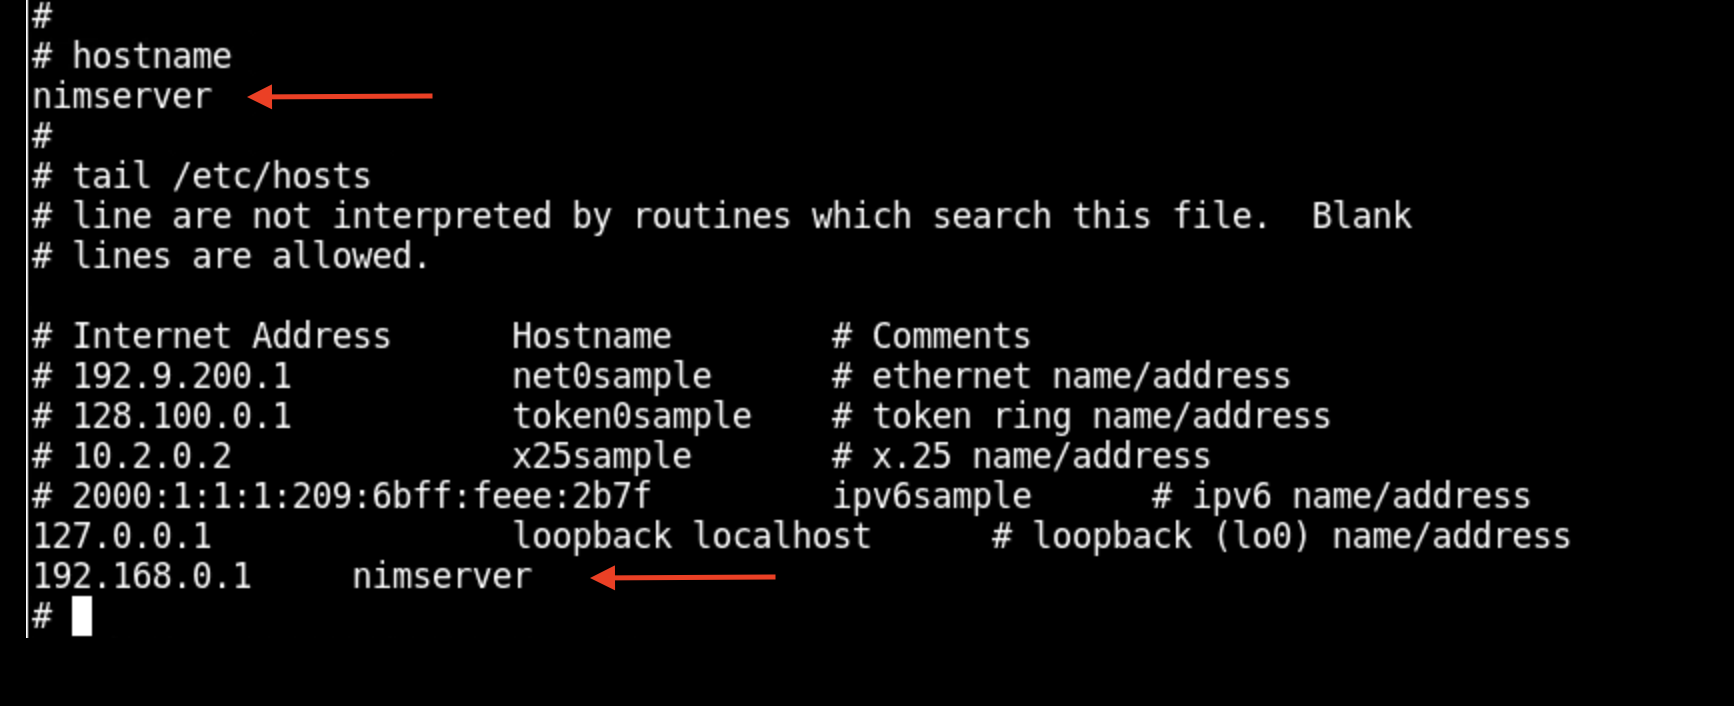
Set Hostname and /etc/hosts to exact name as the hostname used when configuring the LAPRs Network Adapter settings.
 ){}
){} -
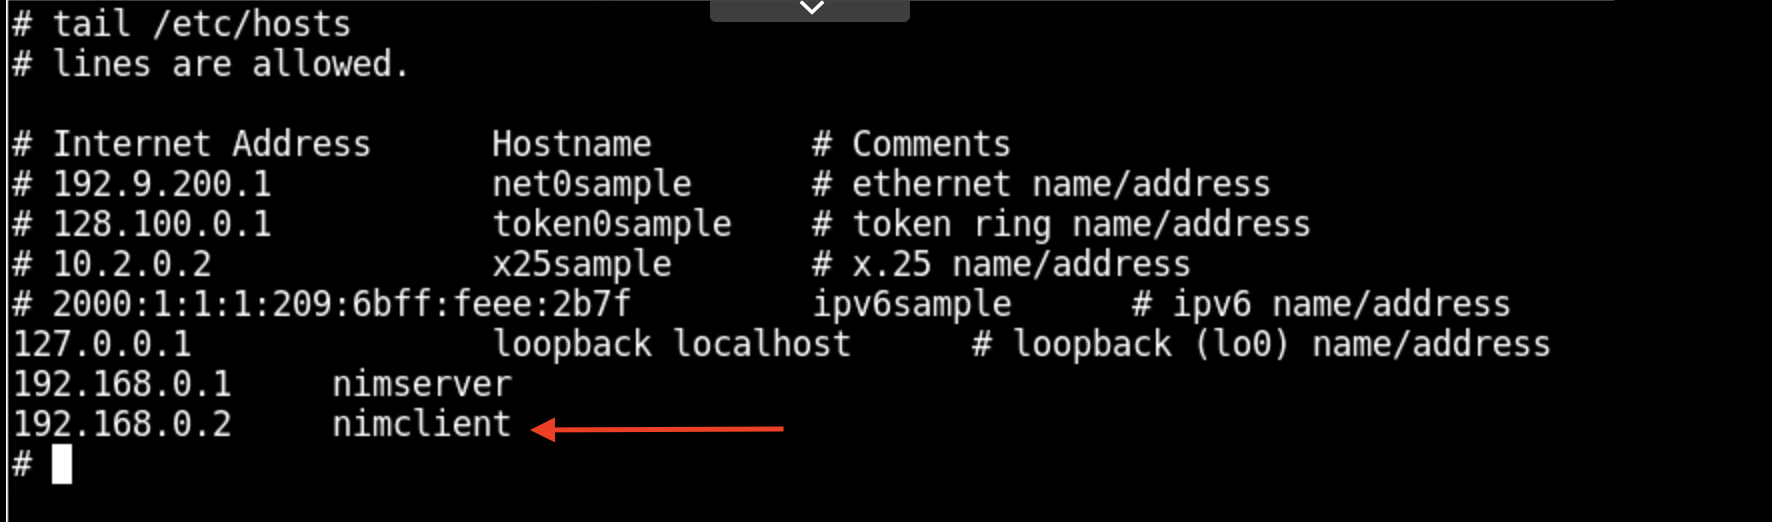
Update the /etc/hosts file with the client hostname.
 ){}
){} -
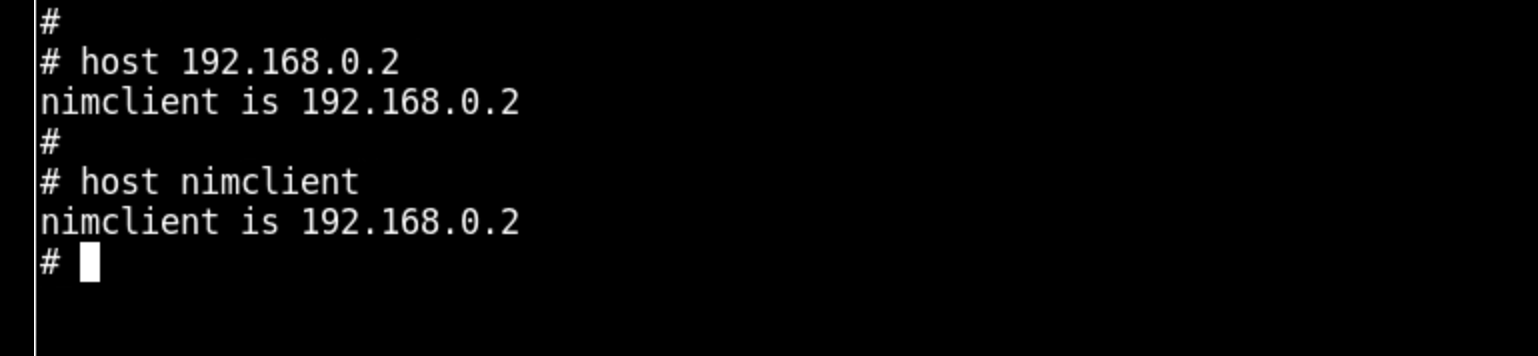
Verify hostname is resolved.
 ){}
){} -
Add the Client in NIM config # smitty nim_mkmac and enter the client hostname.
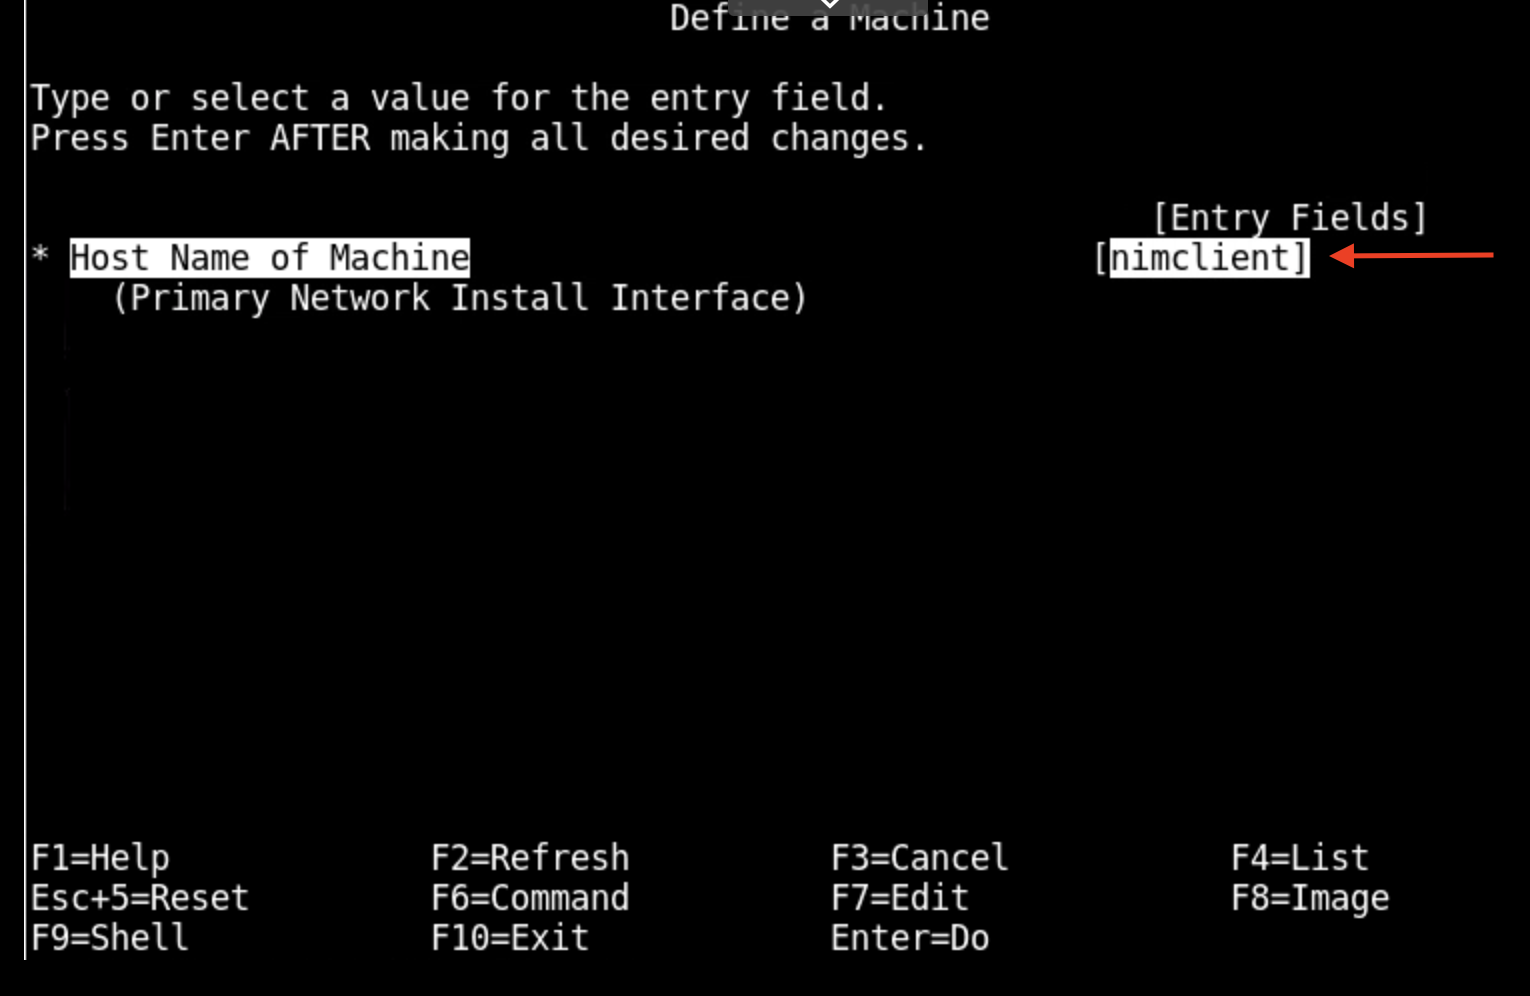 ){}
){} -
Change the setting as shown below and press Enter.
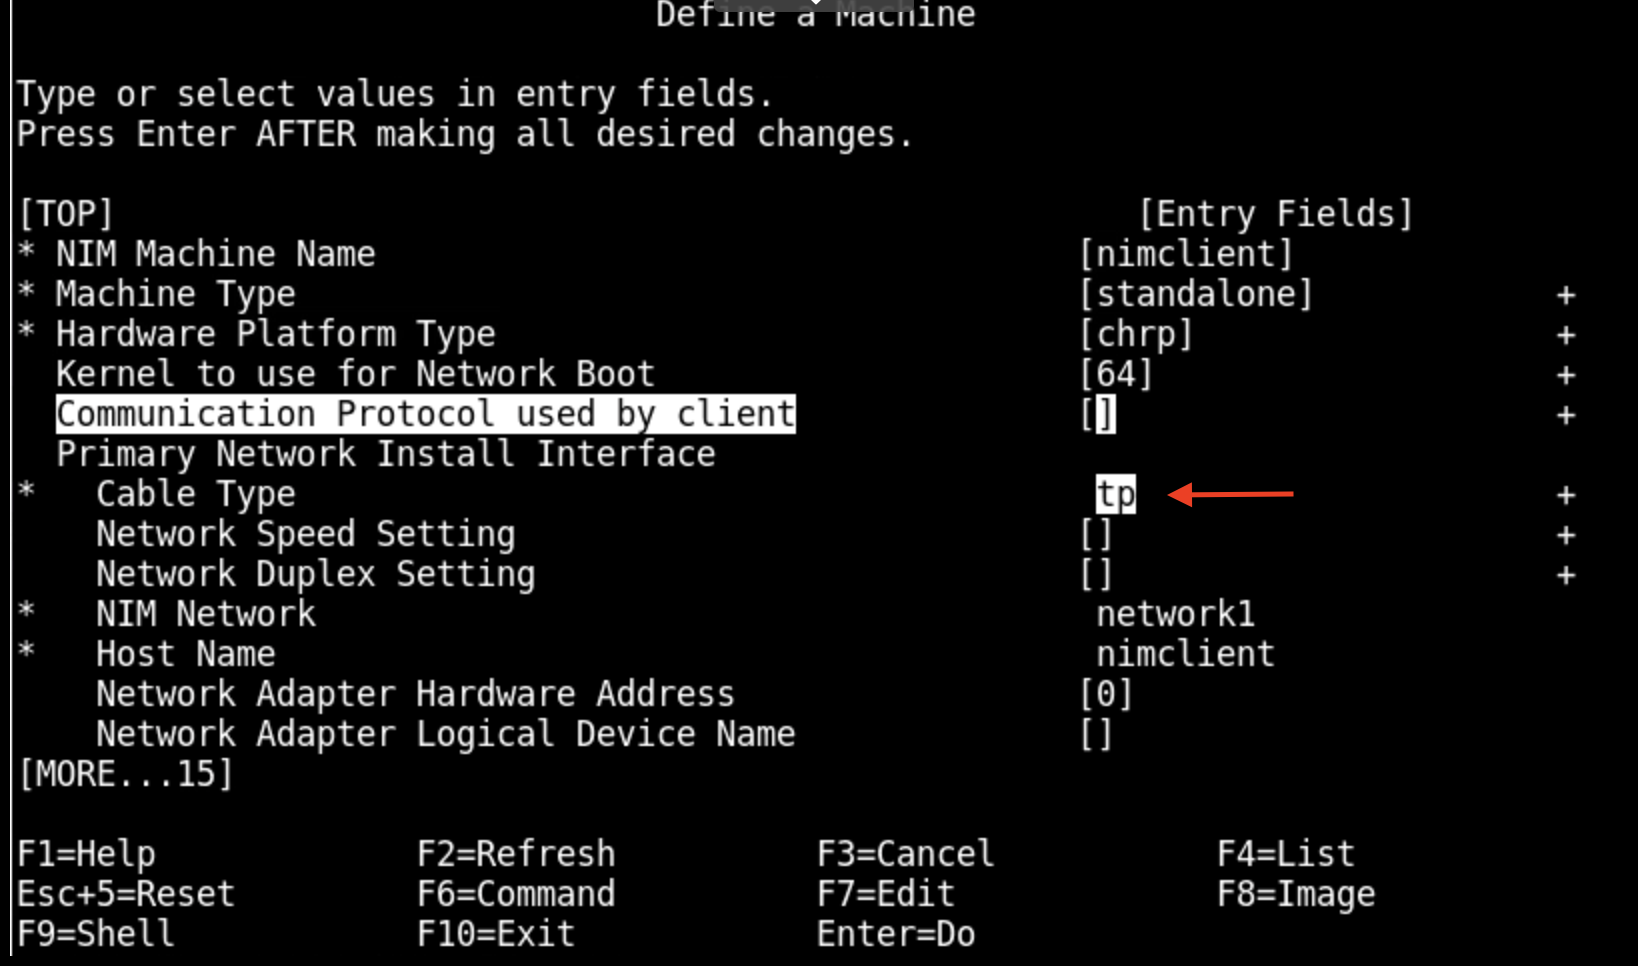 ){}
){} -
NIM Client is defined and can be verified in # lsnimn nimclient.
 ){}
){} -
Copy the Source Mksysb in a new filesystem /export/mksysb.
-
Create the filesystem # crfs -v jfs2 -m /export/mksysb -A > yes -a size=10G -r rootvg.
 ){}
){} -
List the mksysb file content lsmksysb -lf.
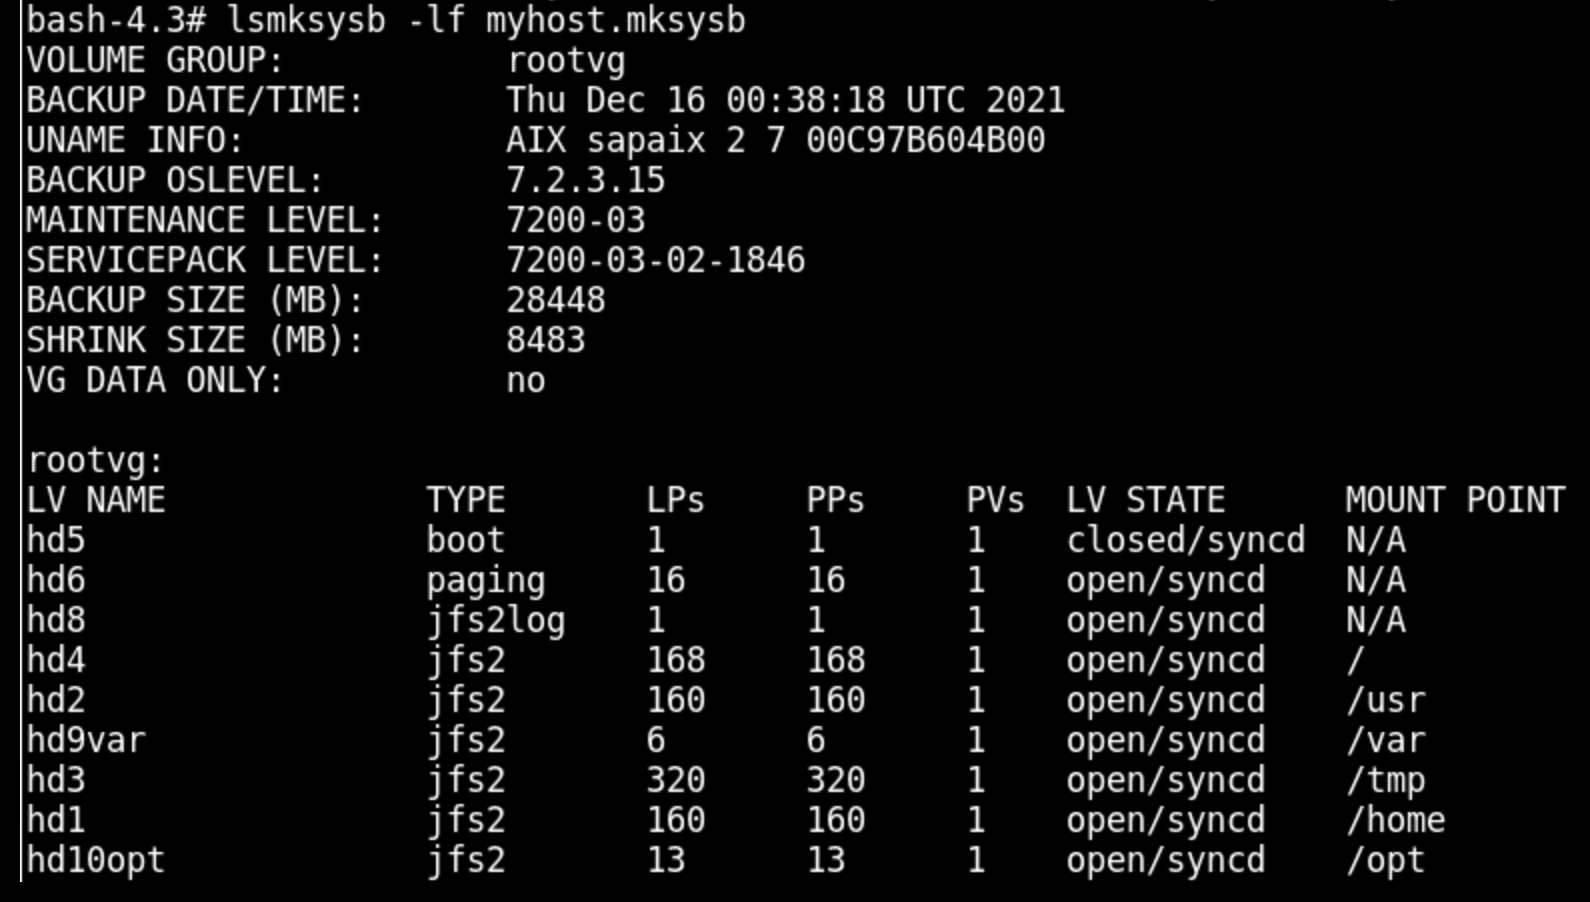 ){}
){} -
Create the two NIM resources required for restoration.
-
Mksysb resource
-
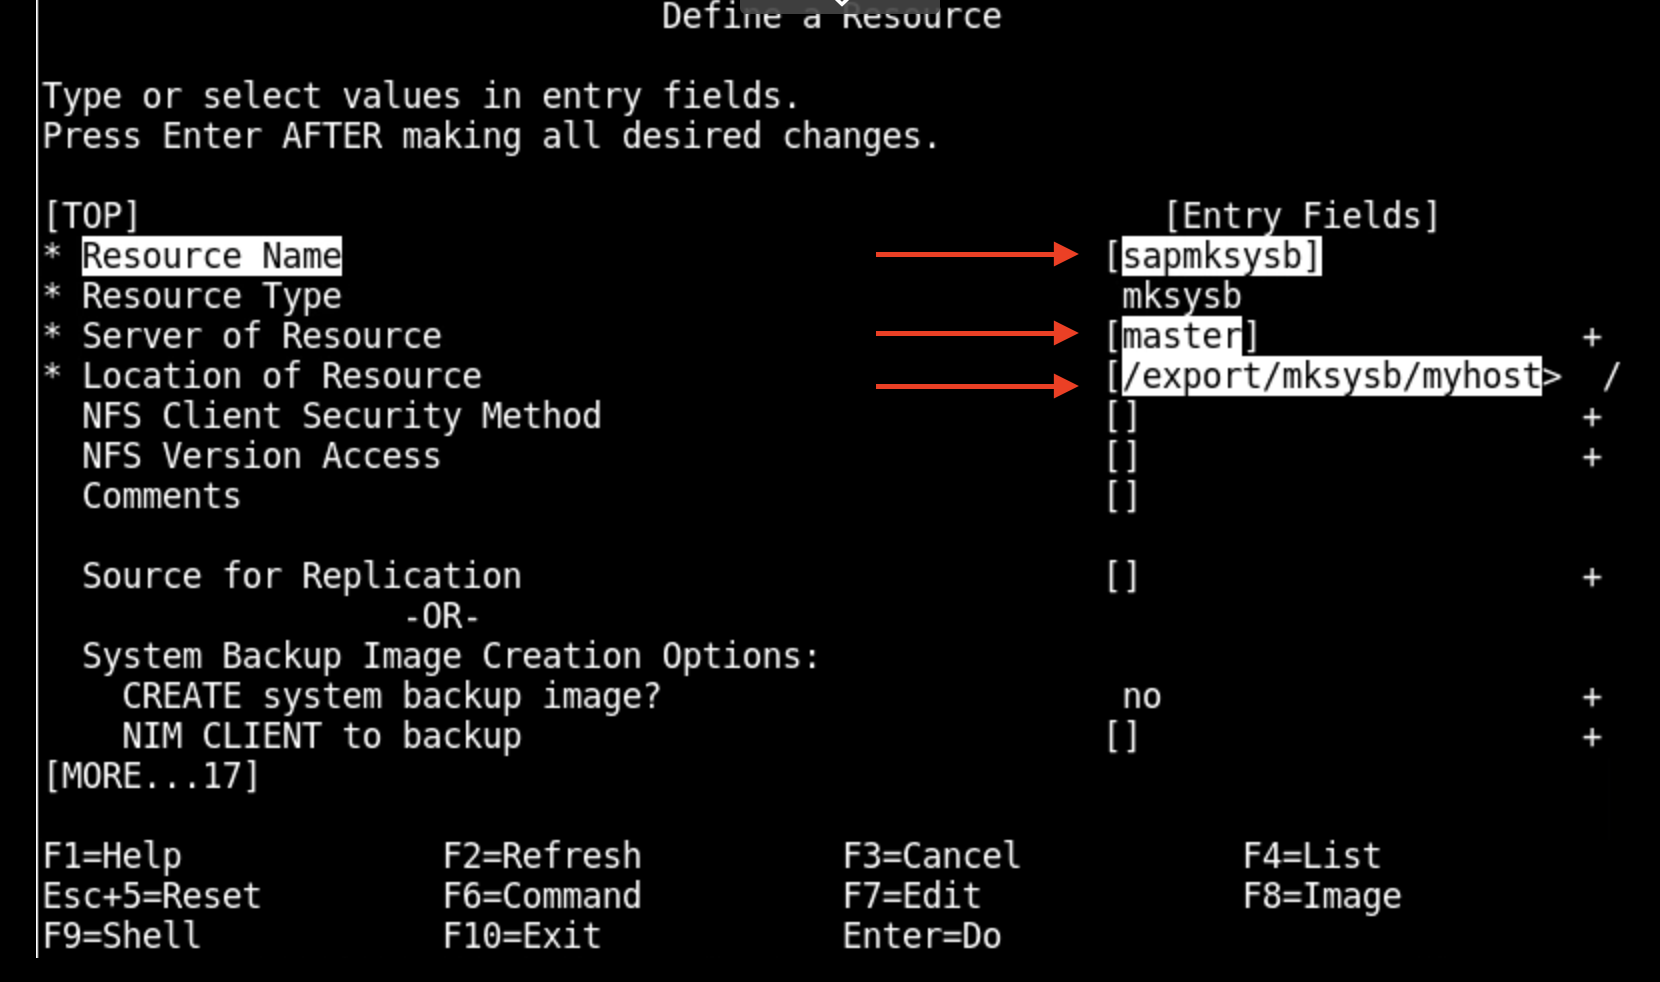
Mksysb - # smitty nim_res > define a resource and select mksysb and press enter.
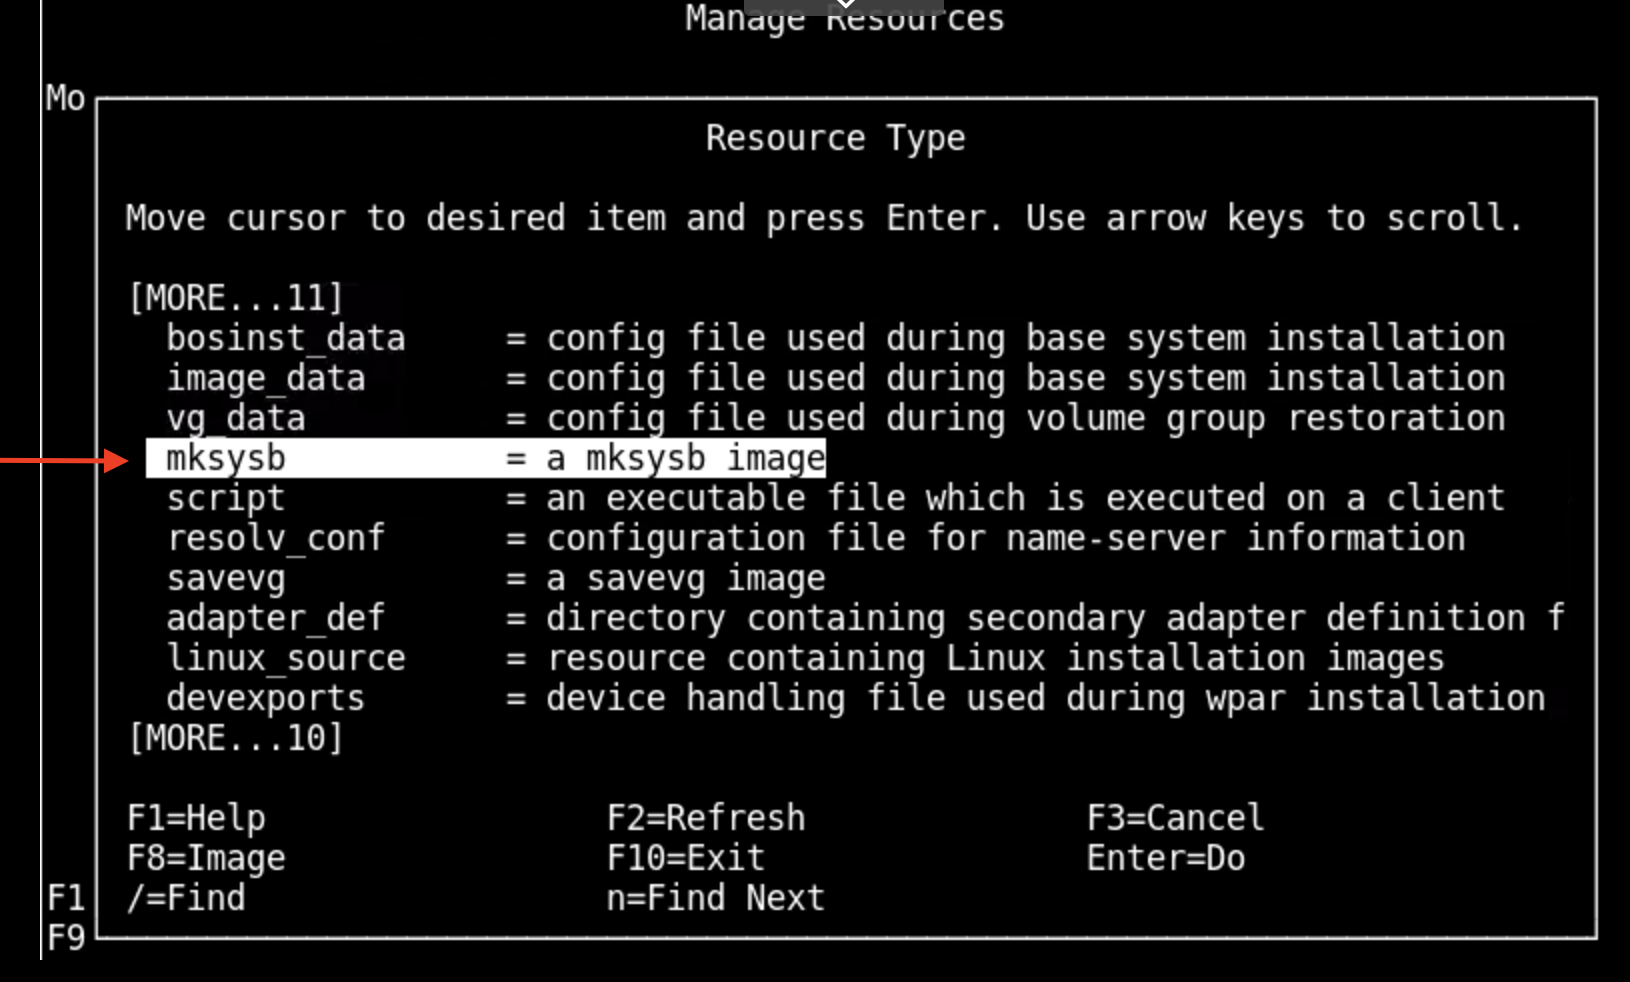 ){}
){} -
Fill in the Name, Server of resource and location of resource (absolute path for location of the mksysb file).
 ){}
){}
-
-
Spot resource
-
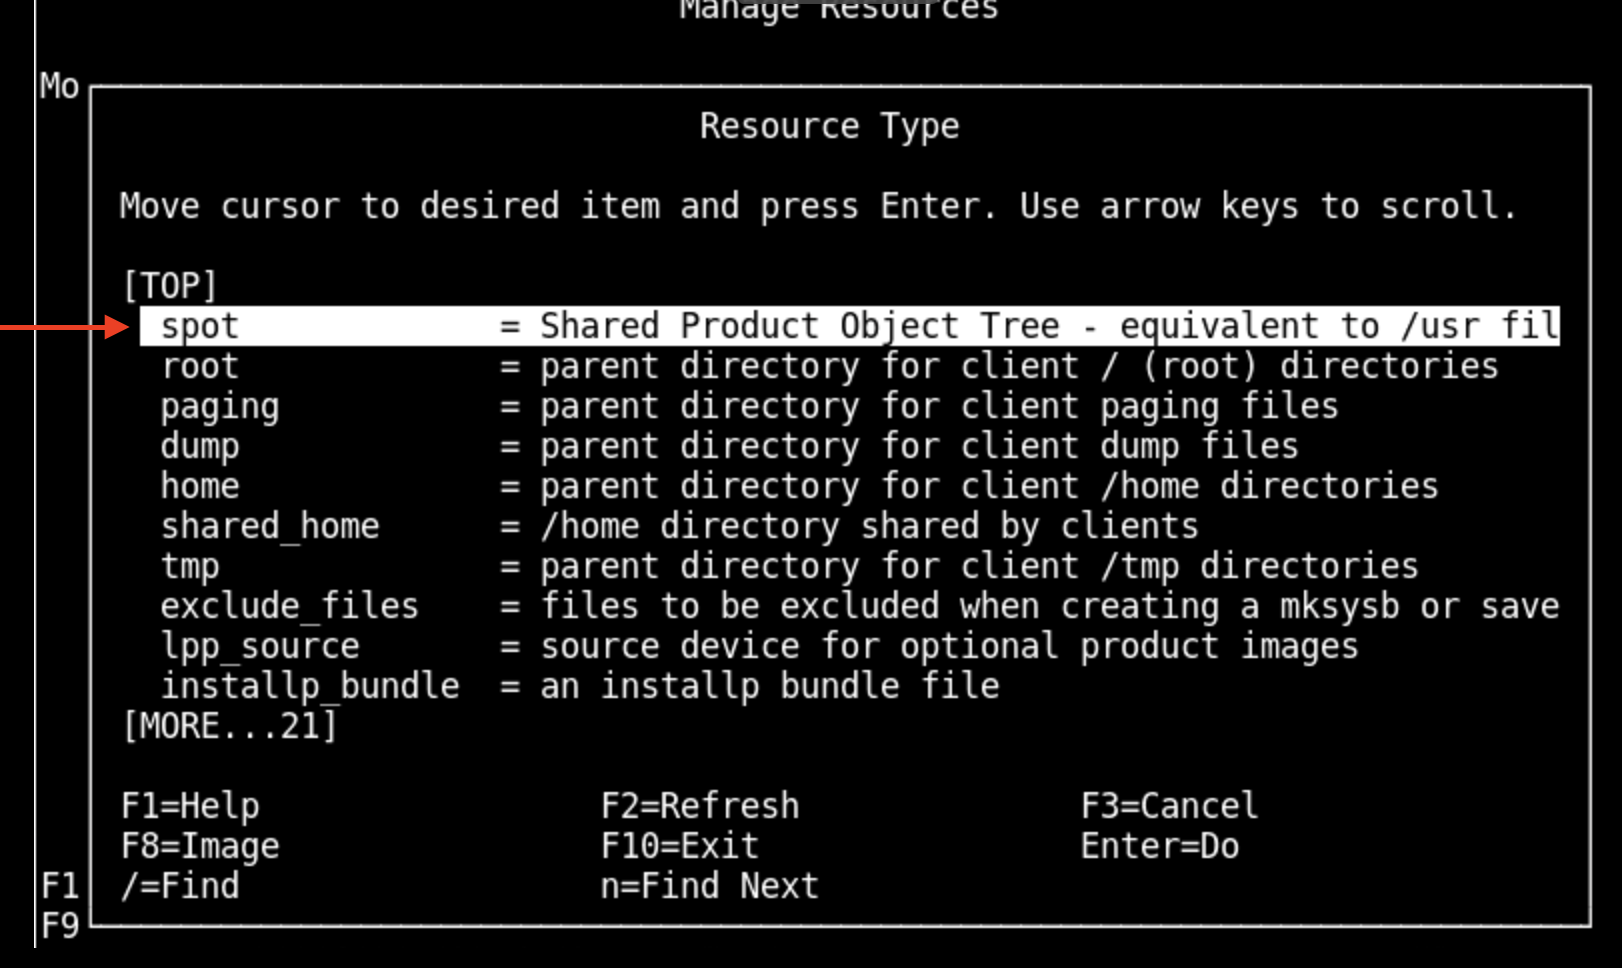
Define spot from mksysb resource # smitty nim_res -> define a resource select spot and press enter (make sure > you have enough space in /export/spot filesystem ~2 > GB).
 ){}
){} -
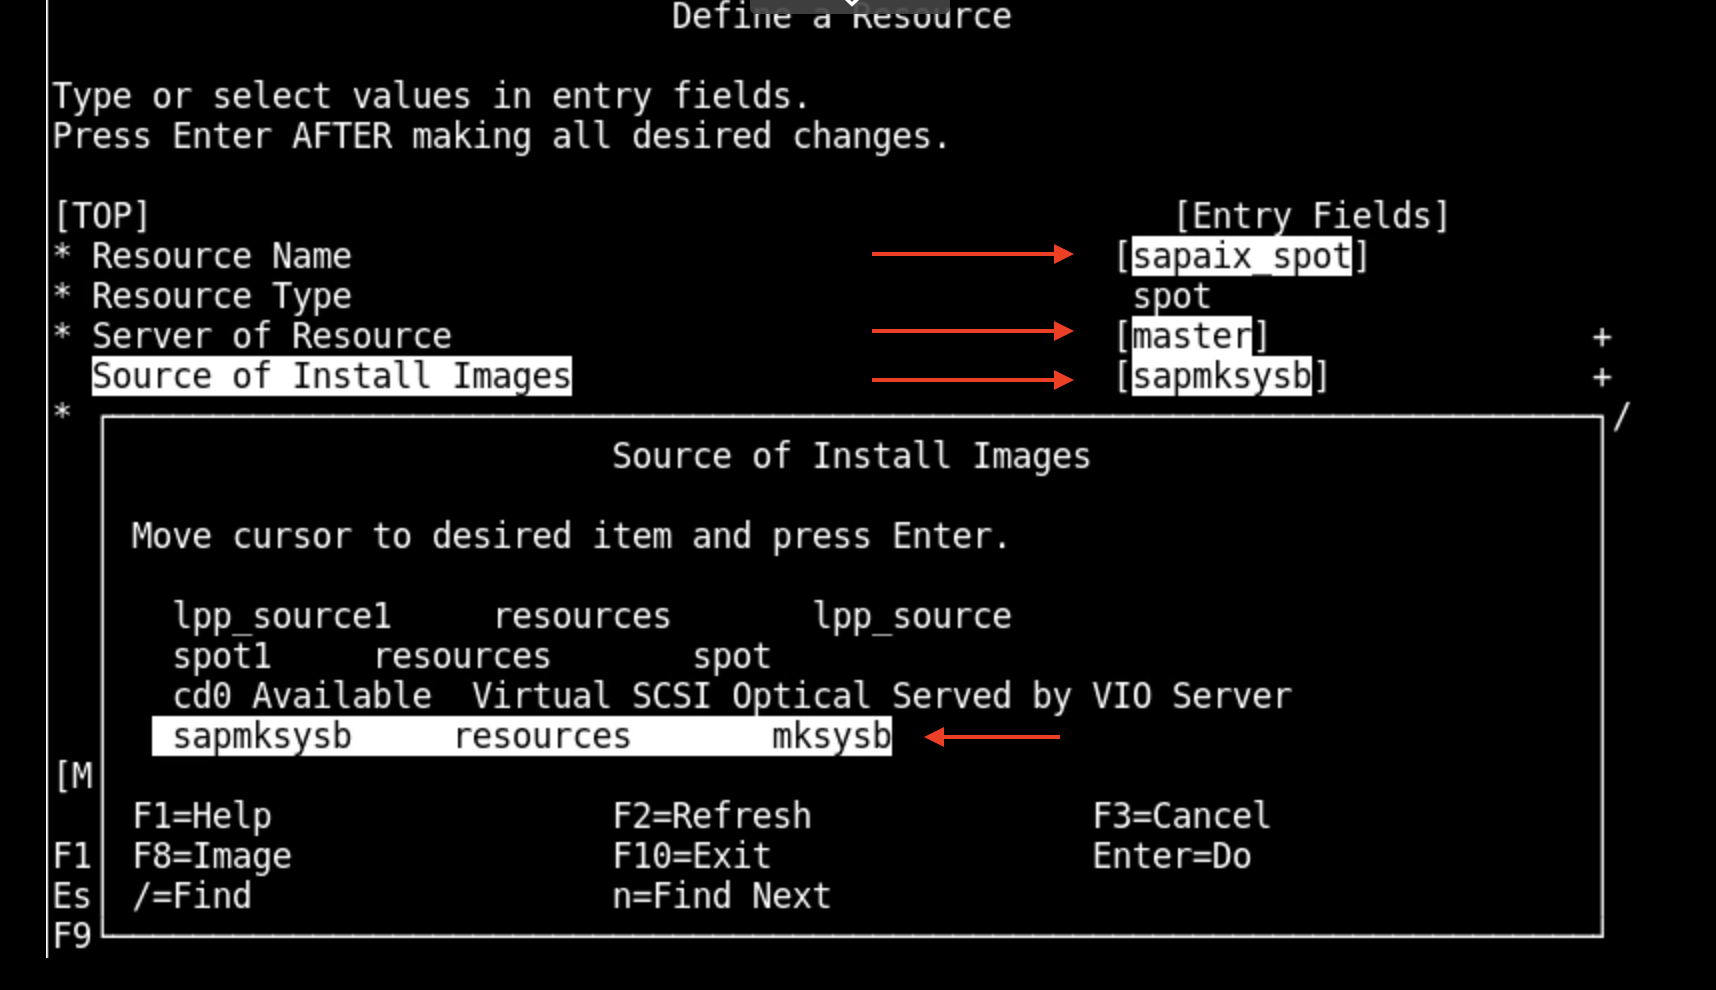
Enter Name, Server of Resource, Source of Install images and Location (absolute Path for the resource “/export/spot sapaix_spot”).
 ){}
){} -
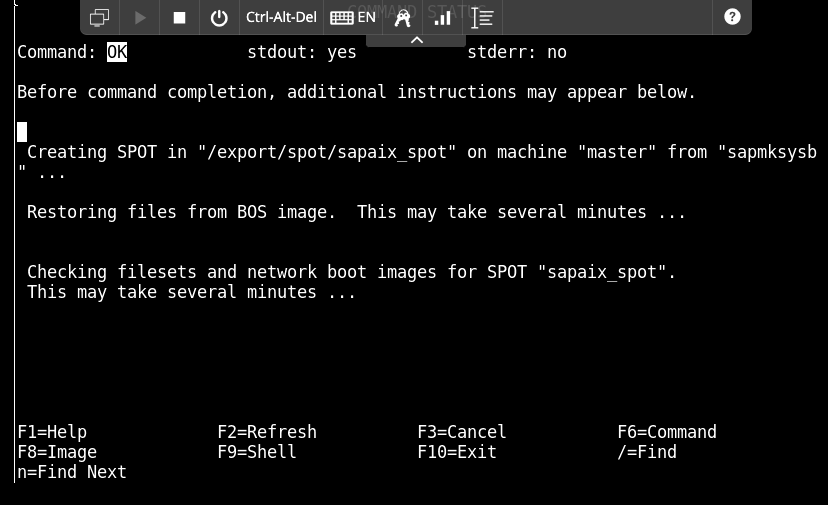
Creation of spot will take some time—approximately 15 to 30 minutes.
 ){}
){}
-
-
-
Assign resources to nimclient machine: # smitty nim_mac_res.
-
Allocate Network Install resources and select nimclient from the list and press Enter.
-
Use F7 or Esc+7 to select the sapmksysb and sapaix_spot and press Enter.
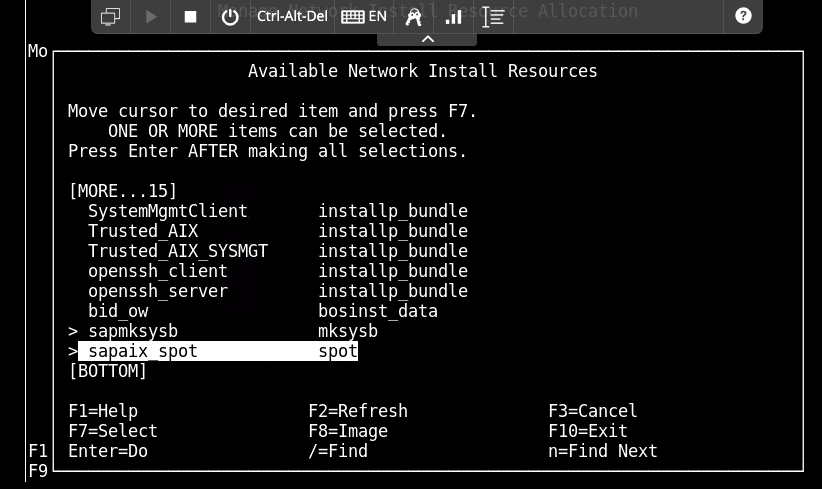 ){}
){} -
Command output will be as below. Exit using F10 or Esc+0.
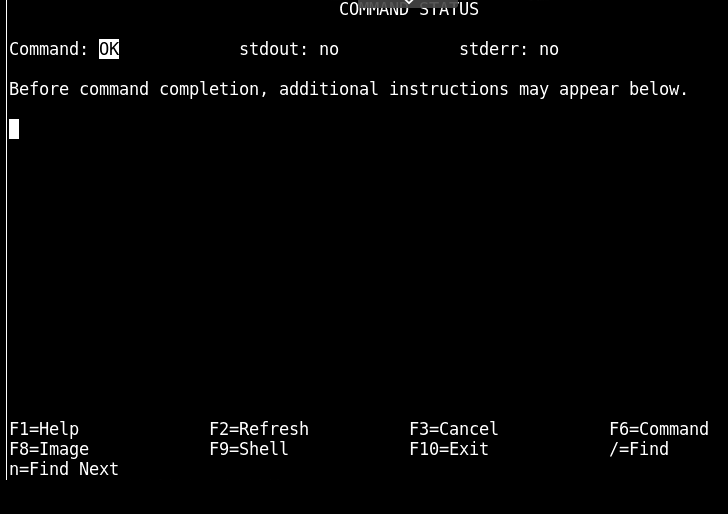 ){}
){} -
Enable Bos installation for the client # smitty nim_mac_op nimclient.
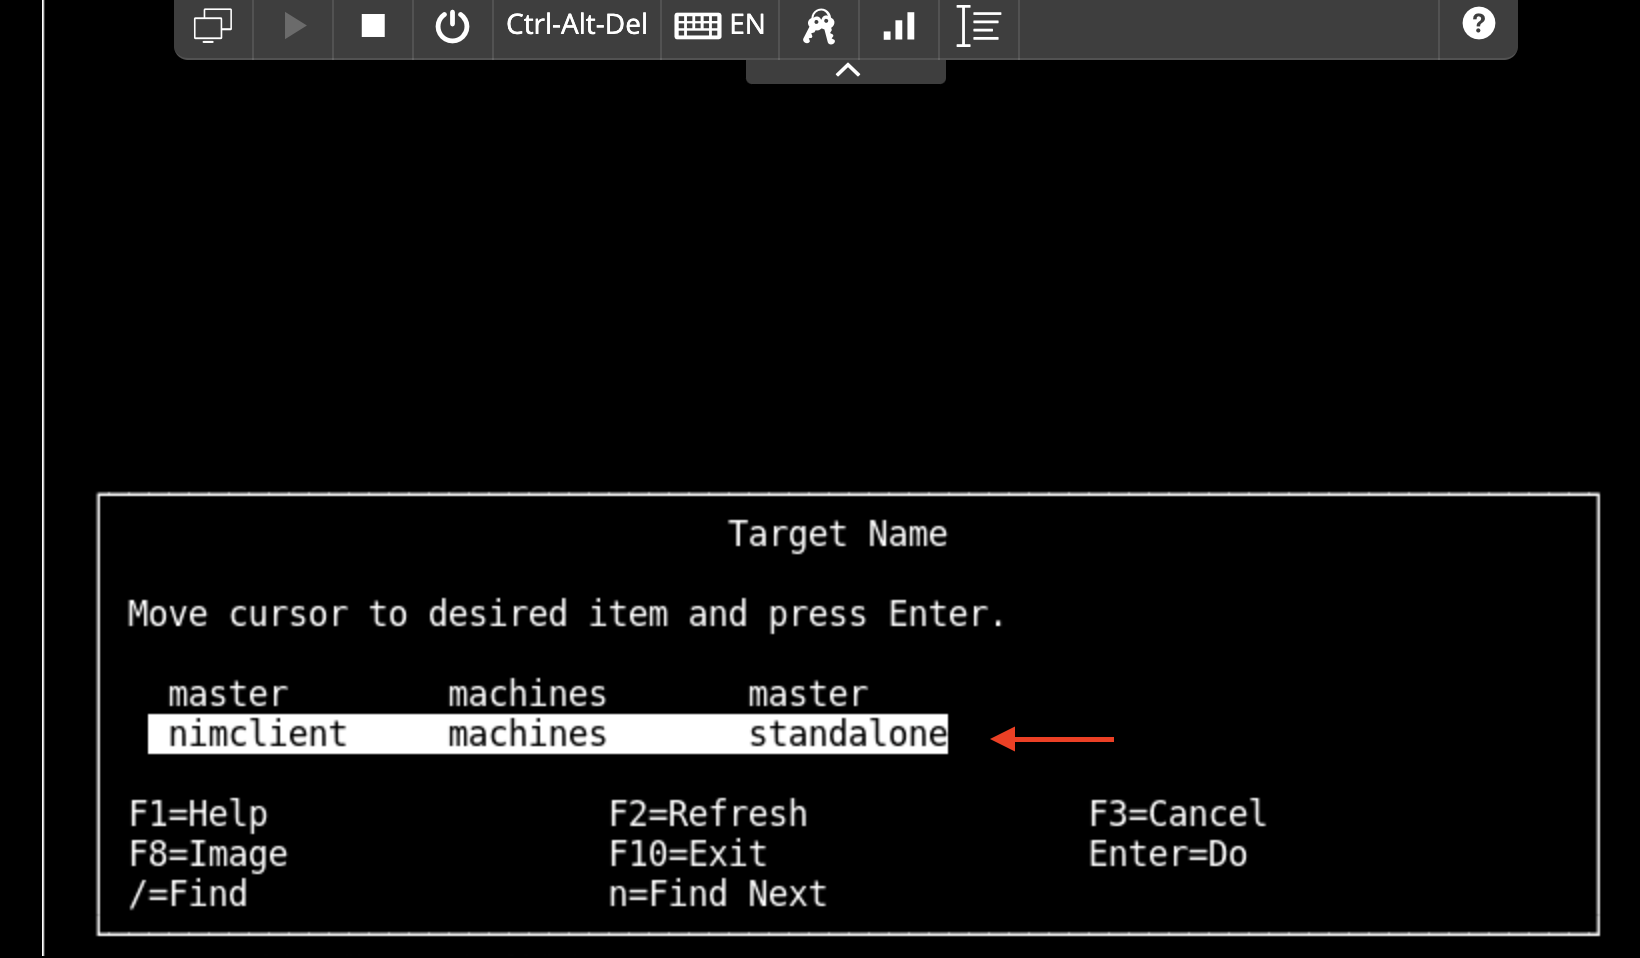 ){}
){} -
Select bos_inst and press Enter.
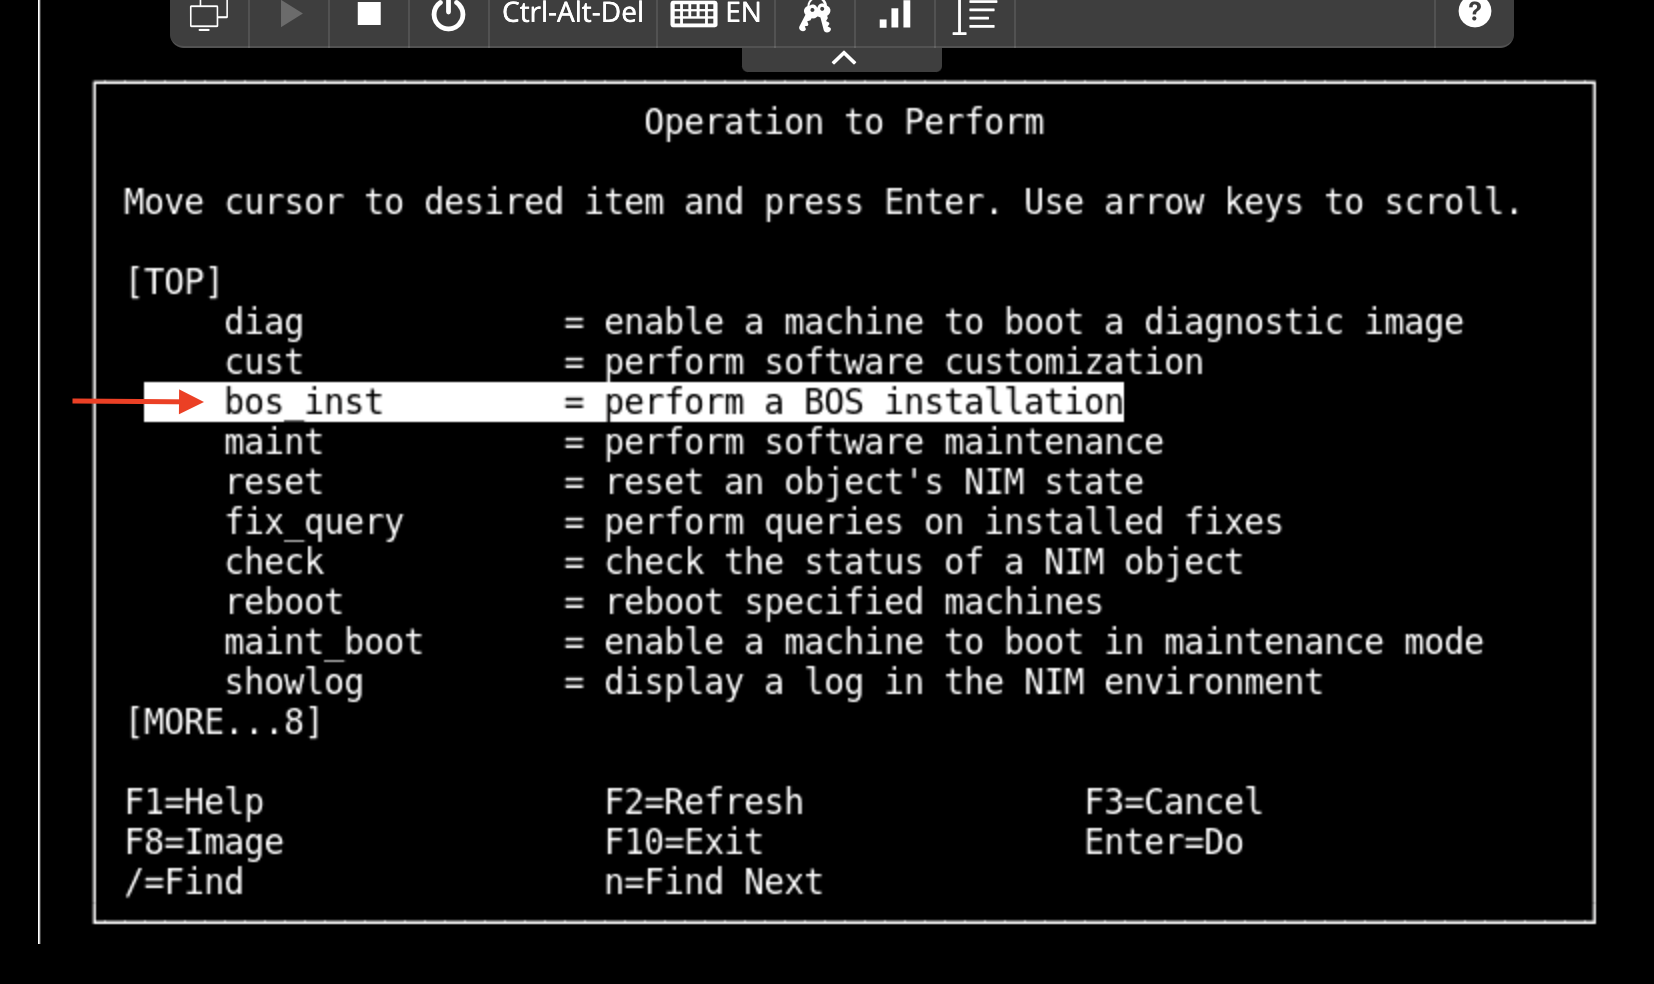 ){}
){} -
Select the options shown below for mksysb restore (Use arrow keys and F4 or Esc+4).
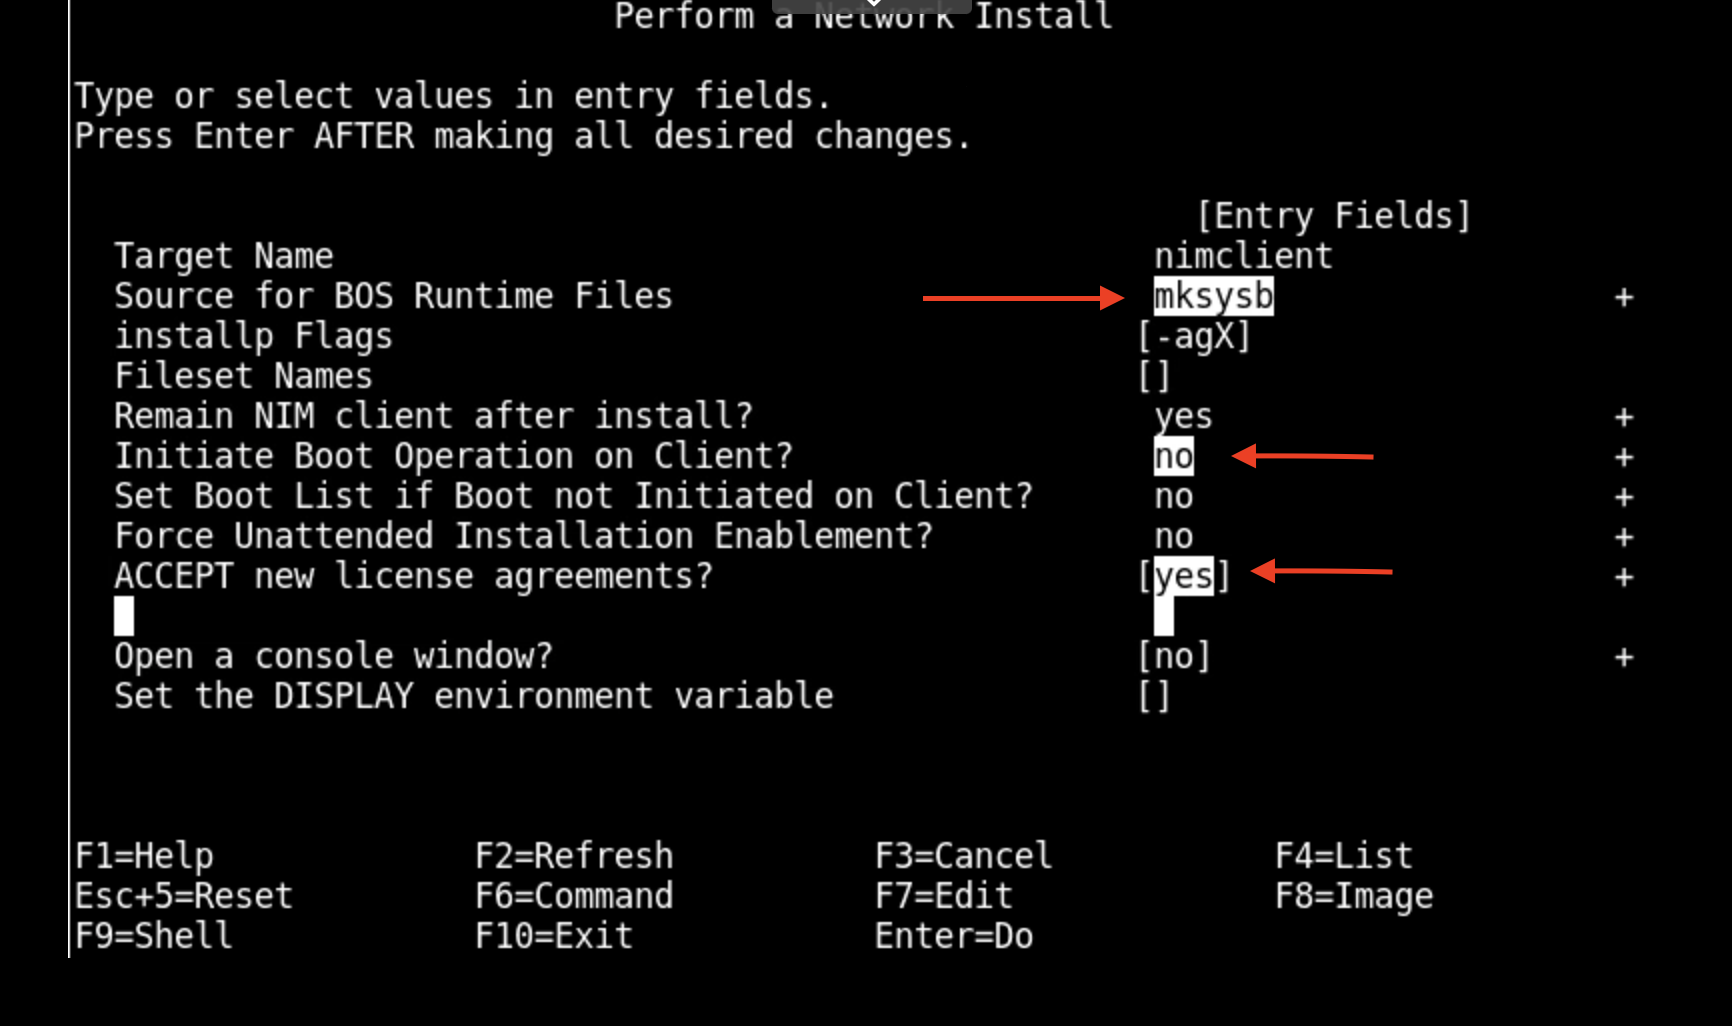 ){}
){} -
The setup is now complete.
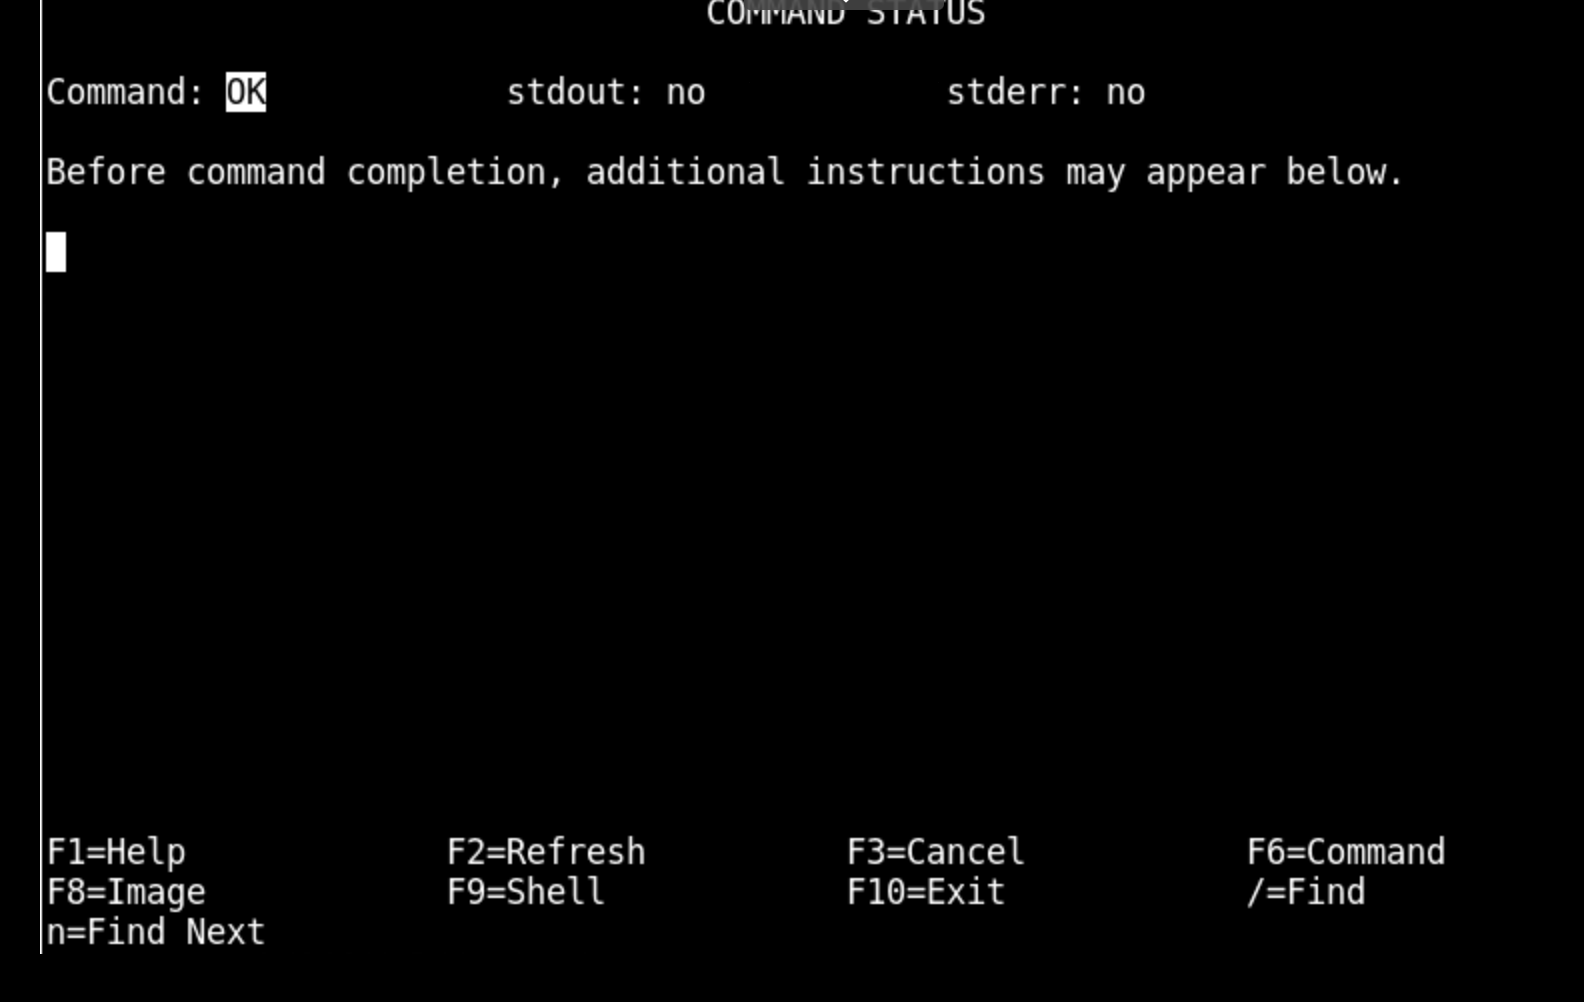 ){}
){} -
Verify the client Status # lsnim -l nimclient.
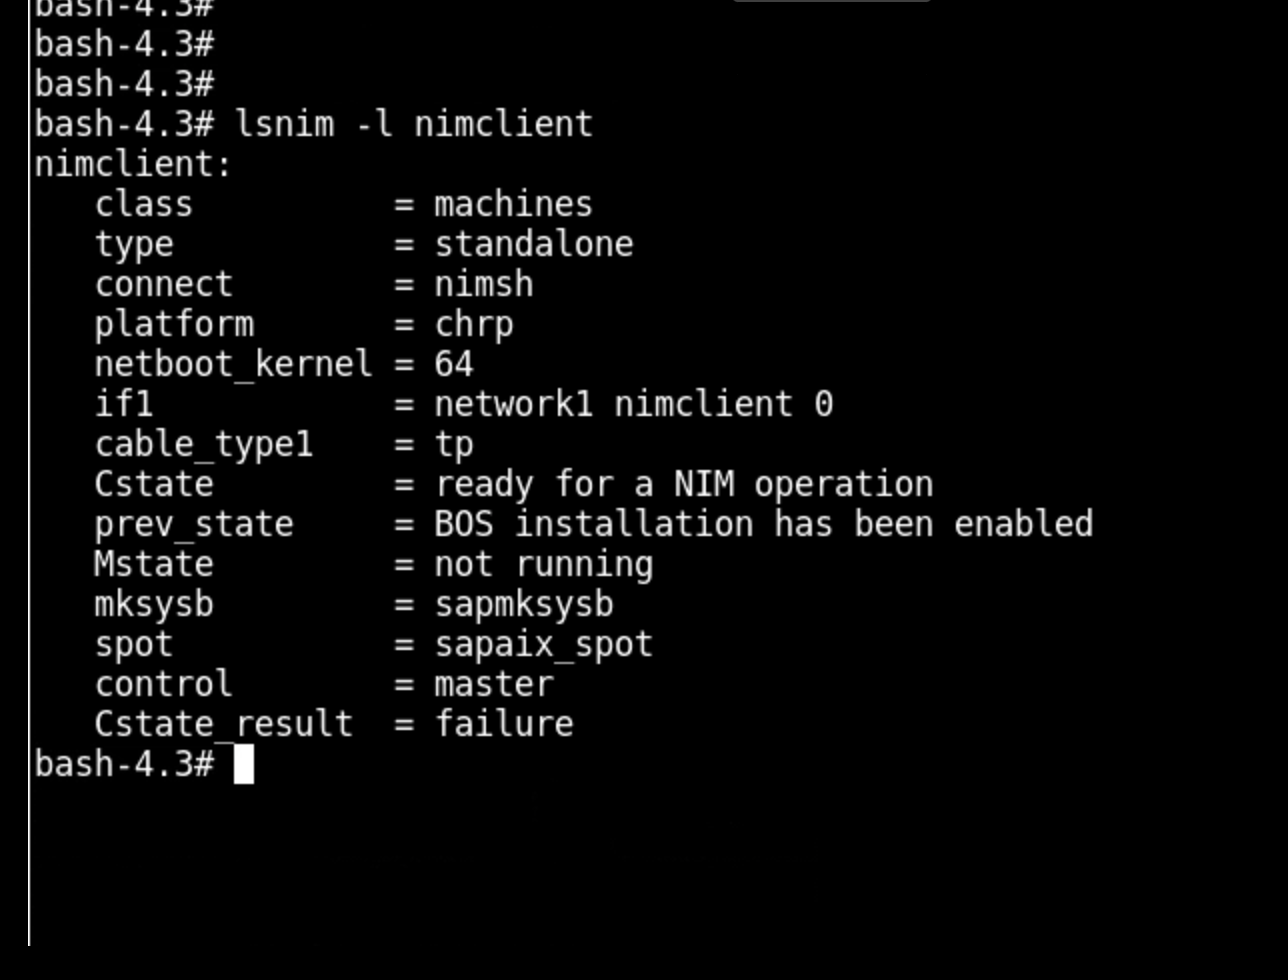 ){}
){}
Setup New LPAR and restore the Mksysb
-
From the Kyndryl Cloud Uplift dashboard, add a new LPAR in your existing environment.
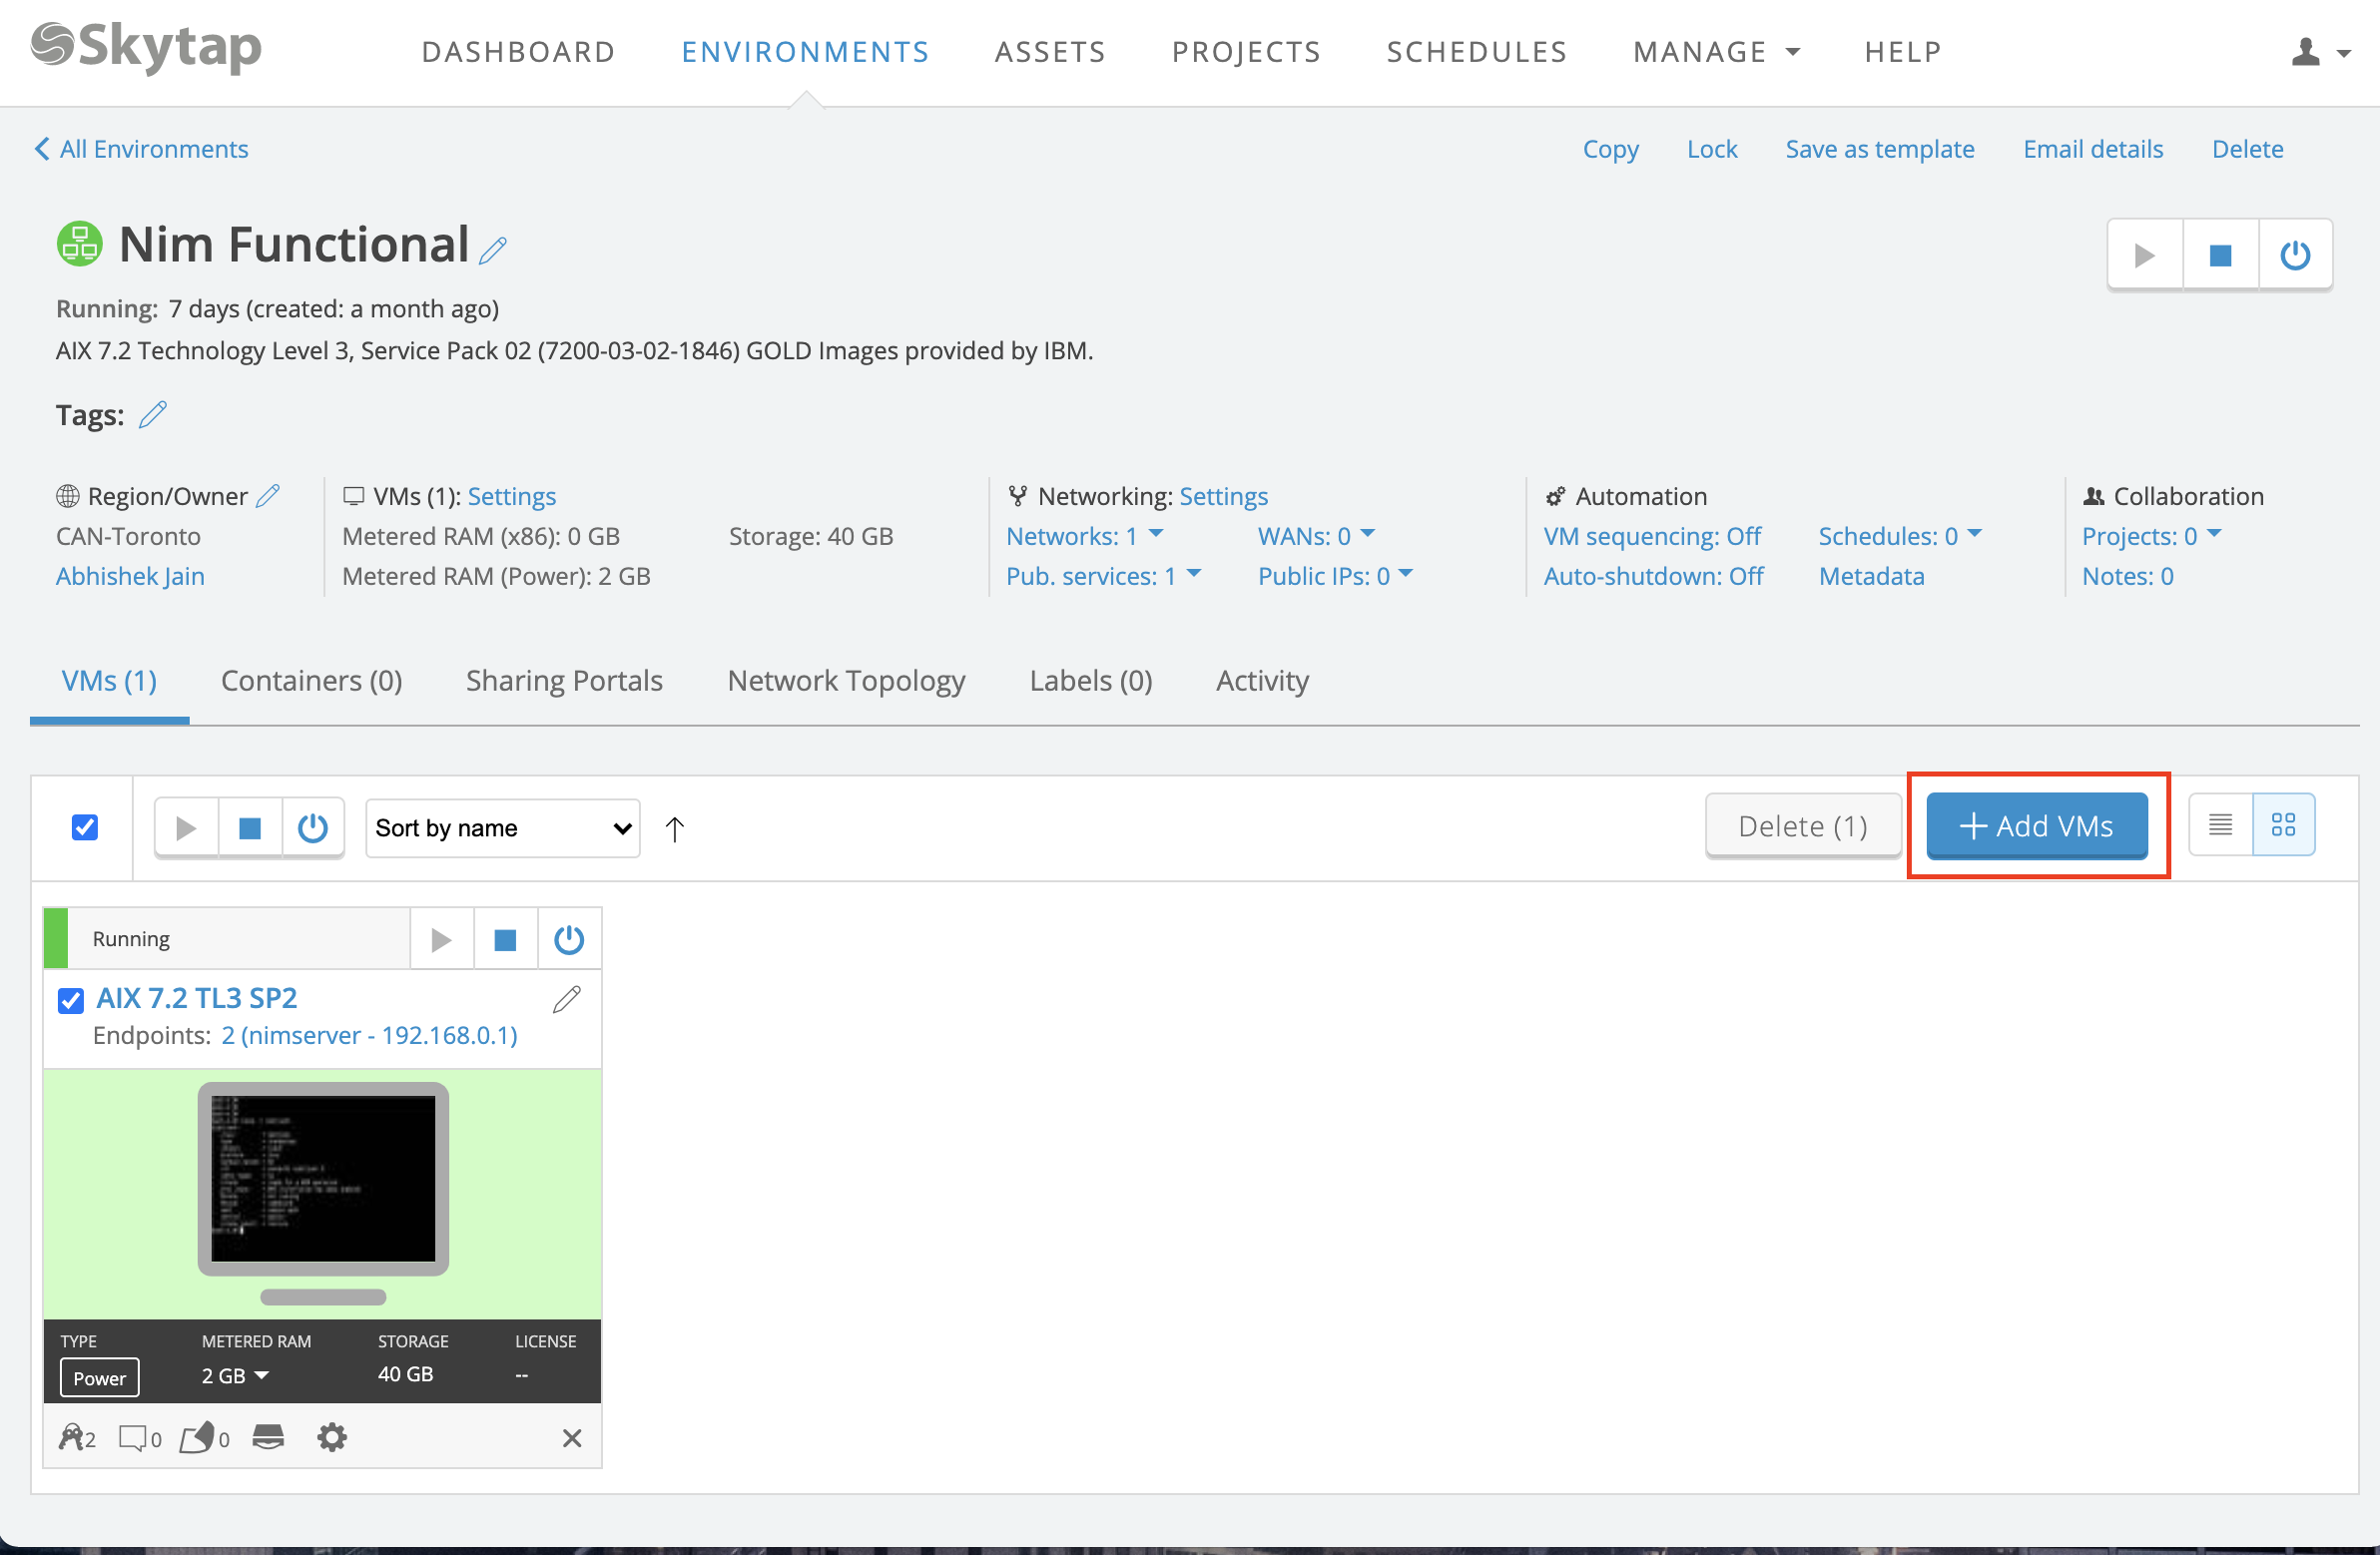 ){}
){} -
Select Templates and choose any AIX template and add VM.
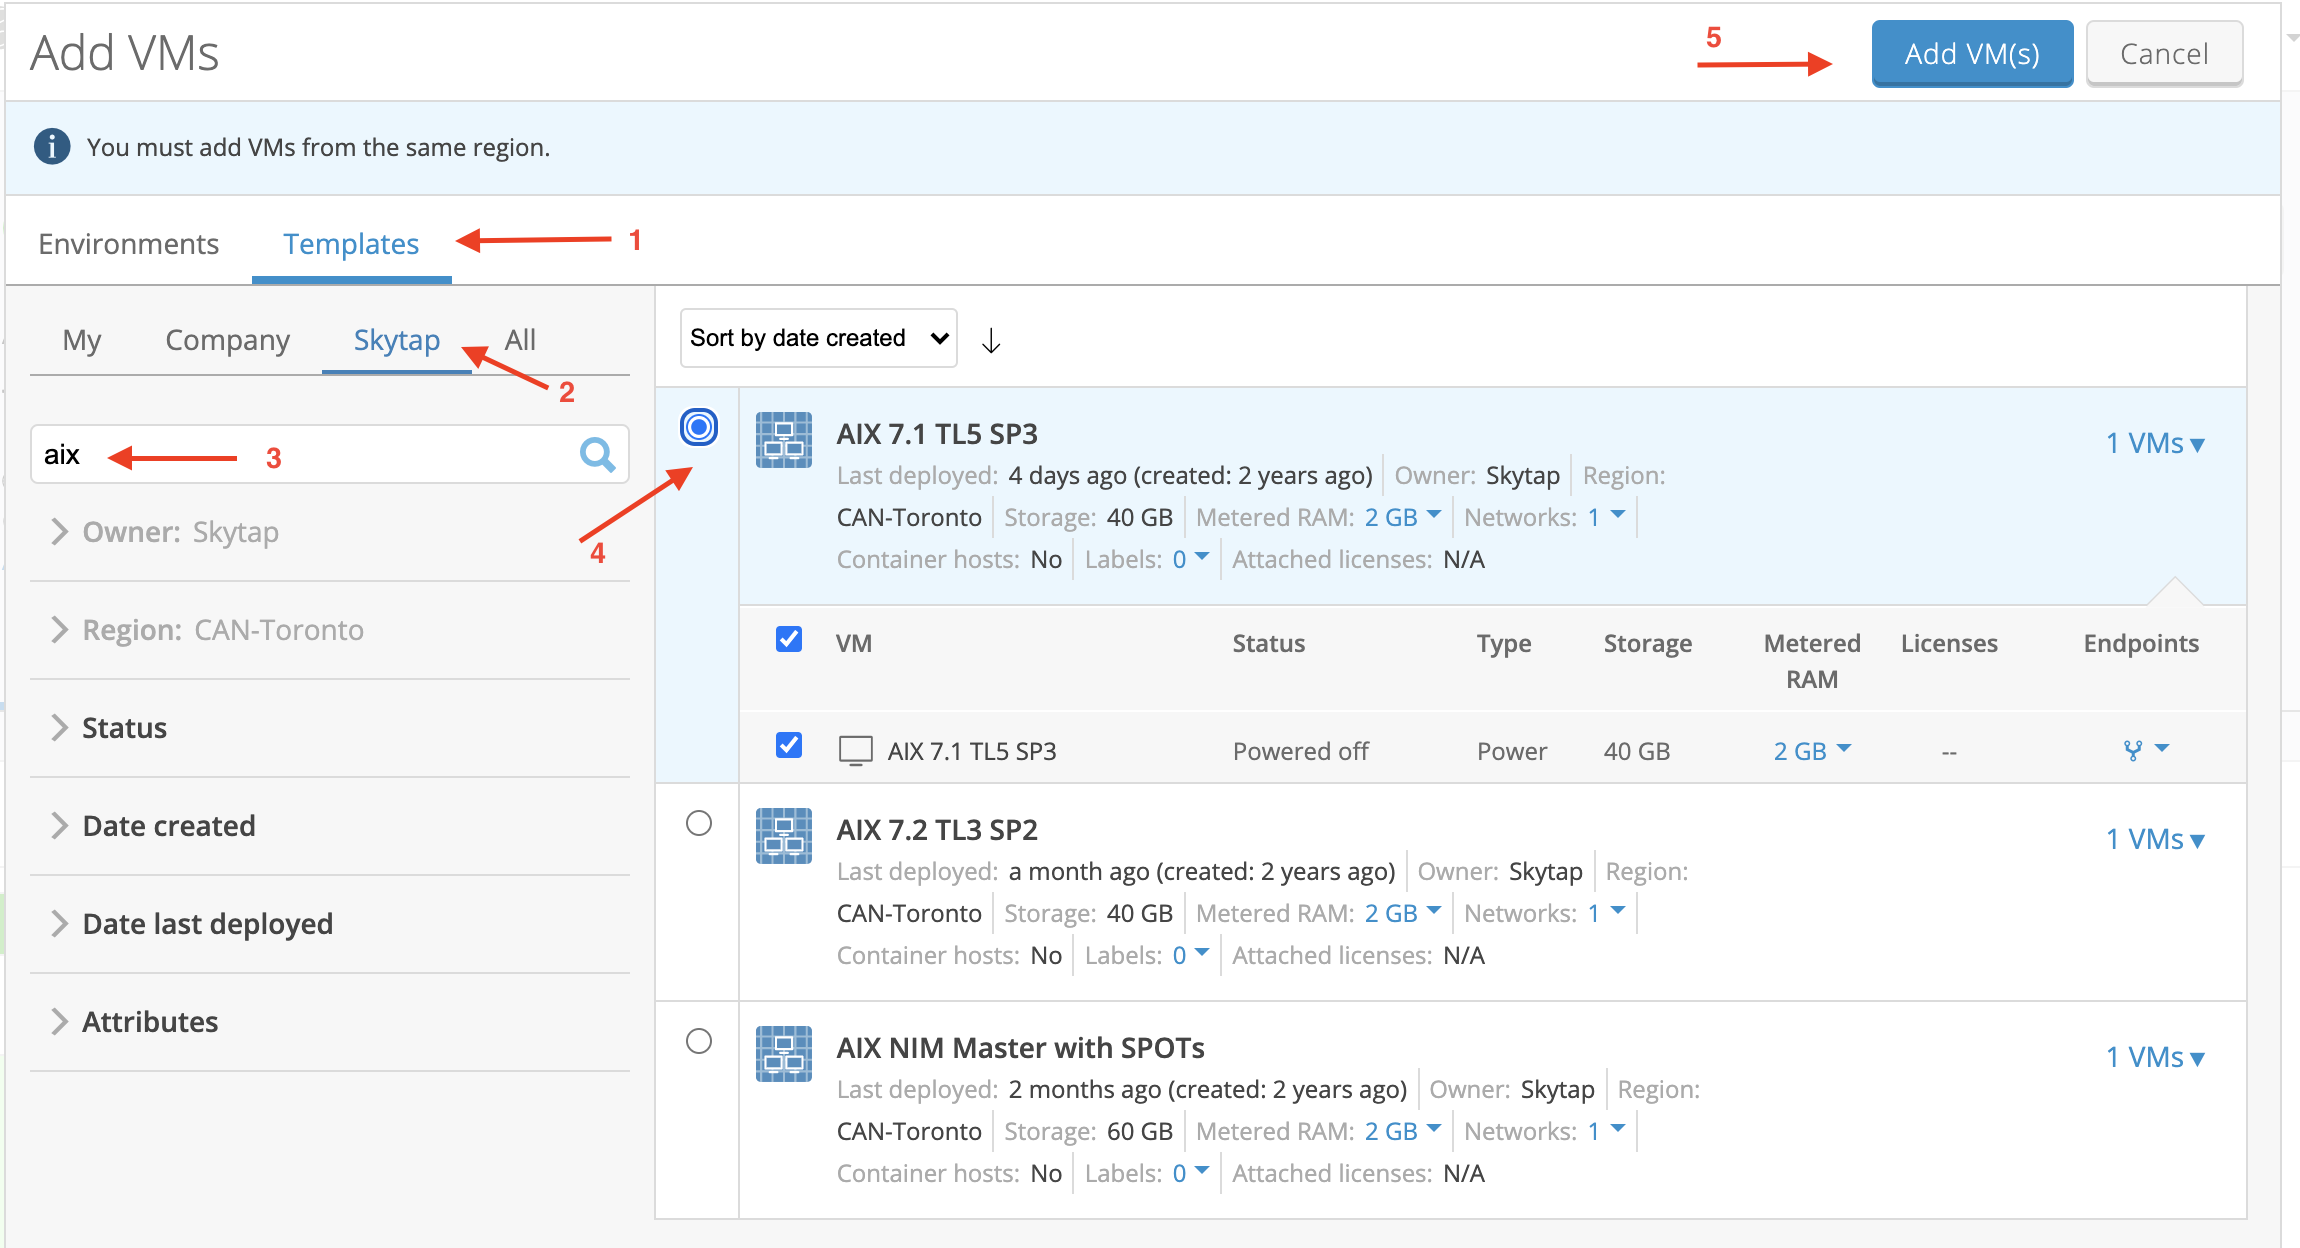 ){}
){} -
Edit the setting on VM and Set Hostname and IP.
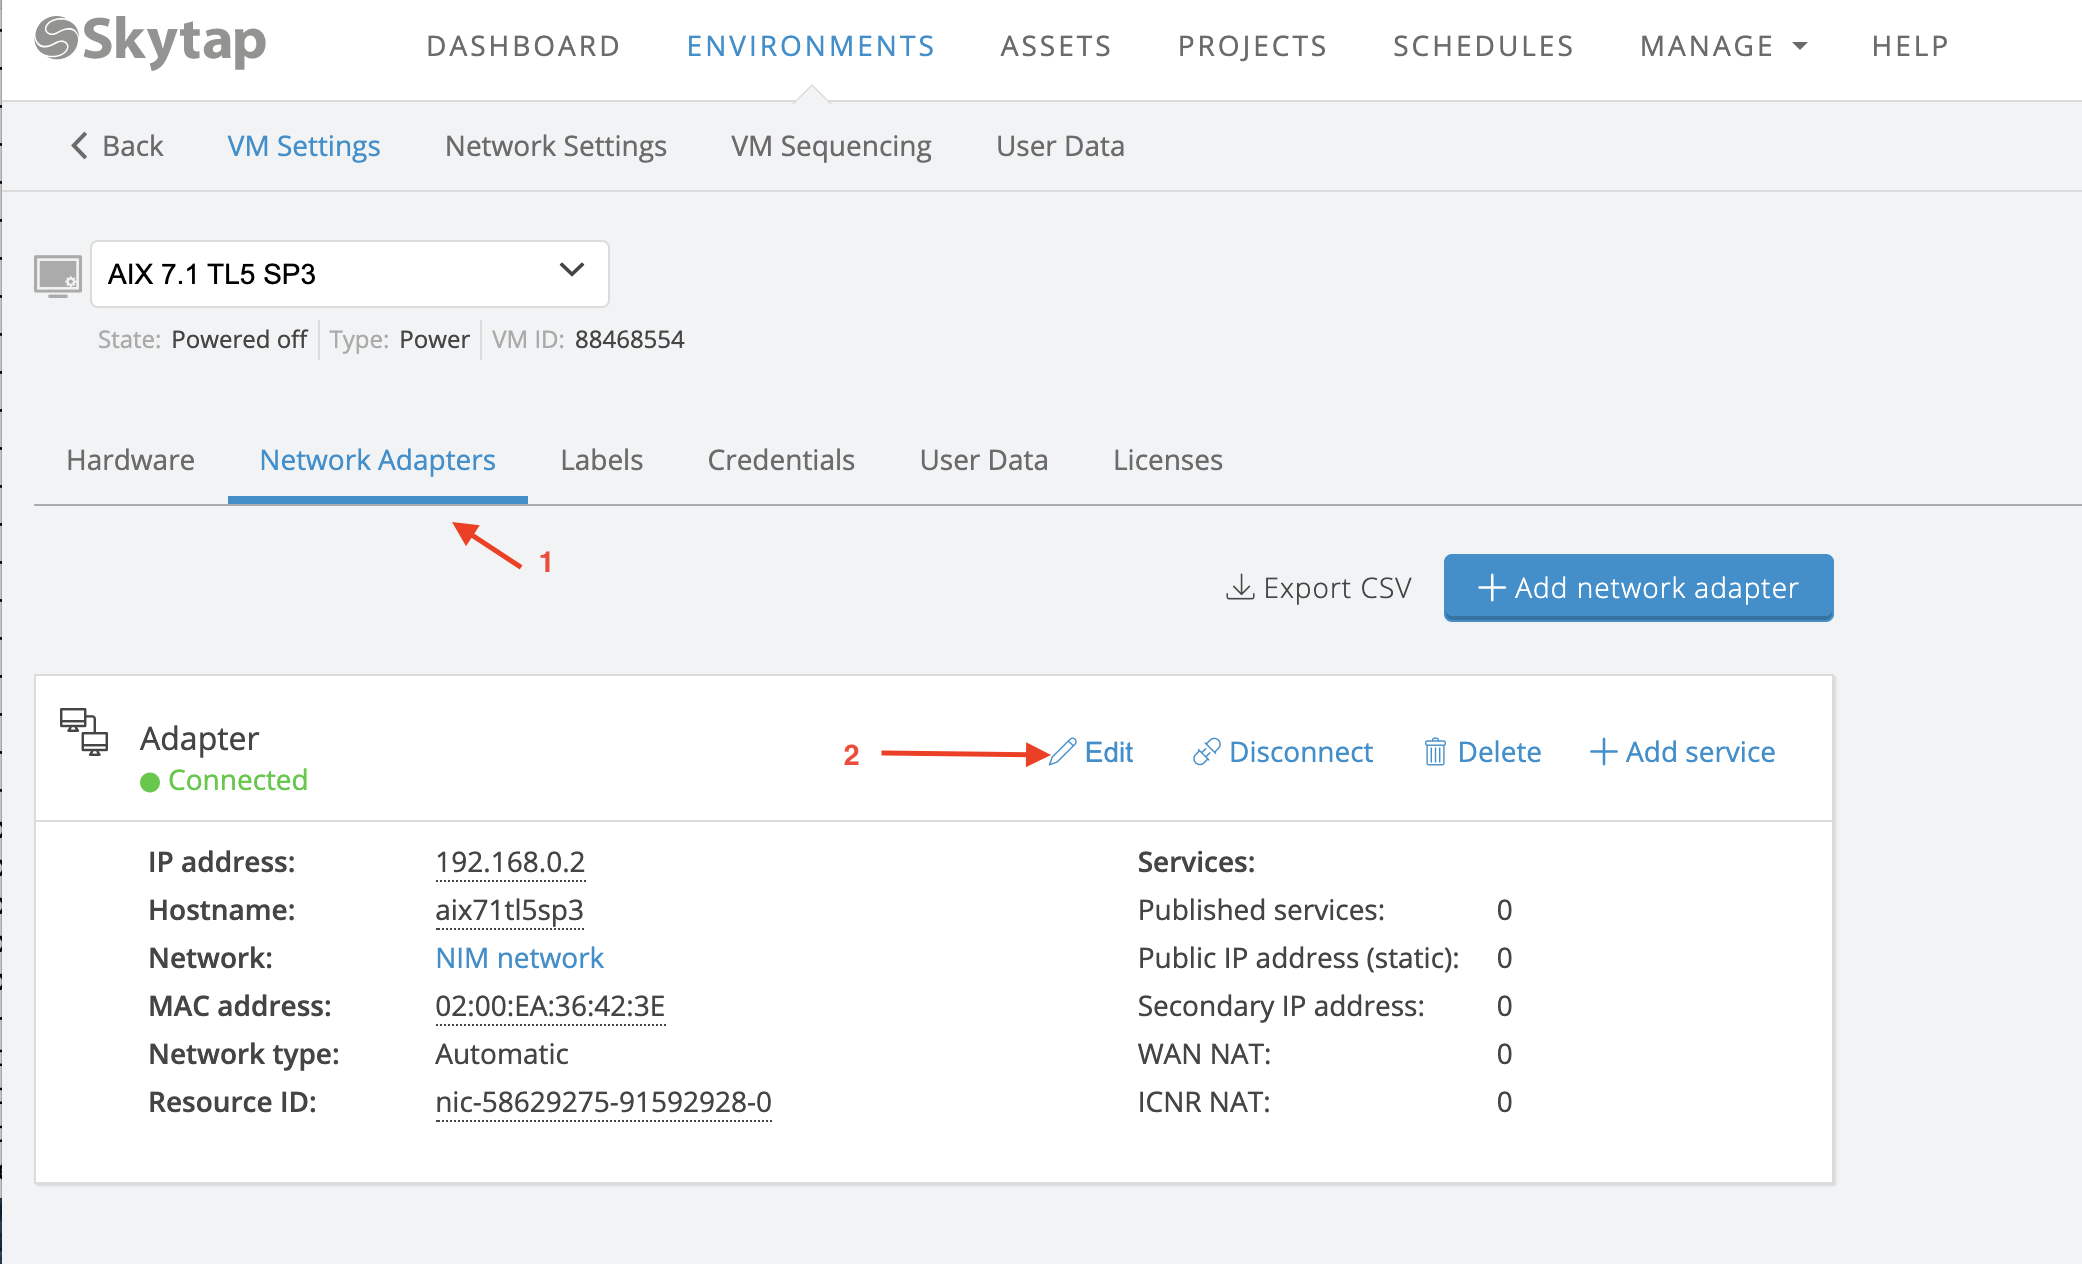 ){}
){}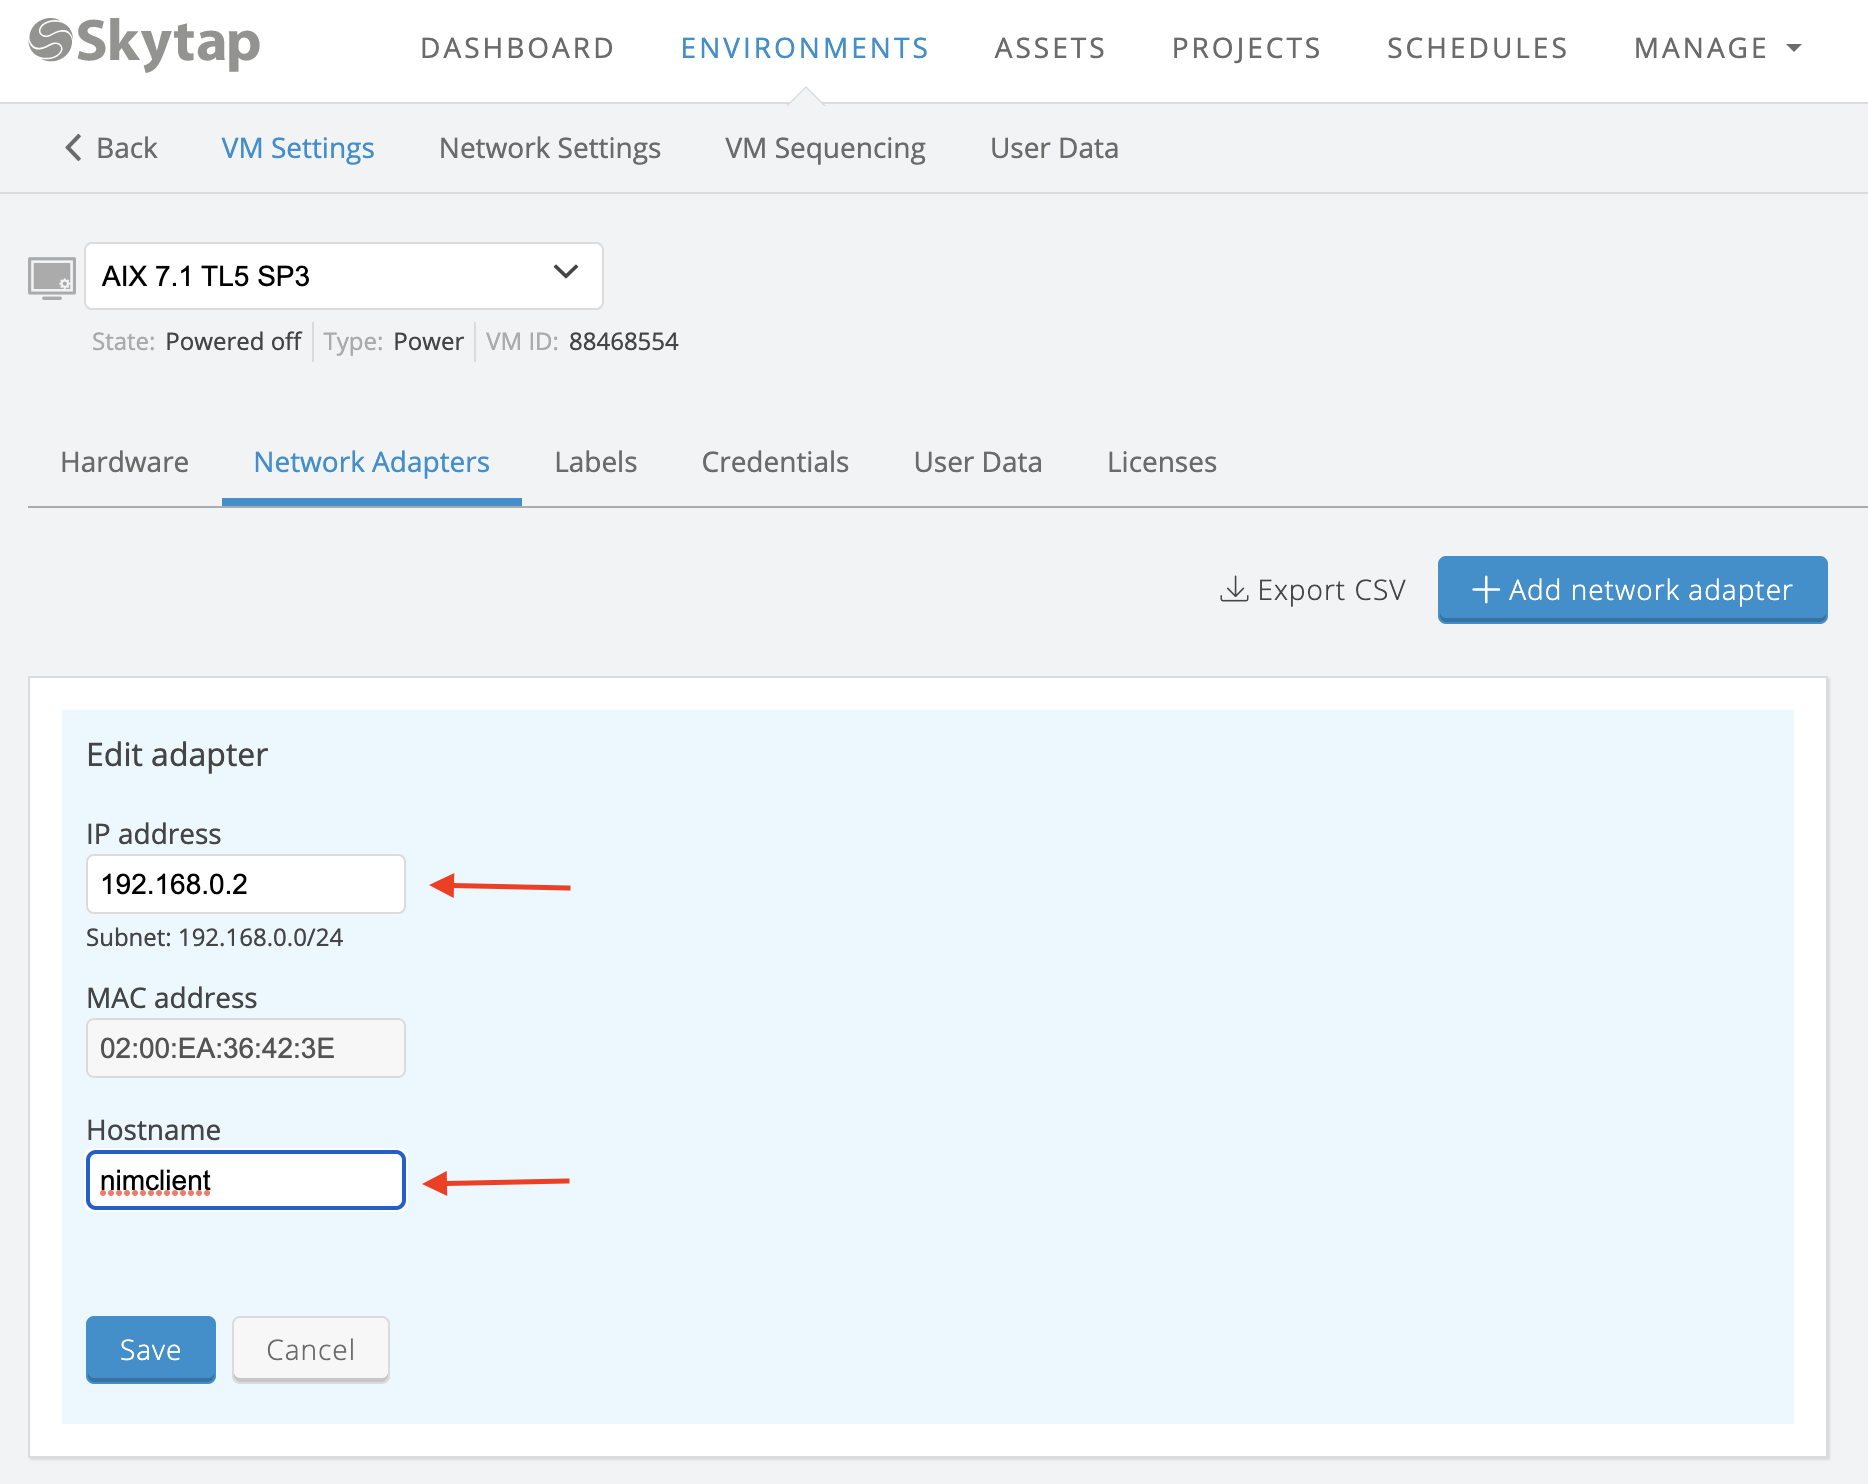 ){}
){} -
From hardware setting assign the disks as per Source LPAR rootvg.
-
Delete the existing disk and add new disk.
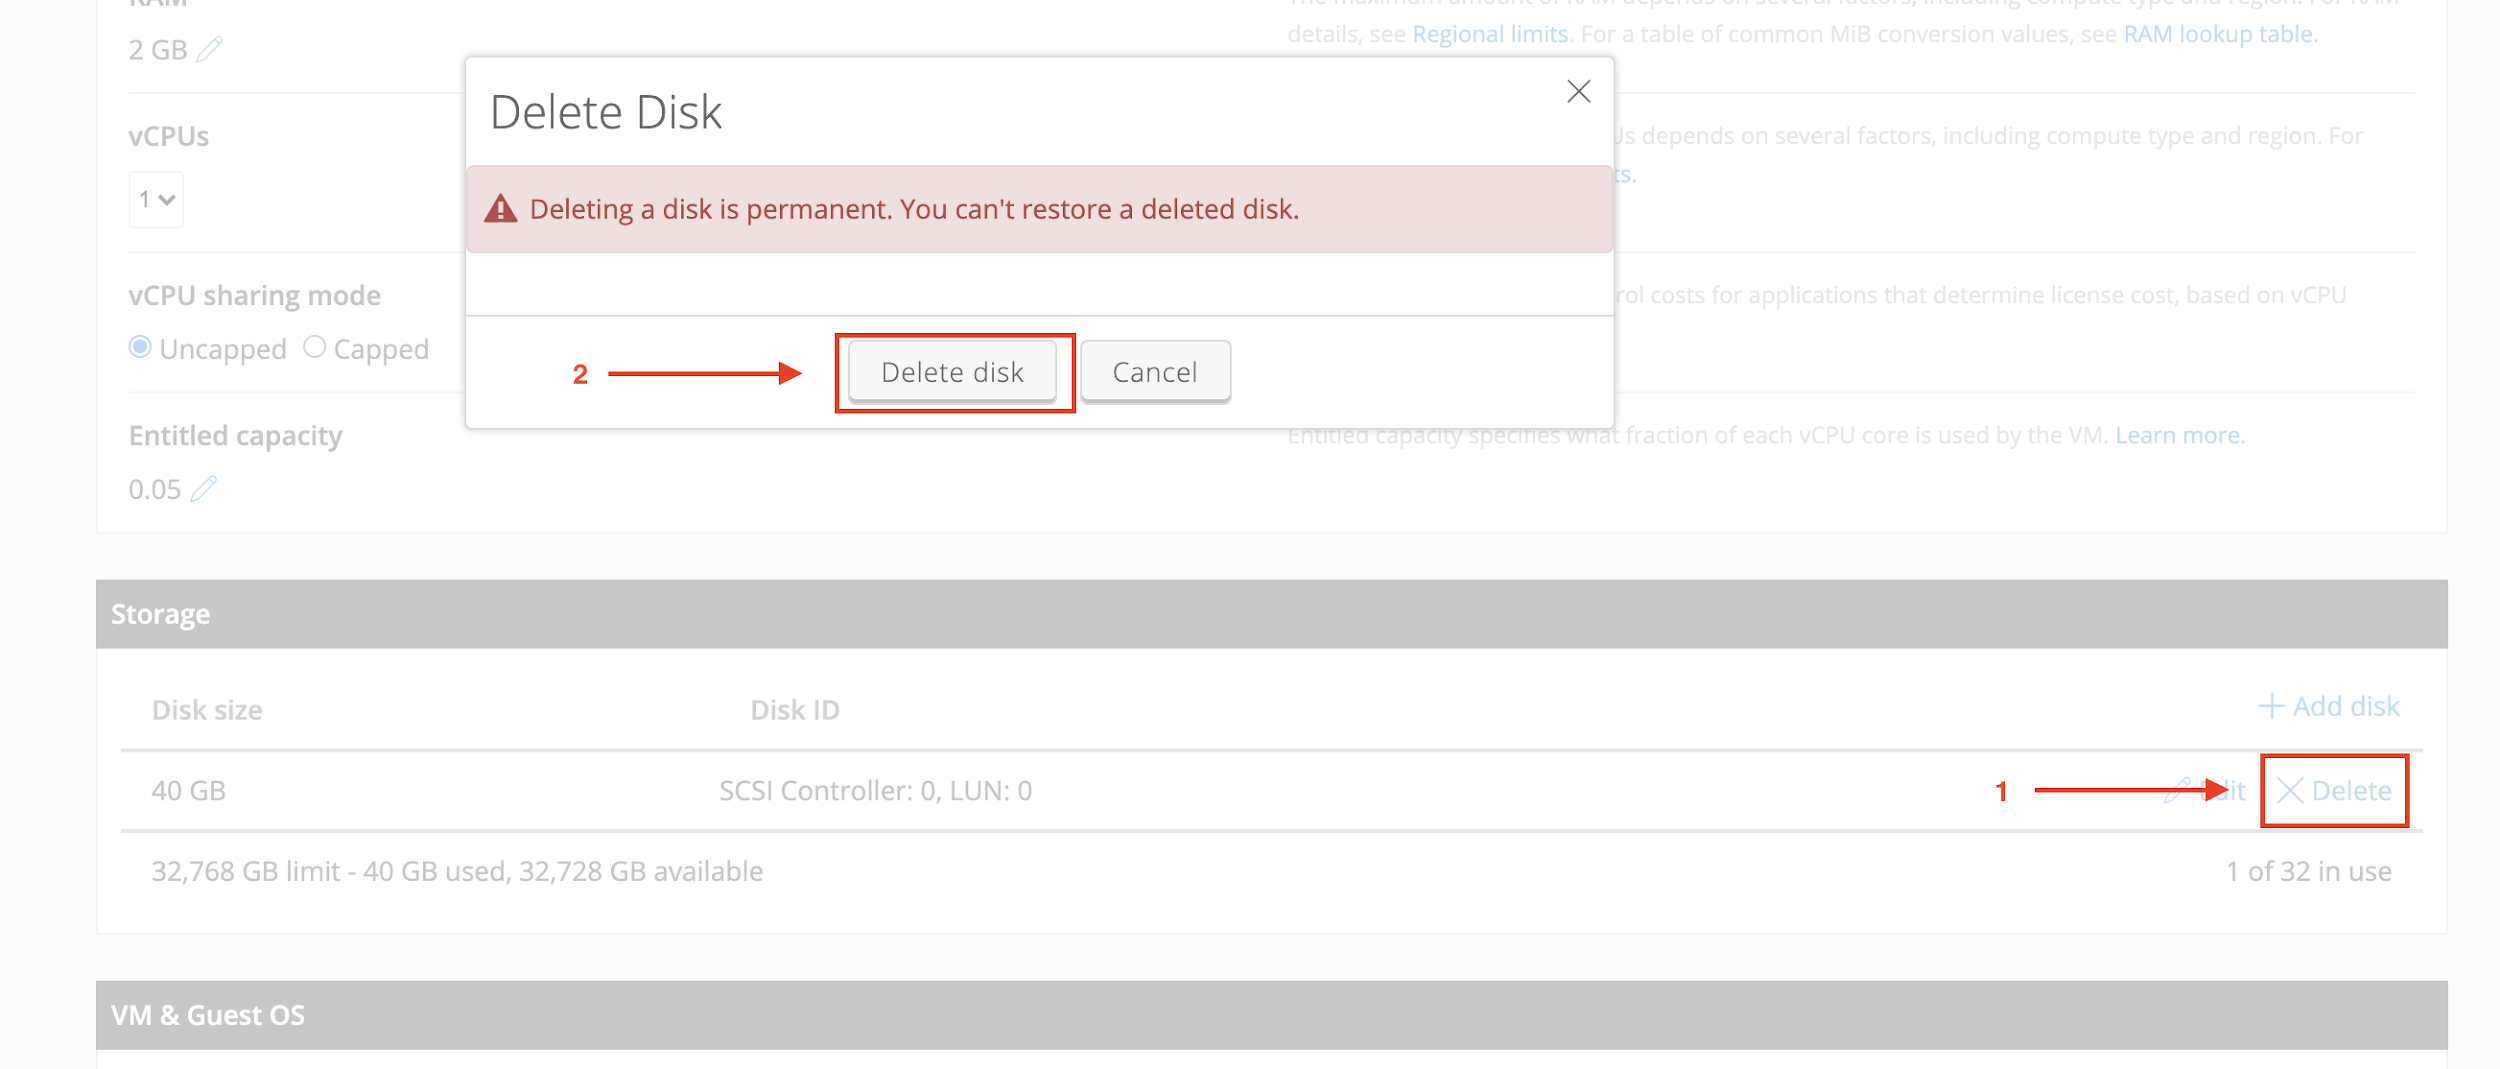 ){}
){} -
Add new disk.
 ){}
){} -
Update the CPU/RAM if required and start the LPAR and open the console.
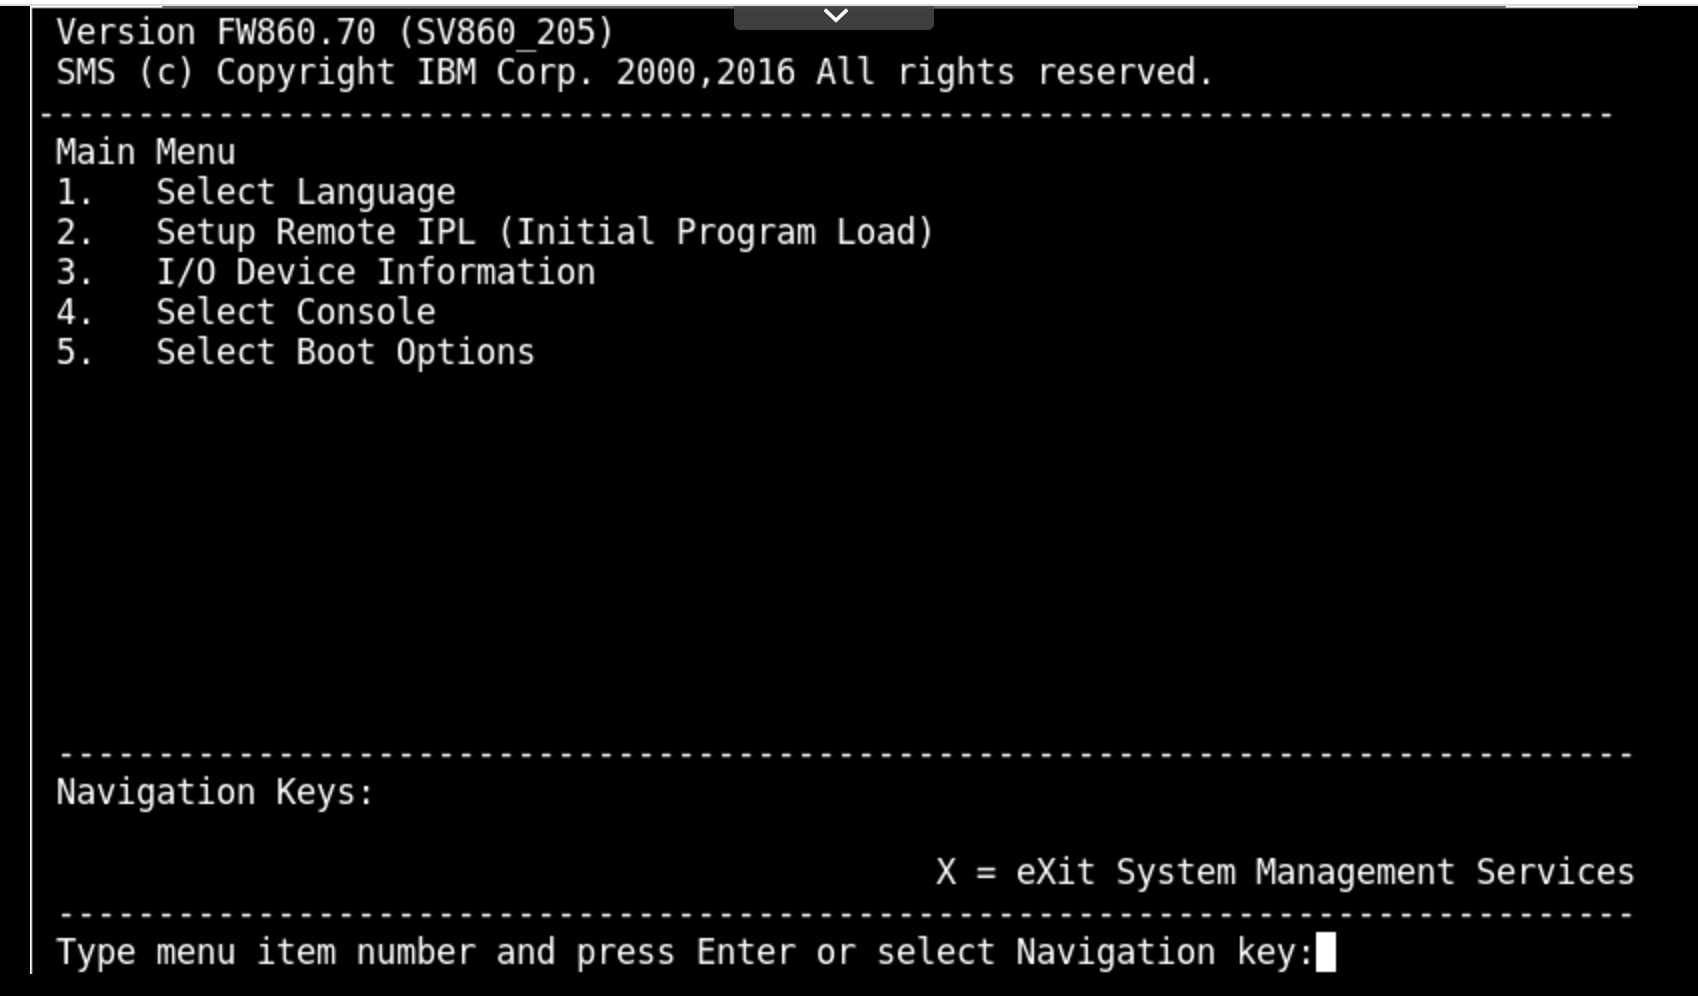 ){}
){}Note: System will enter in SMS menu.
-
-
Set up NIC/Ethernet to boot using NIM server using the below sequence.
- 2. Setup Remote IPL
- 1. Interpartition Logical LAN
- 1. IPv4 – Address Format
- 1. BOOTP
- 1. IP Parameters
-
Configure the IPS to match the IP as shown below.
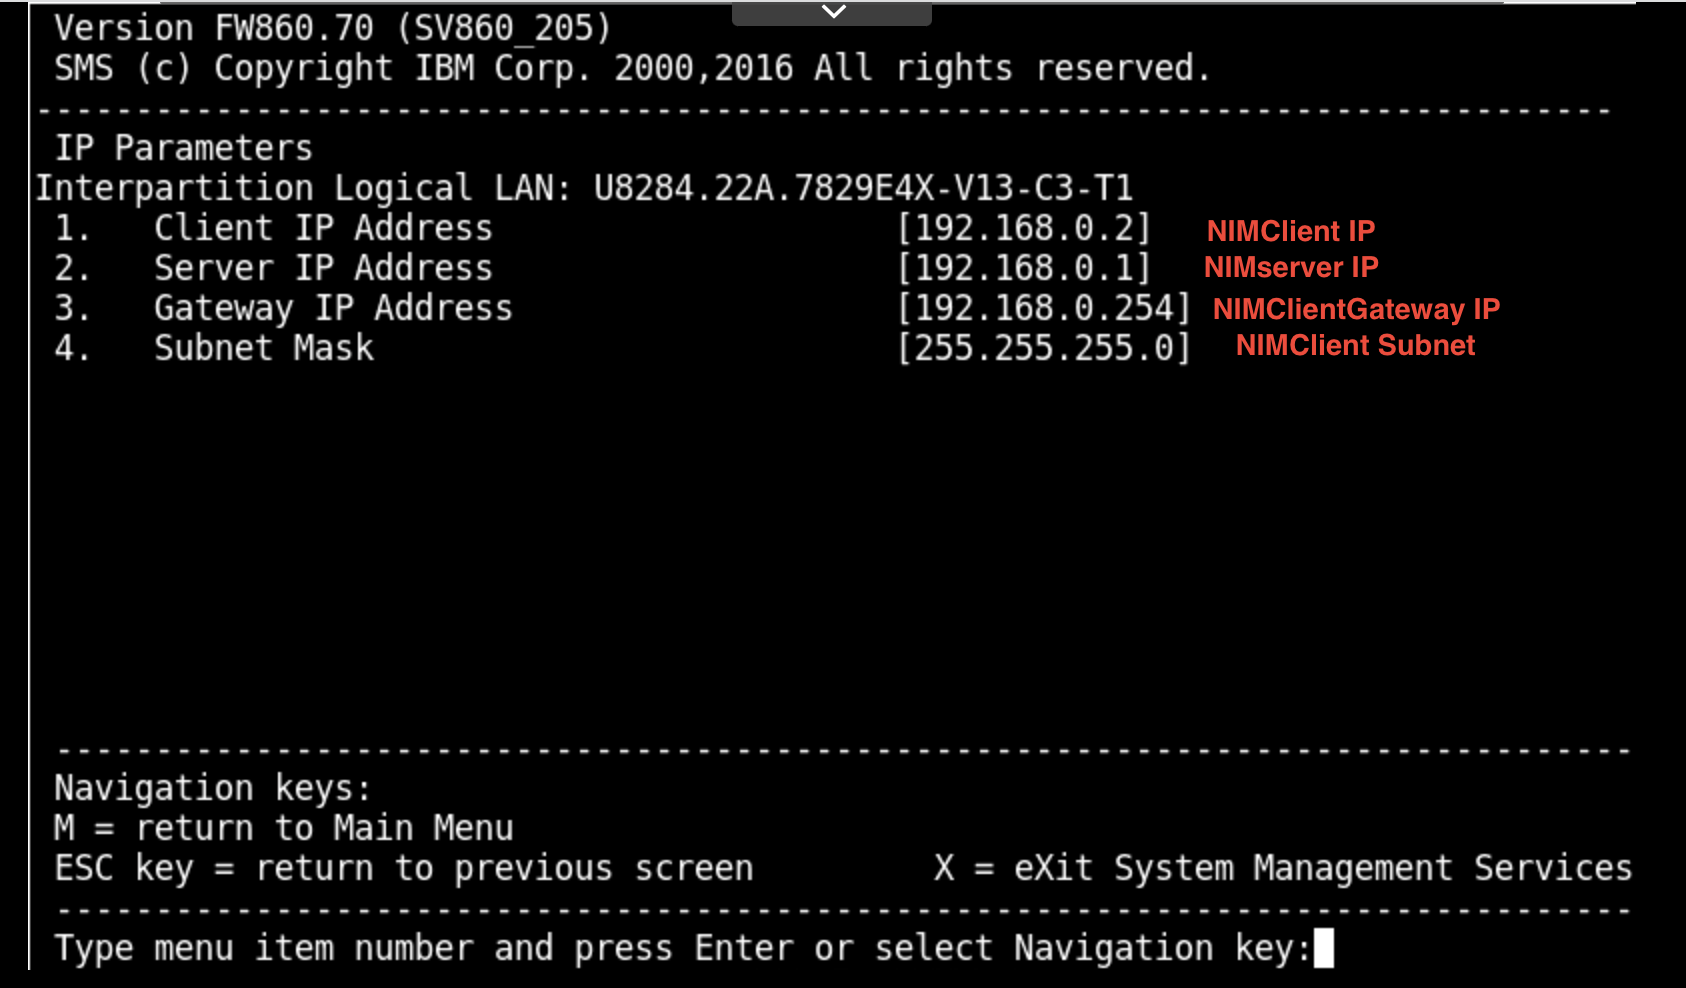 ){}
){} -
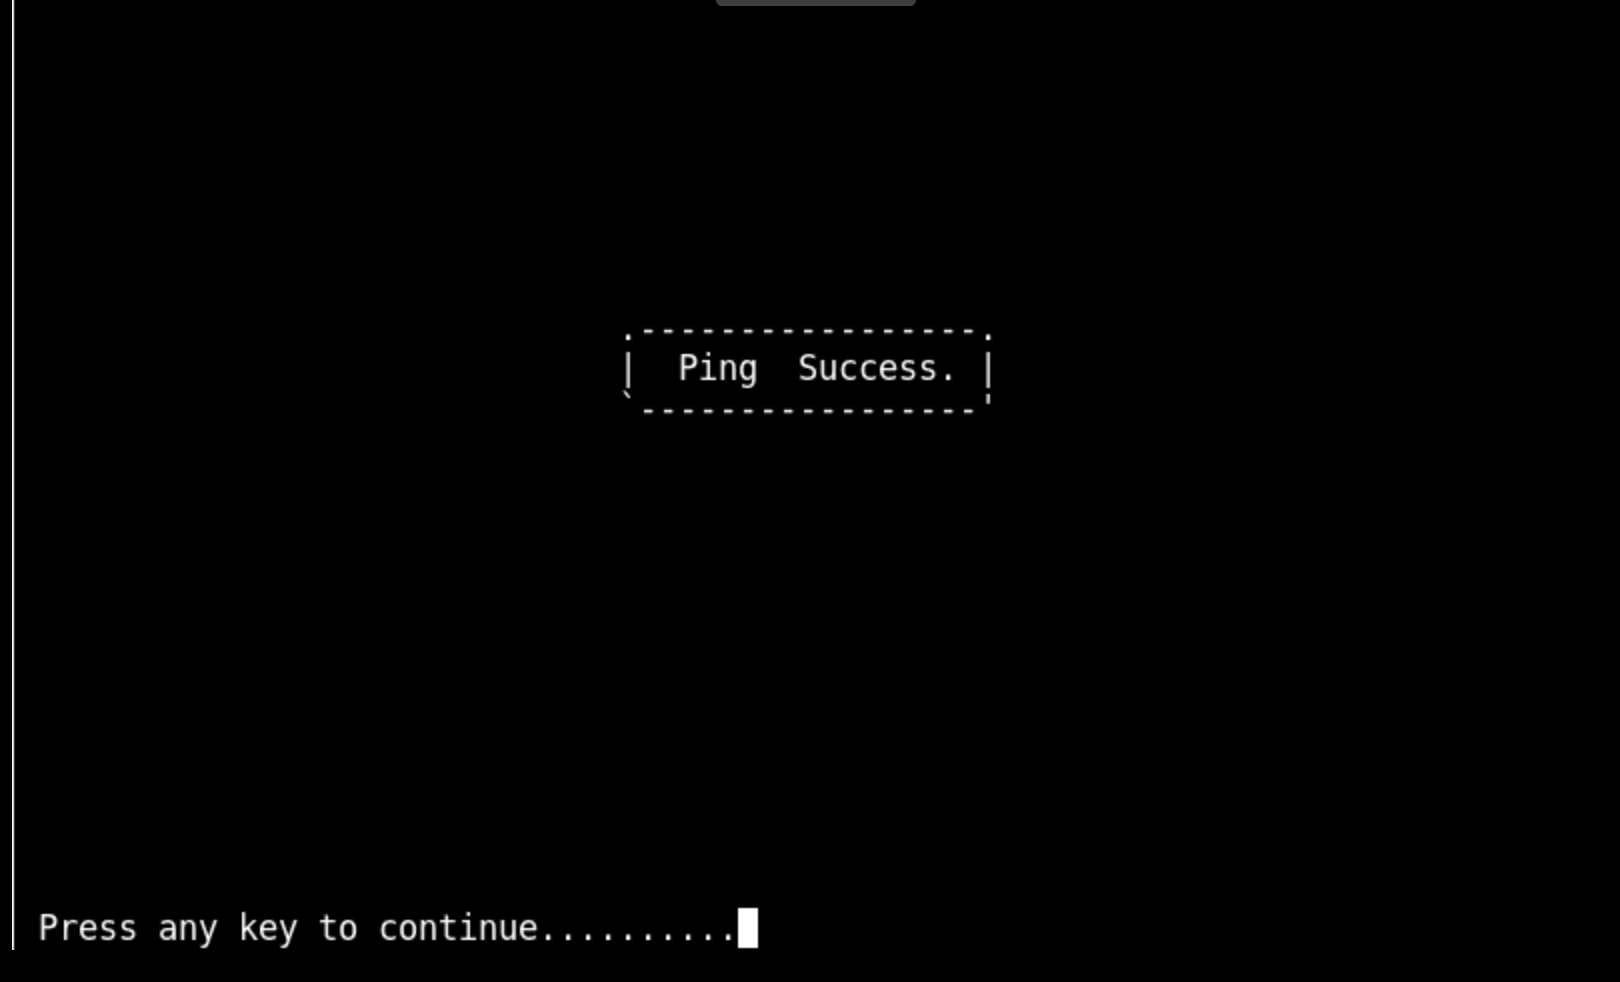
Press esc to return to previous Menu and run “3 - Ping Test” -> press 1 and enter to execute.
 ){}
){} -
On successful ping press enter and return to main menu using “M”.
-
Press “X” to exit and server should start boot using the LAN adapter.
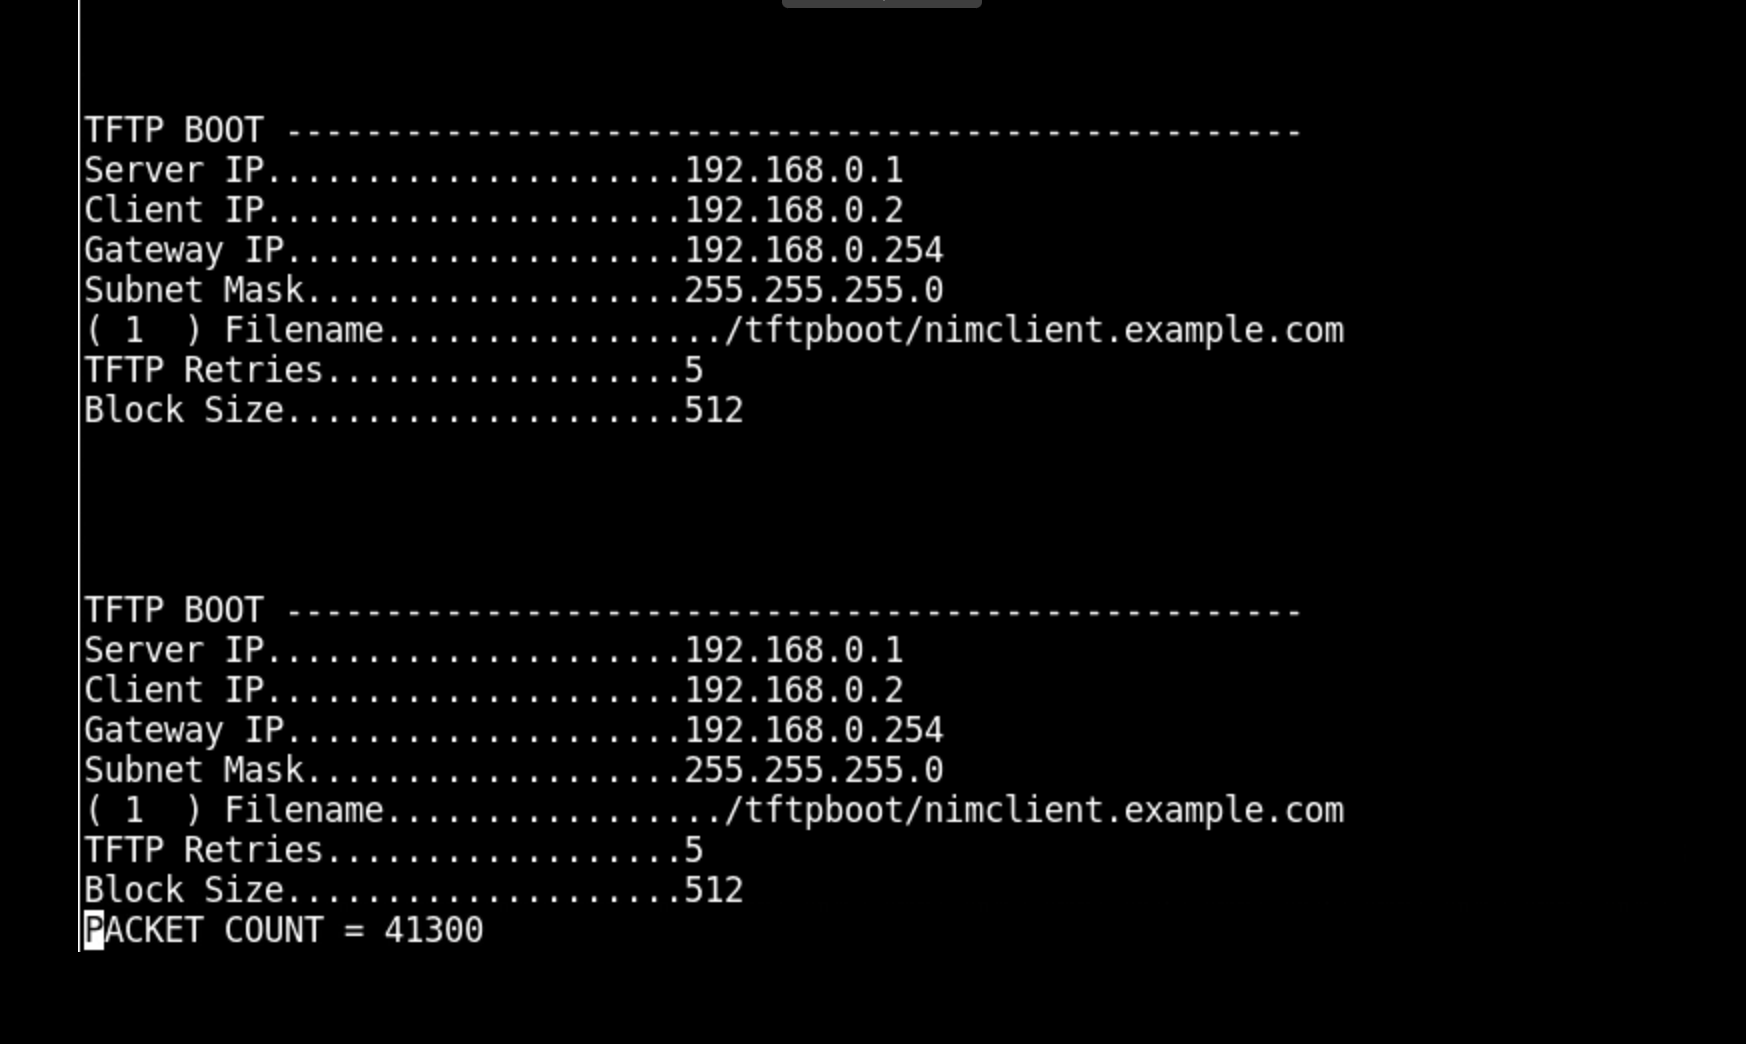 ){}
){} ){}
){} -
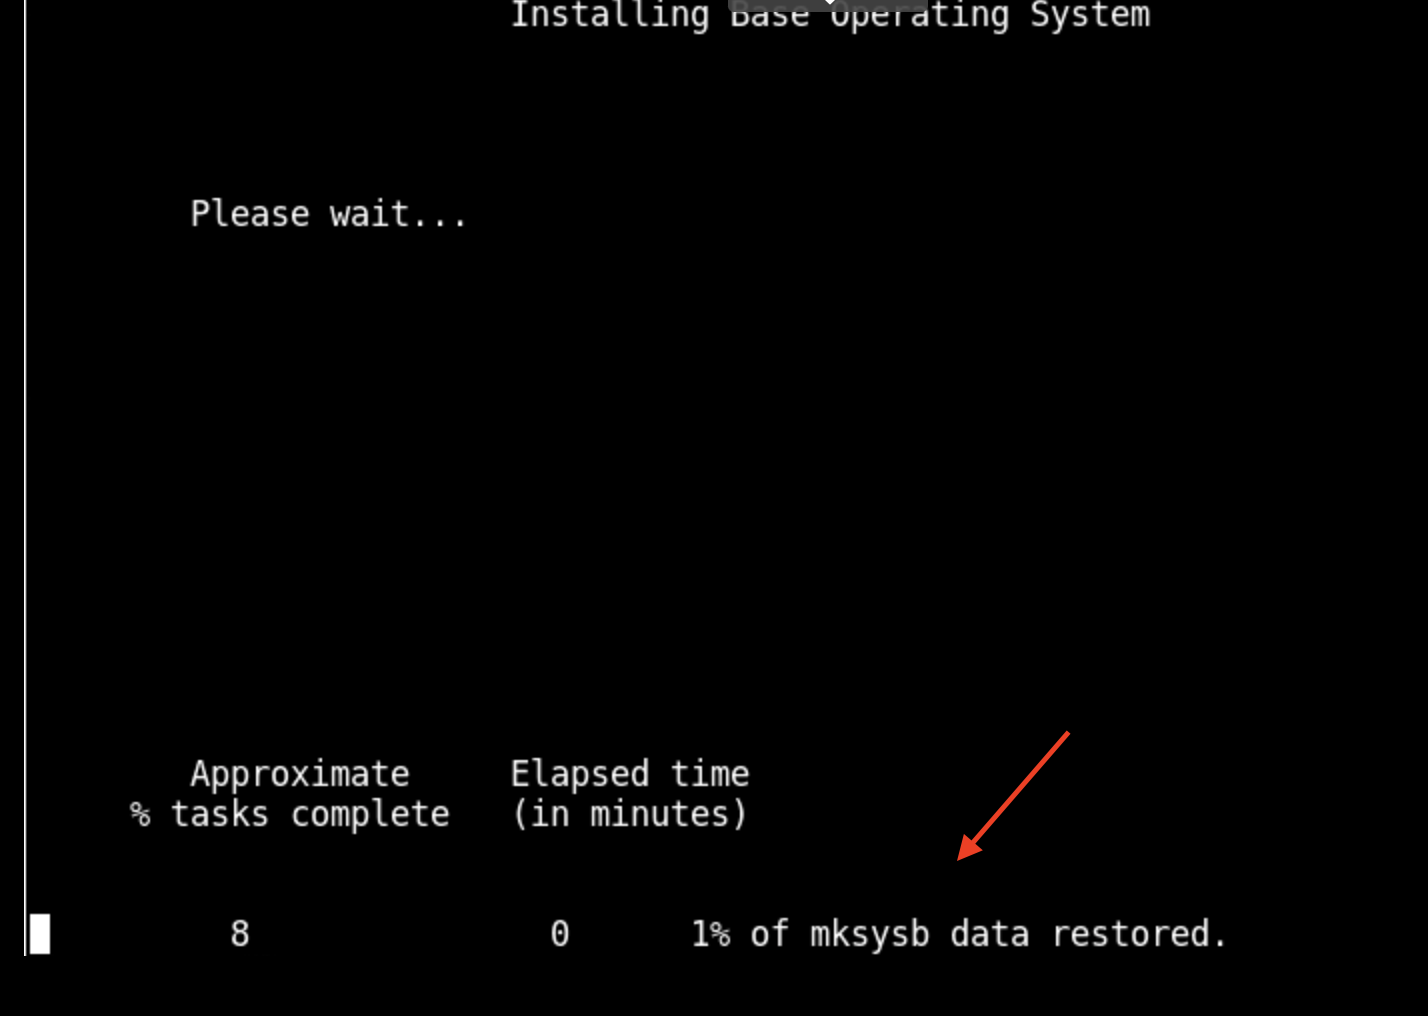
It will take approximately 10 to 20 mins. to restore Mksysb and server will reboot with the Mksysb restored.
Savevg Backup and Restore in Kyndryl Cloud Uplift
-
Backup and restore data volumes using savevg.
-
Prechecks:
- Minimize active read/writing to disk to avoid file or database corruption.
- Verify enough free space to backup volume group to your filesystem.
-
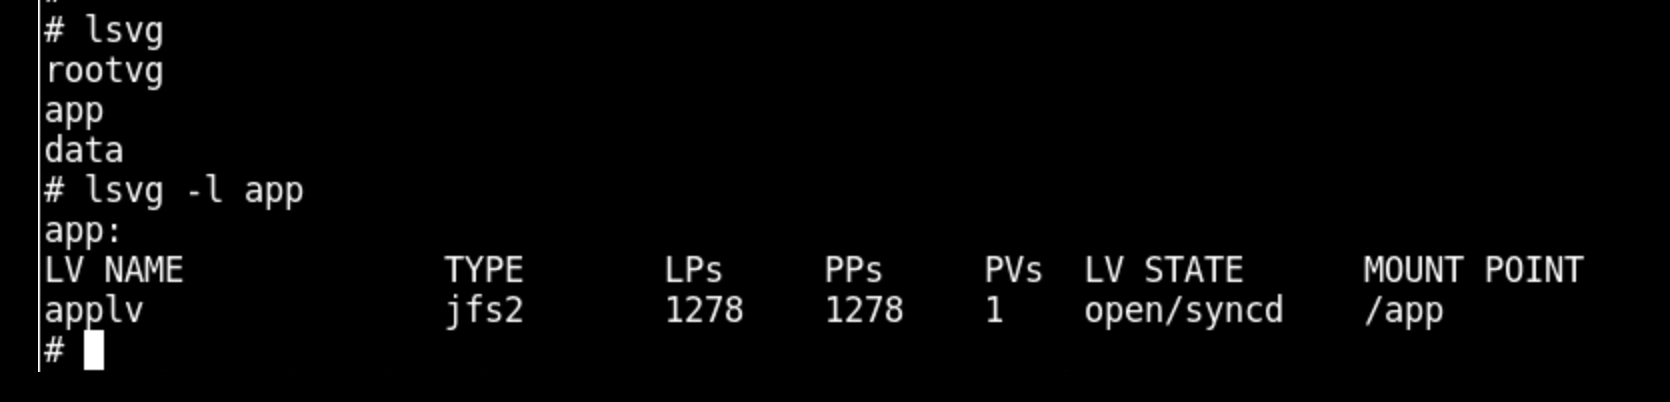
Backup execution - verify volume group has desired volumes:
-
Run # lsvg and #lsvg - an app to review volumes to be backed up.
 ){}
){} -
Run backup to location with sufficient space with the command # savevg -r -f /tmp/backup/app.image app.
 ){}
){}
-
-
Copy backup to Kyndryl Cloud Uplift LPAR (see copy methods above for mksysb).
-
Prepare system in Kyndryl Cloud Uplift to restore volumes. Note: if you want to shrink your volumes when restoring, you should pick smaller sizes that are still sufficient for the data in the volume group.
-
Identify physical volumes associated with the volume and their sizes.
Run # lspv and # lspv hdisk1 to confirm the size in megabytes of any necessary disks.
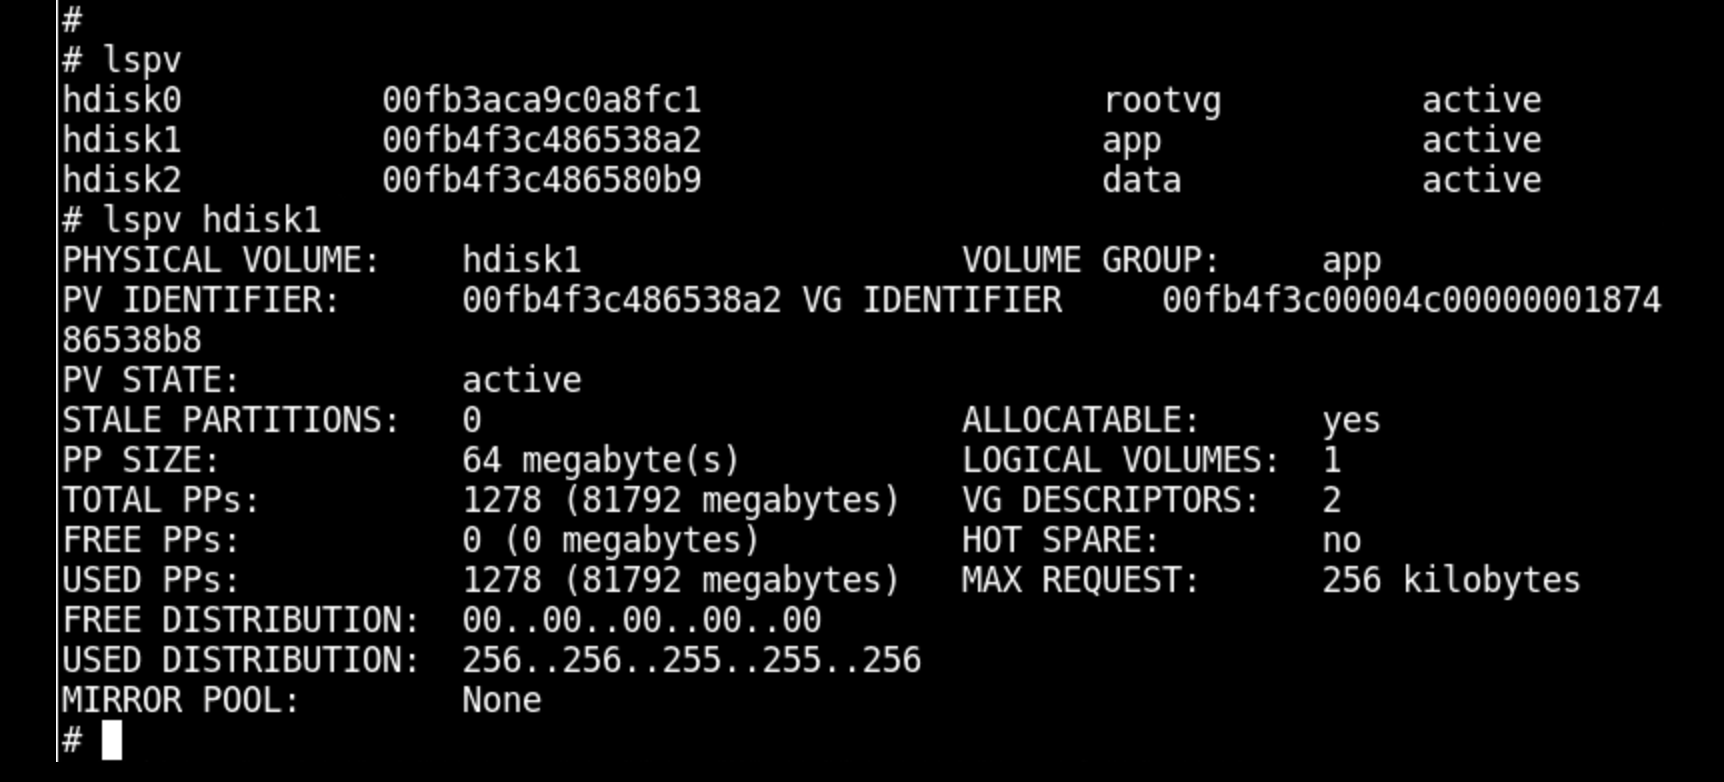 ){}
){} -
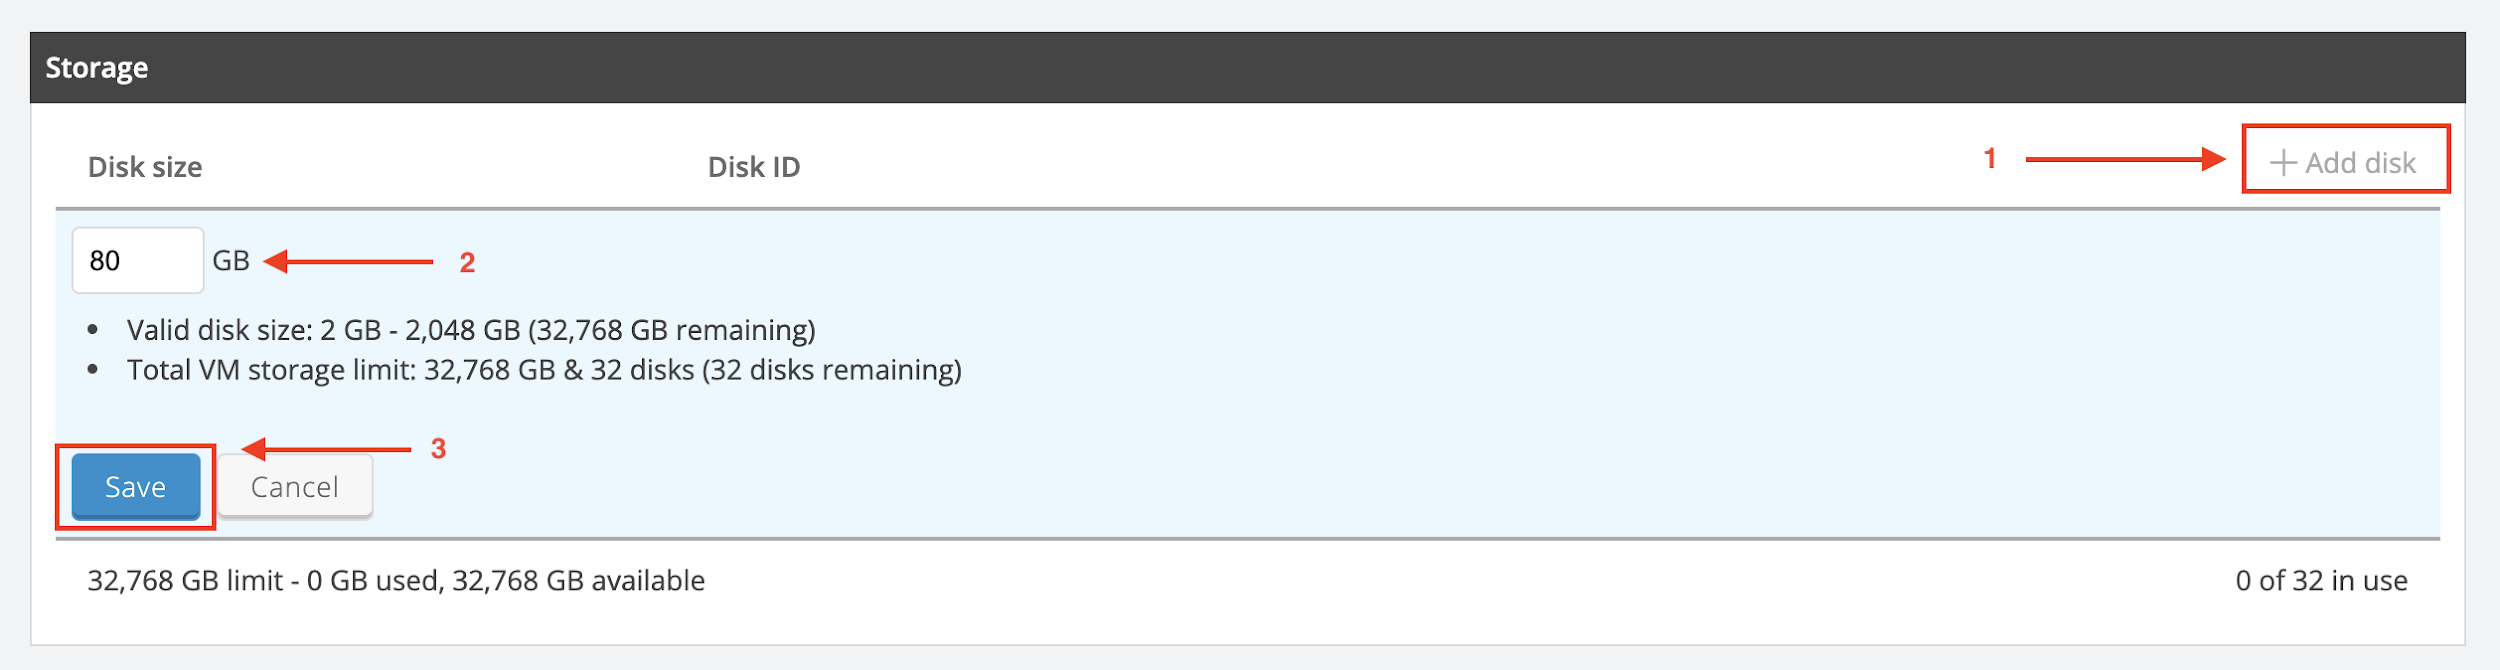
In Kyndryl Cloud Uplift, add disks to your restore target of sufficient size.
-
-
Shut down the restore LPAR in Kyndryl Cloud Uplift, go to edit VM and add disks.
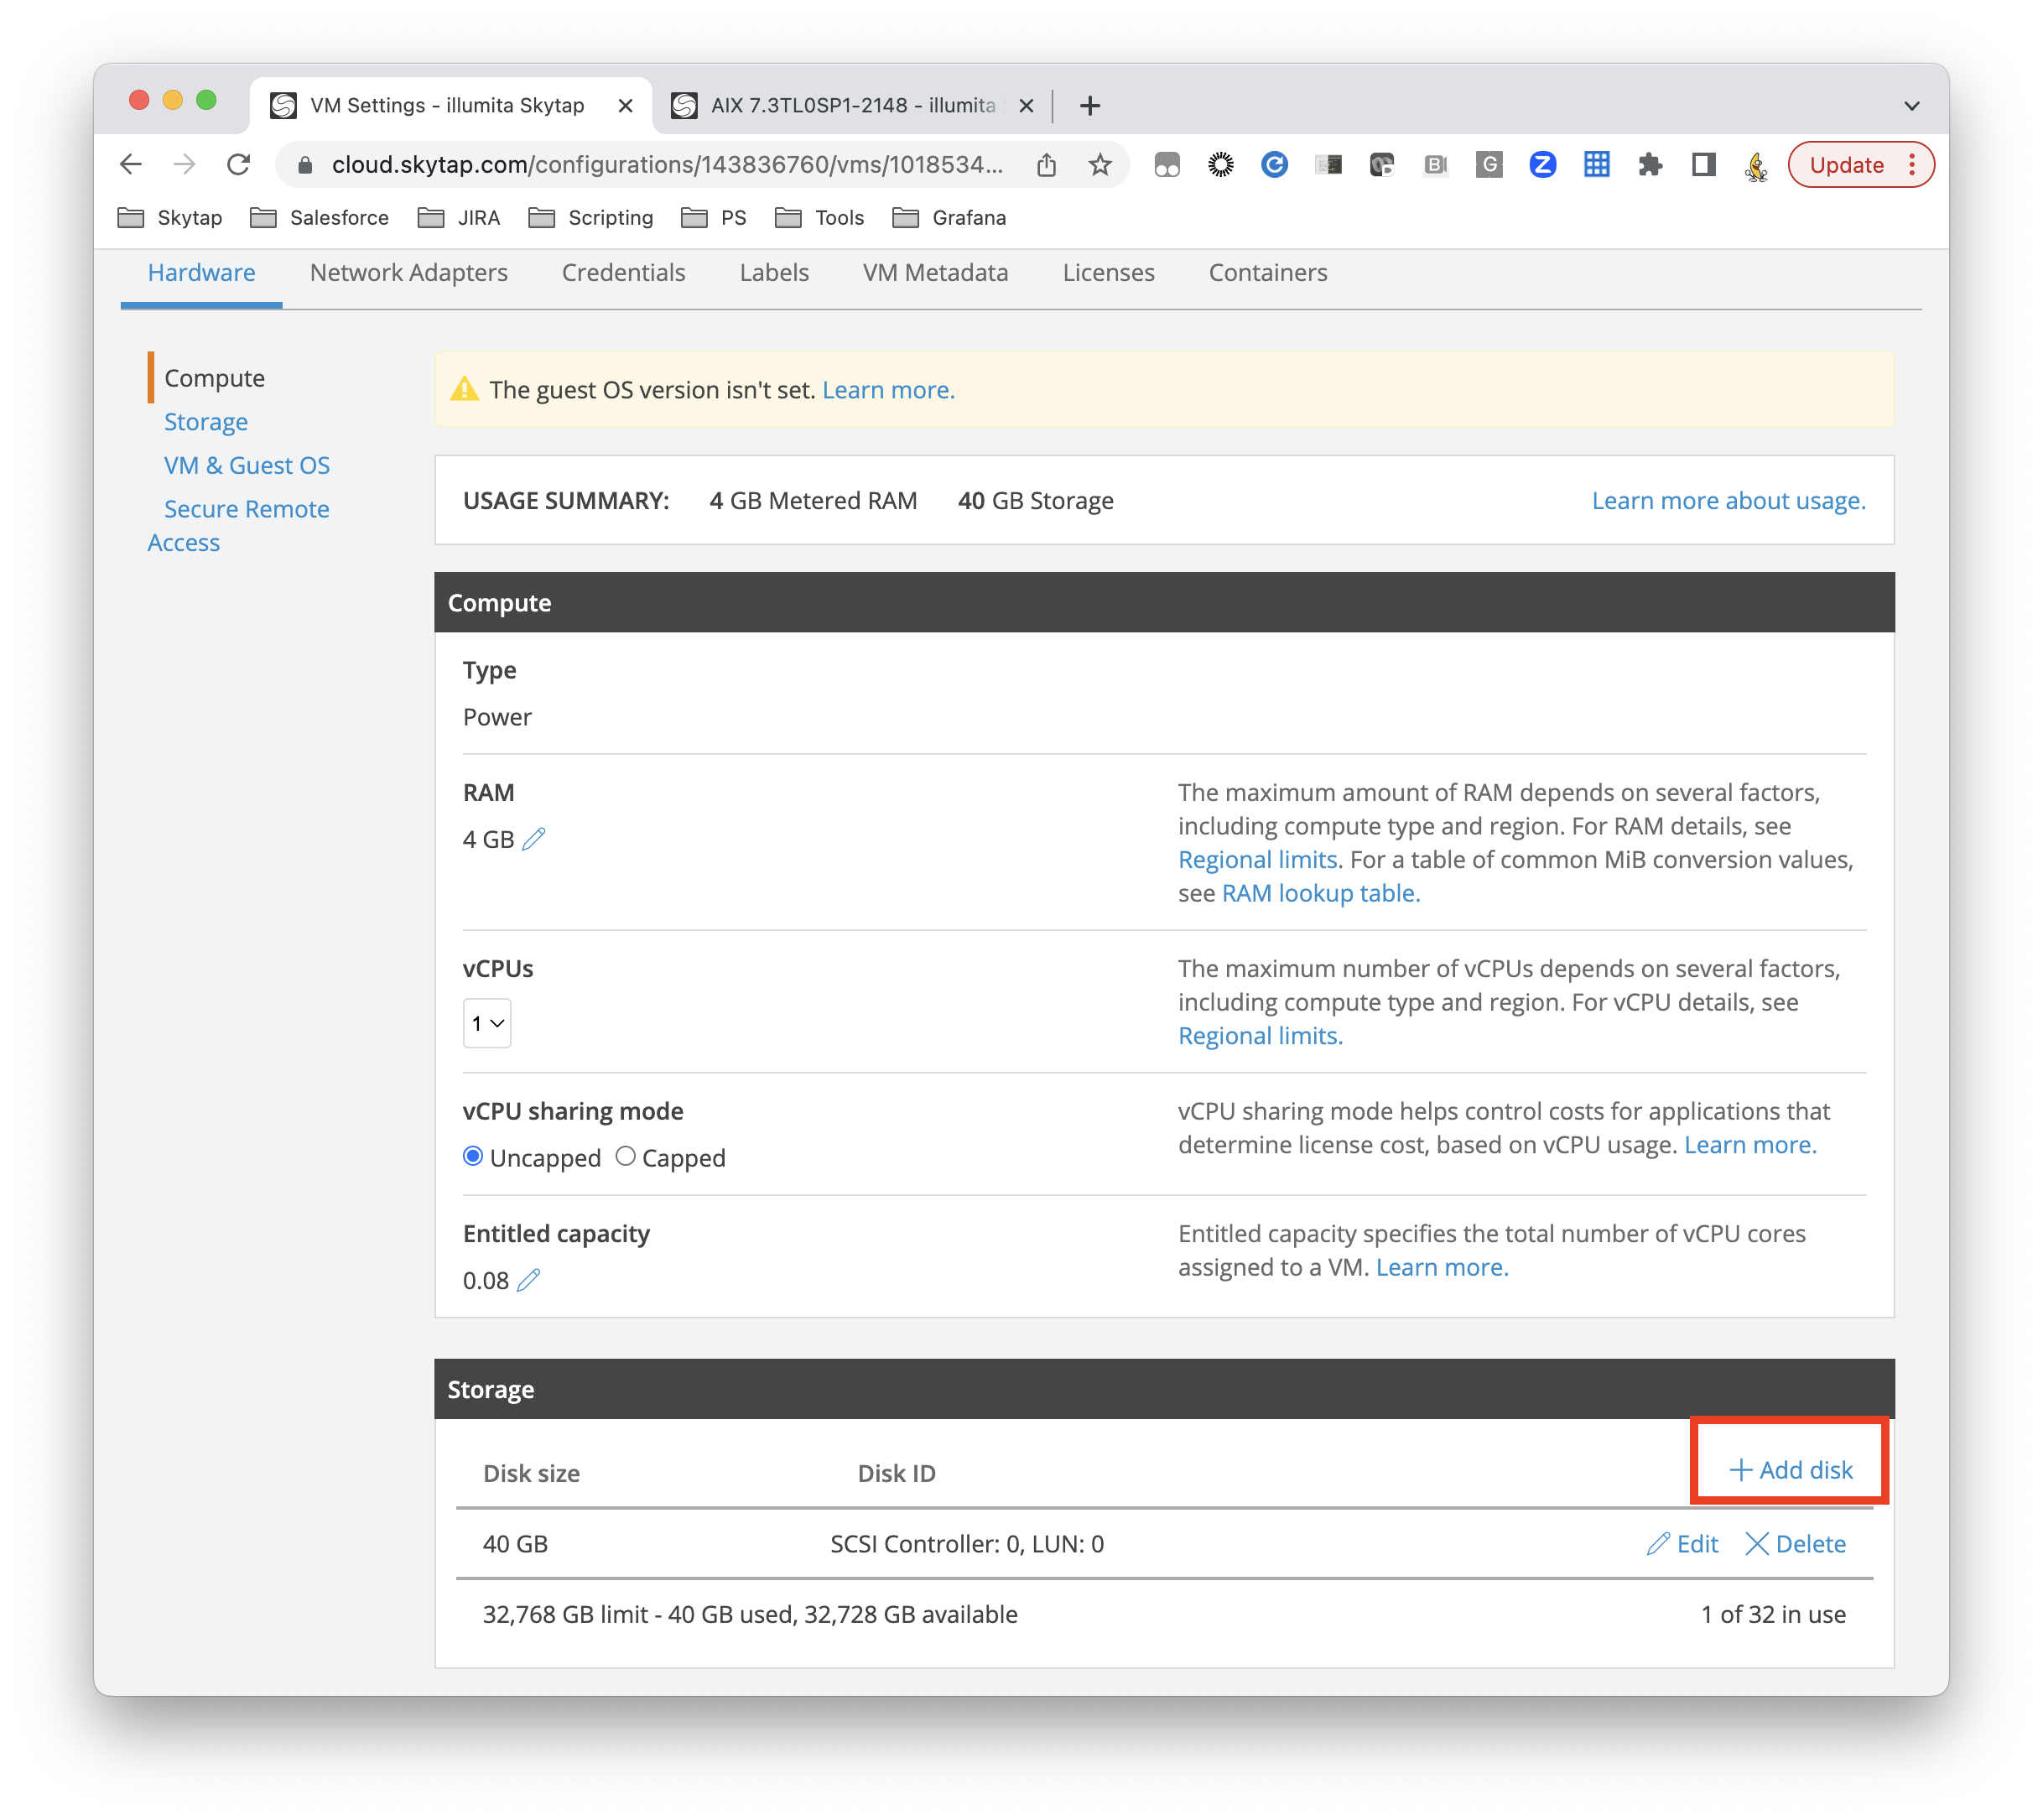 ){}
){} -
Pick how much storage you need and select “Save”.
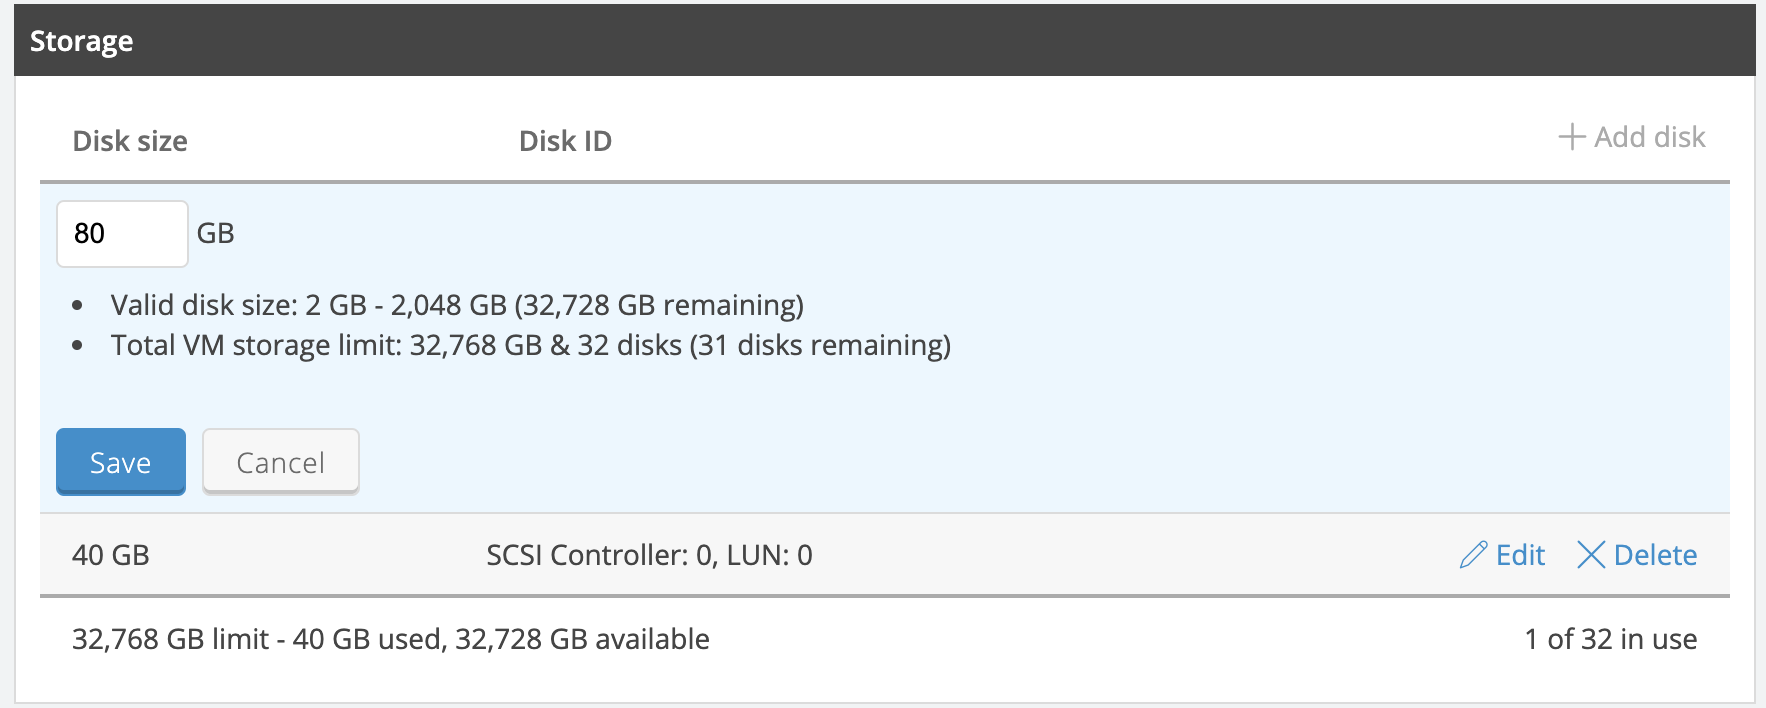 ){}
){} -
Repeat for any additional physical disks you need to add.
-
Start LPAR when disks added.
-
-
Run restores for savevg
-
Identify the sizes of your disks to make sure you are restoring to the correct locations with # lspv and # bootinfo -s hdisk1.
 ){}
){} -
Run # ls savevg -f app.image -l to confirm contents of savevg file.
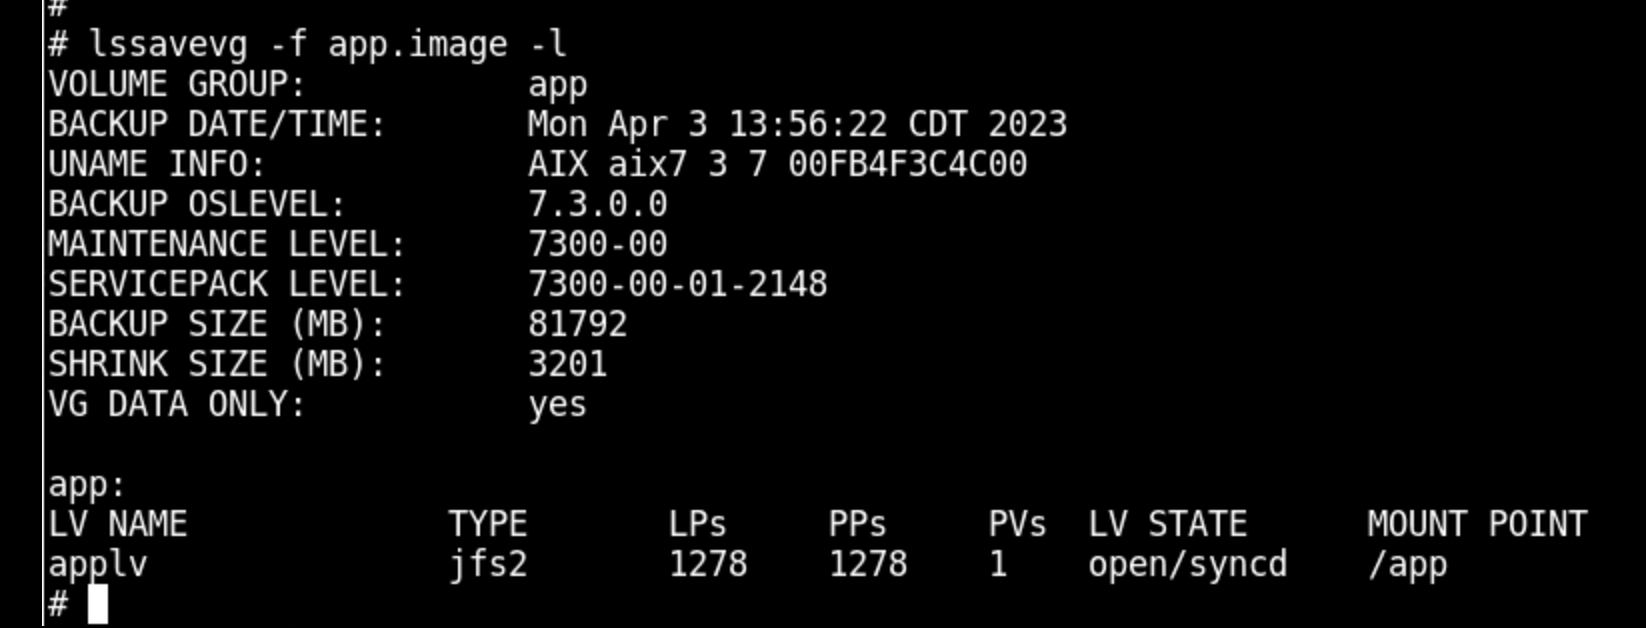 ){}
){} -
Run restore # restvg -f app.image hdisk1 (add flag -s to restore with minimum size, you can specify multiple disks if desired).
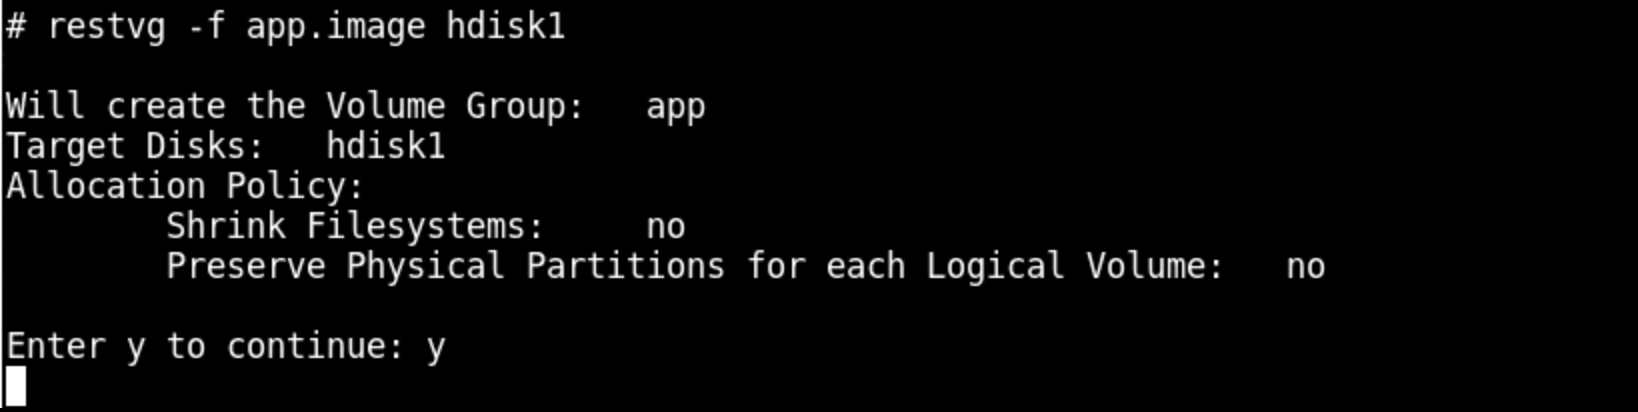 ){}
){} -
Finished.
-