EXPRESS ROUTE Inter-Connect from Skytap to Azure Native
Table of Contents
- Create Kyndryl Cloud Uplift Environment
- Create an Express Route Definition in Kyndryl Cloud Uplift
- Create a Resource Group in the Azure Portal
- Create a Virtual Network to attach the ExpressRoute
- Create an address space and subnet
- Create a Virtual Network Gateway
- Create Local Network Gateway
- Add all components to the Virtual Network Gateway
- Create test VM inside of Azure Native
- Test end-to-end connection from Kyndryl Cloud Uplift to Azure Native
- Appendix
Create Kyndryl Cloud Uplift Environment
Create the initial Kyndryl Cloud Uplift environment that contains your VMs or LPARs.
-
Login to the Azure portal and access your Kyndryl Cloud Uplift subscription.
You should land on the Dashboard page of Kyndryl Cloud Uplift.

-
Select AIX 7.1 in the search field. Select US-Texas-M-1 as the Region. Finally, select the AIX Template that matches your criteria.
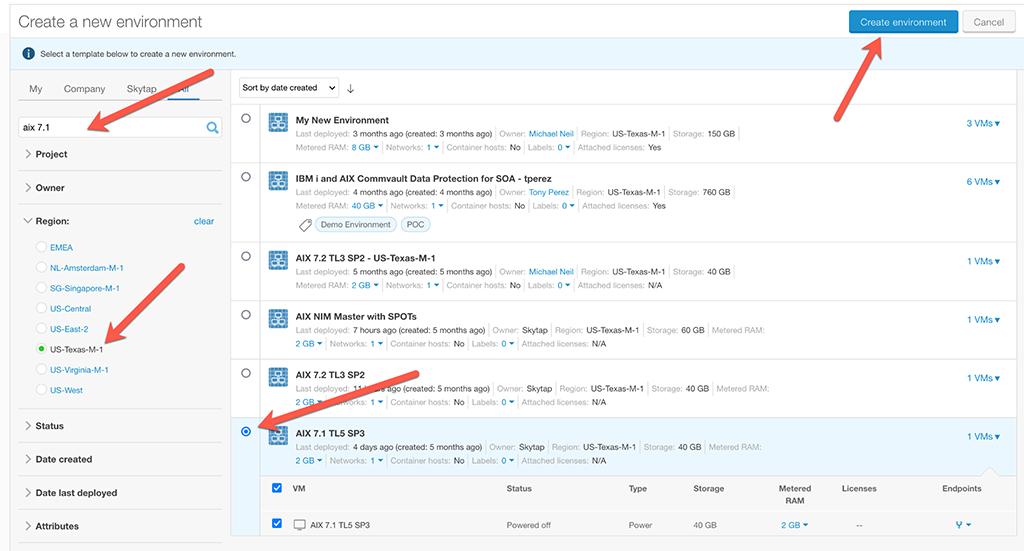
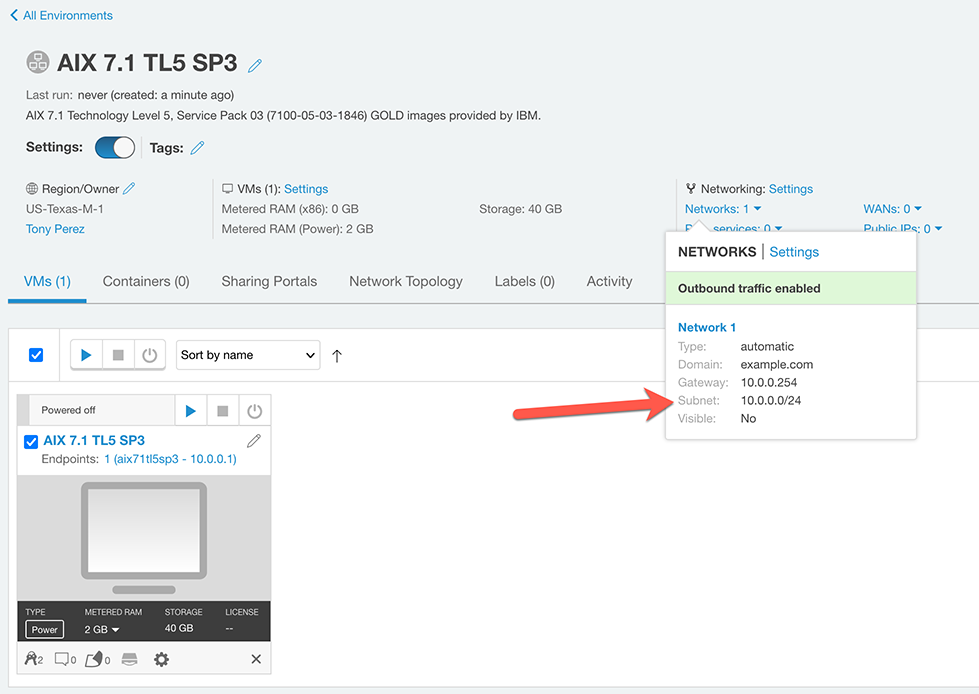
You should see the following page, make note of the default subnet that is created, you will use that value (as an example: 10.0.0.0/24) when defining your Express Route Connection.
Create an Express Route Definition in Kyndryl Cloud Uplift
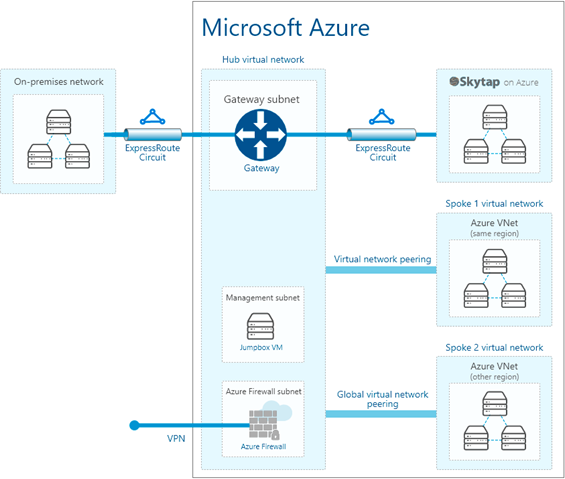
In Kyndryl Cloud Uplift – Establish Private Network Connection with Express Route and Configure a Virtual Network Gateway in Azure for ExpressRoute, then Connect the ExpressRoute Circuit to the Virtual Network Gateway. To do this, you will create an Express Route definition in Kyndryl Cloud Uplift using the following steps.
-
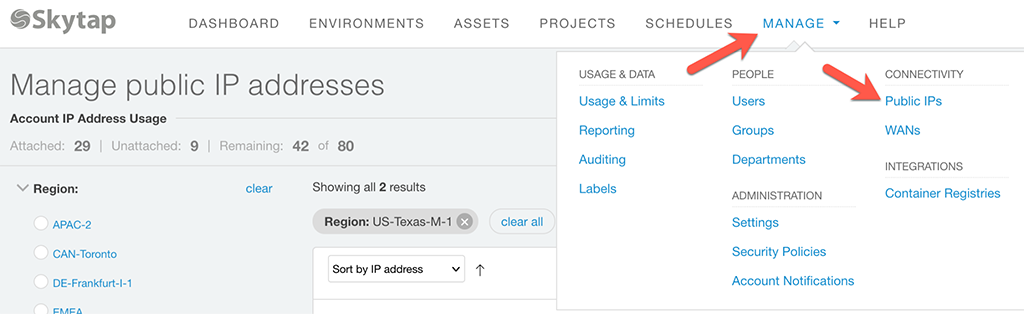
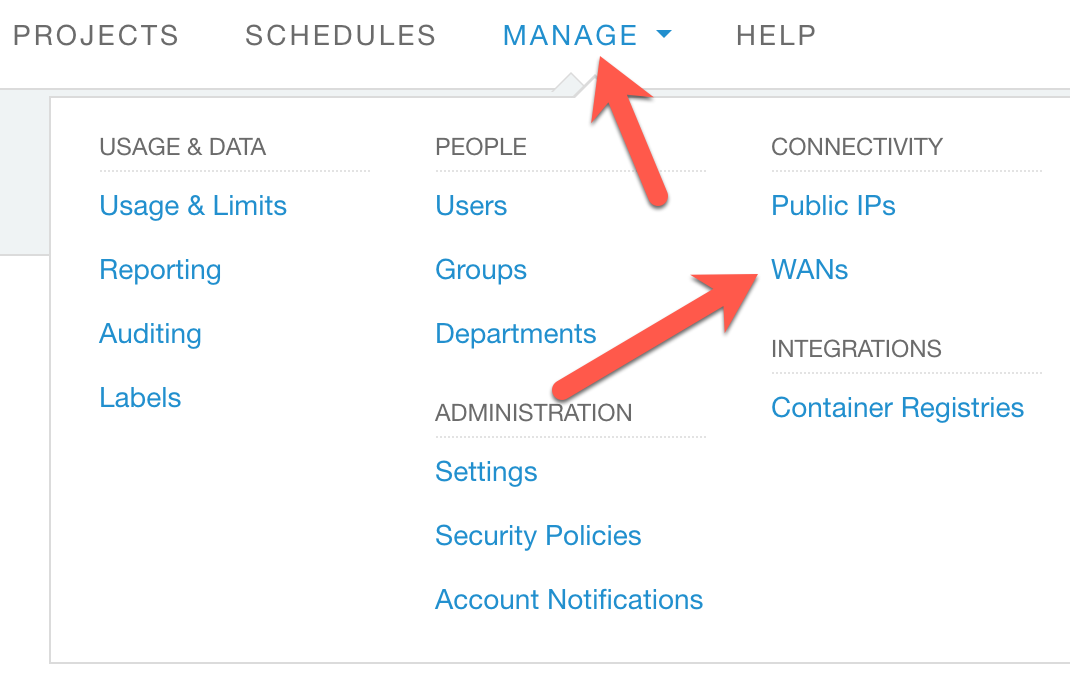
From the Manage Tab, Select Public IP
-
Allocate a public IP address.
Note Even though the end-point for the Express Route connection is label public IP in the user interface, the connection described in this document does not send traffic onto the public Internet, all the traffic stays within the Azure data-center.
-
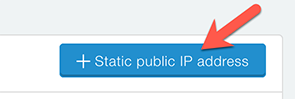
Click + Static public IP address:
-
Select the region where the connection will be created, in this case, Texas-M1 which is South Central in Azure.
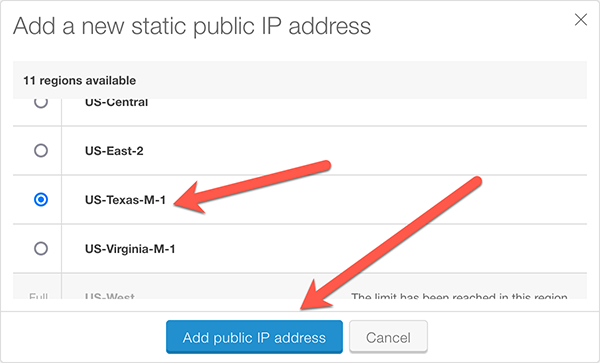
Note The new unattached IP address will be used in defining the Azure side of the Express Route connection.
-
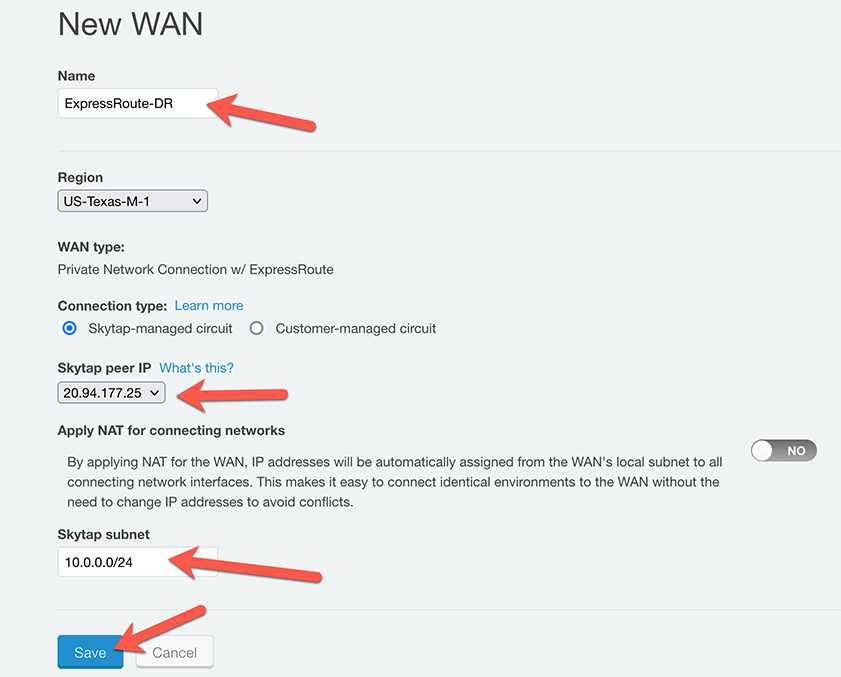
Now define a new WAN connection in the Kyndryl Cloud Uplift user interface.

-
Fill in the page and press Save.
Note You’ll see the following message while the connection is being built:

Once finished, you'll see the service keys required to define the Express Route endpoint on the Azure Native side of the connection.

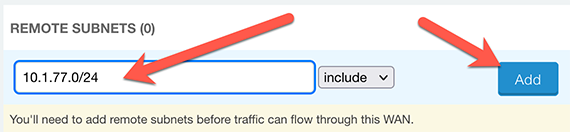
If you know what subnet(s) that will be accessed in native Azure, you can add them now or later. The subnet 10.1.77.0/24 is what will be defined as the VNET in Azure that the Kyndryl Cloud Uplift environment will talk to.
-
Add the remote subnet on the right side of the page.
Create a Resource Group in the Azure Portal
-
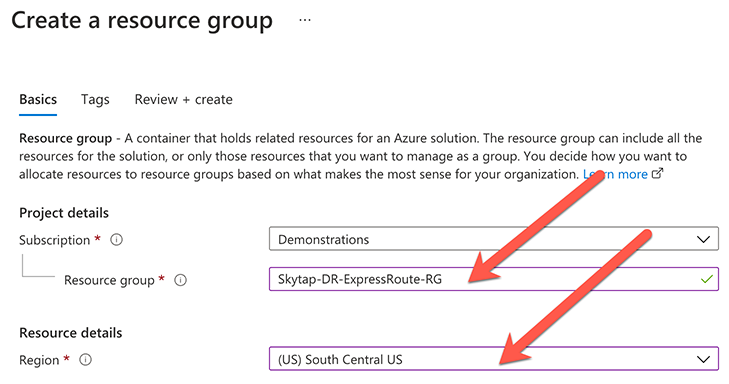
From the Azure Portal, create a Resource Group:

-
Give the Resource Group a name: (Example Kyndryl Cloud Uplift DR ExpressRoute-RG)
-
Click Review & create and then Create to finish creating the Resource Group.
Create a Virtual Network to attach the ExpressRoute
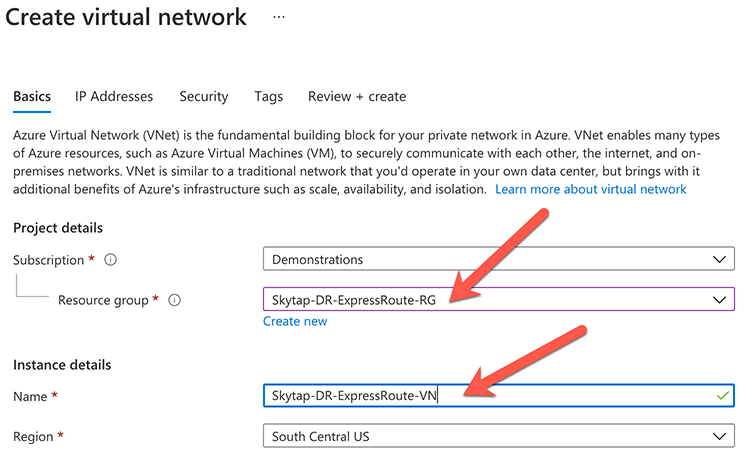
-
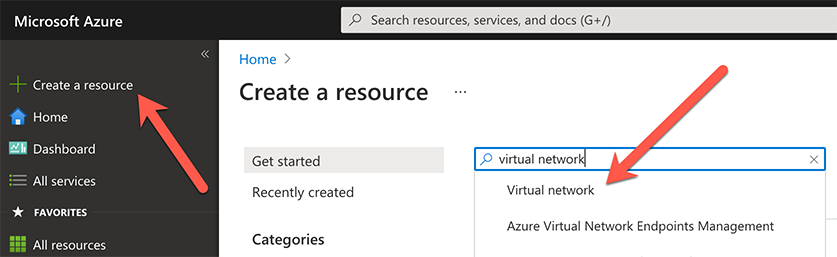
Click: Go to Resource

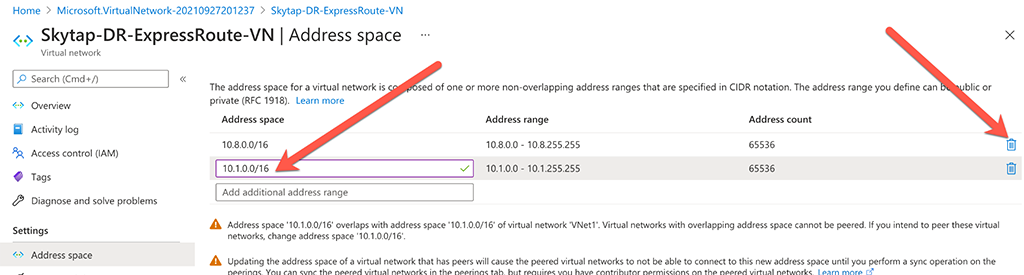
Create an address space and subnet
-
Create an address space: (Example:10.1.0.0/16)
Note If there are any other address spaces already defined, delete them. See example, remove 10.8.0.0/16 if it exists.
-
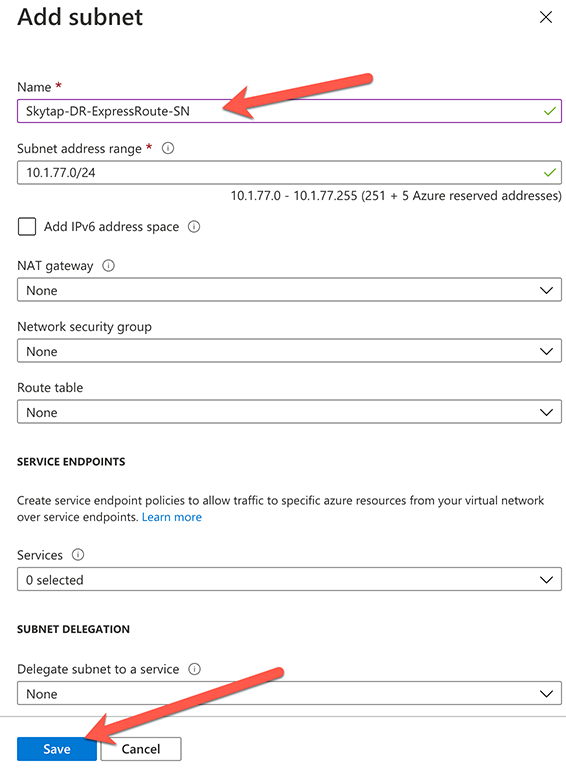
Now create a /24 subnet that fits within that address space. (Example: 10.1.77.0/24 in the 10.1.0.0/16)
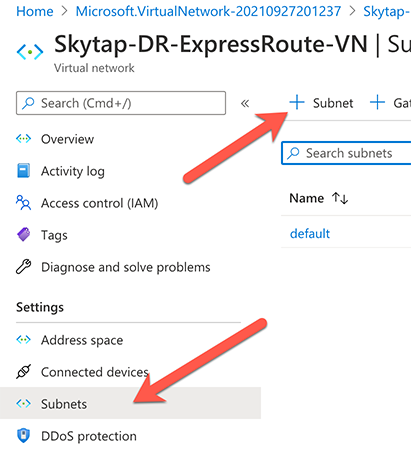
-
Name this subnet something like the following example: Kyndryl Cloud Uplift-DR-ExpressRoute-SN
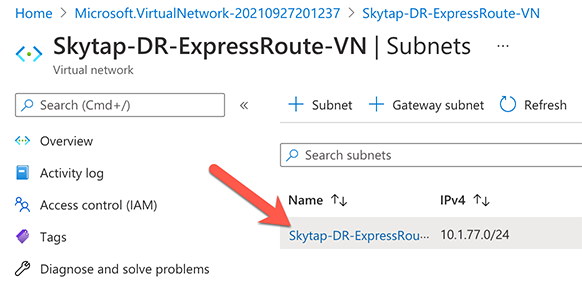
You should now have one subnet defined:
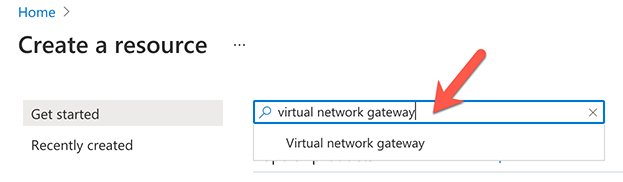
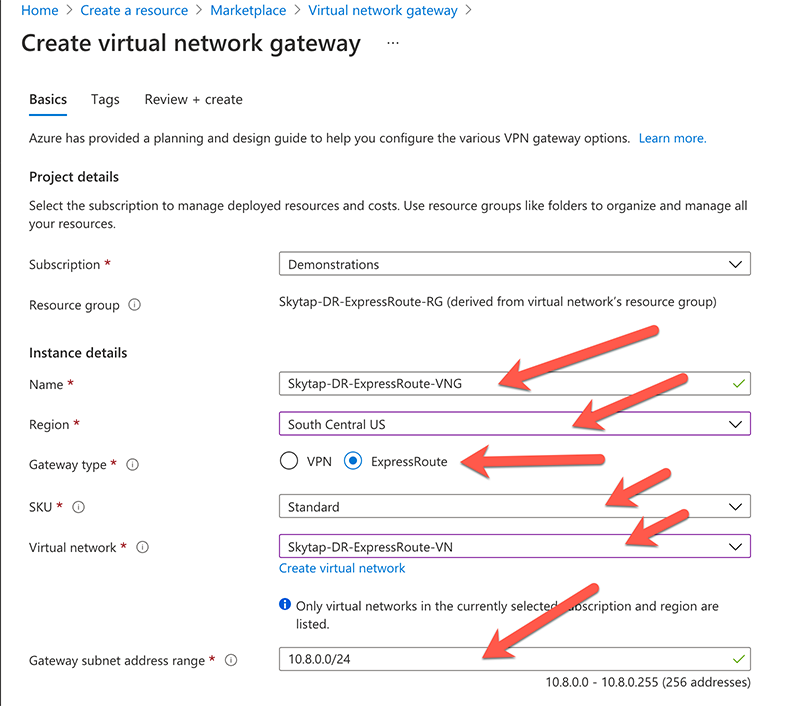
Create a Virtual Network Gateway
-
Create a virtual network gateway, and name it similar to the following example: Kyndryl Cloud Uplift-DR-ExpressRoute-VNG
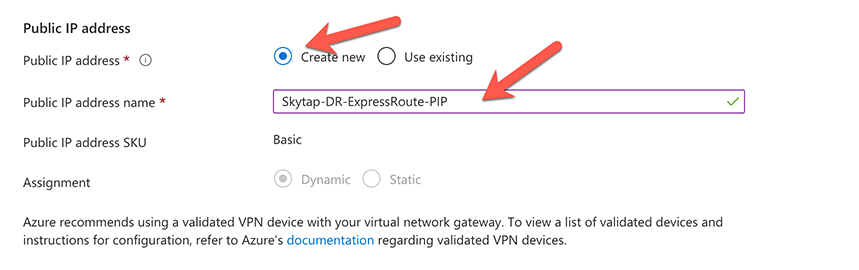
Note The virtual network gateway creates an IP endpoint that the Azure user interface calls Public IP Address. The Express Route connection created in this example does not send traffic to the public Internet. All the traffic will stay within the Azure Data center.
-
Click Review + create.
Note This Azure process can take 30+ minutes to complete.
-
Once done, click Go to Resource.

-
Review the values of your definition.
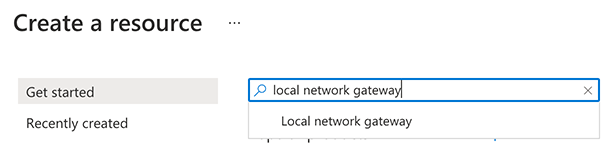
Create Local Network Gateway
Define and create a Local Network Gateway.
-
Fill out the values based on what has been defined so far:
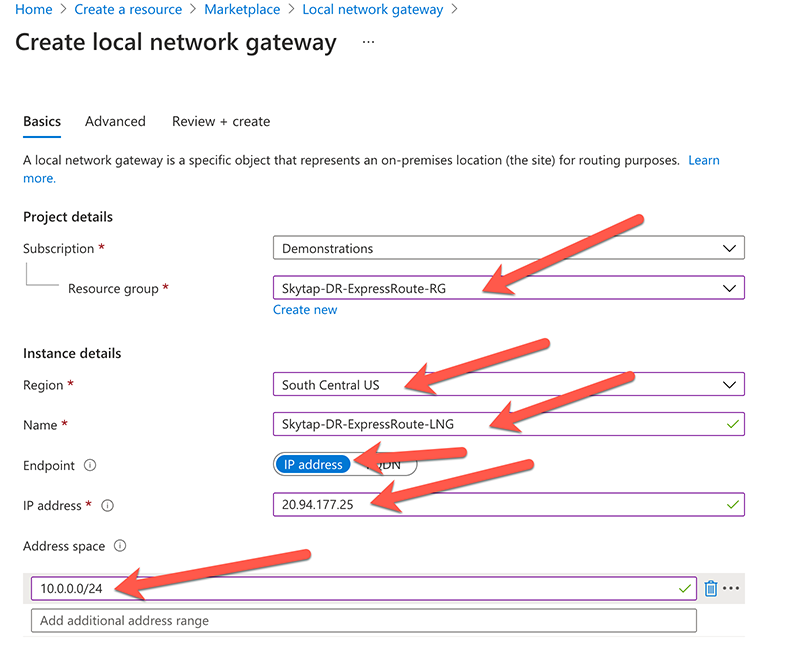
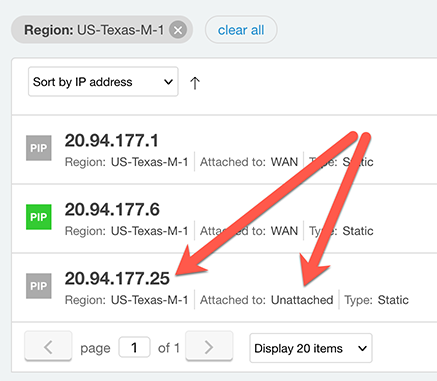
Note In our example 20.94.177.25 is the IP endpoint defined for the Kyndryl Cloud Uplift side of the Express Route Connection, and 10.0.0.0/24 is the address space used by the Kyndryl Cloud Uplift environment that we defined.
-
Click Review and create to create the Local Network Gateway.
Note This Azure process can take few minutes to complete.
-
Click on Go to Resource to review your connection configuration.
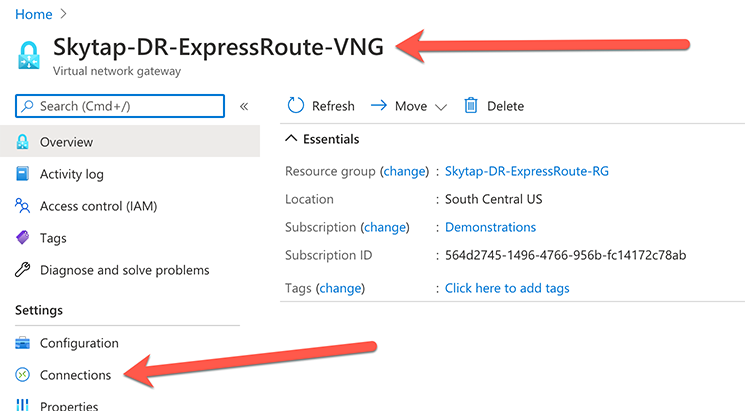
Add all components to the Virtual Network Gateway
-
Search for your previously defined Virtual Network Gateway (VNG)
(Example: Kyndryl Cloud Uplift-DR-ExpressRoute-VNG)
- Click Connections.
-
Click + Add.
-
Define the new connection inside the VNG:
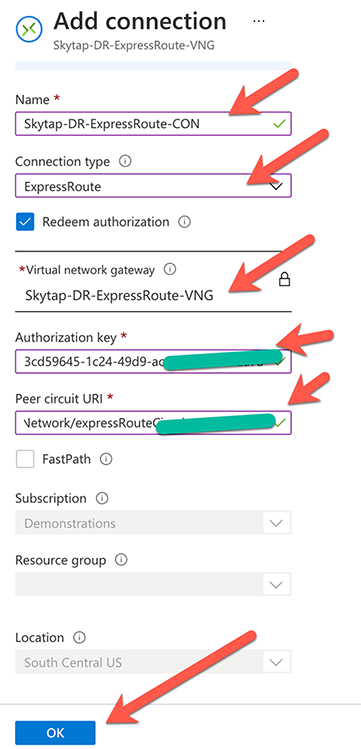
- Authorization Key = The Authorization Key shown in the WAN definition within Kyndryl Cloud Uplift.
- Peer circuit URI = The Resource ID shown in the WAN definition within Kyndryl Cloud Uplift.
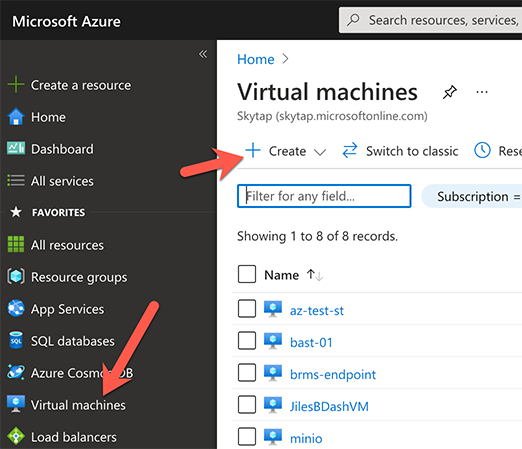
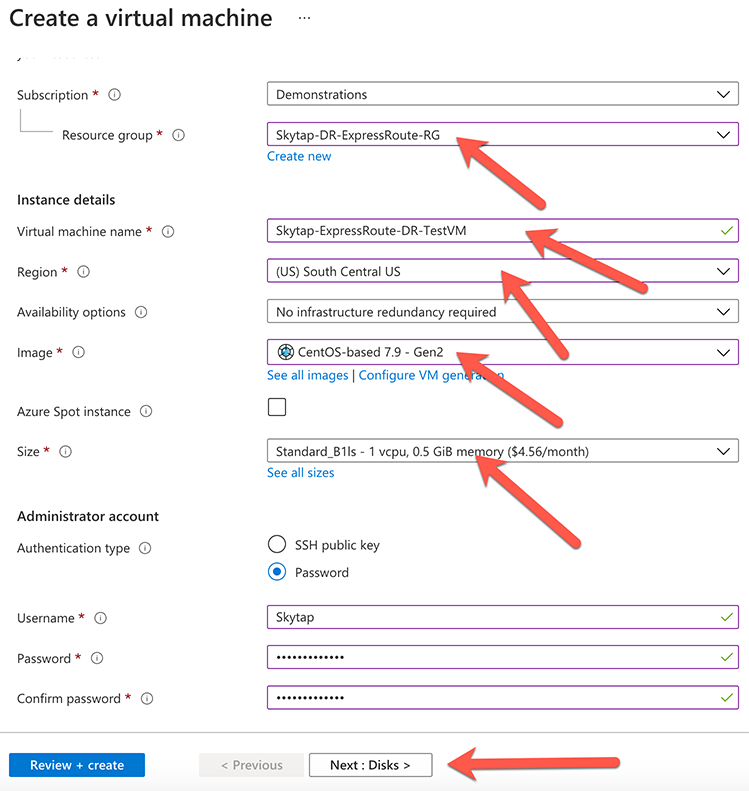
Create test VM inside of Azure Native
In order to test the connection from Kyndryl Cloud Uplift to Azure, add a VM to the defined subnet in the Azure VNet and attempt to ping it from the Kyndryl Cloud Uplift WAN page.
-
Add a VM to the subnet defined in Azure.
-
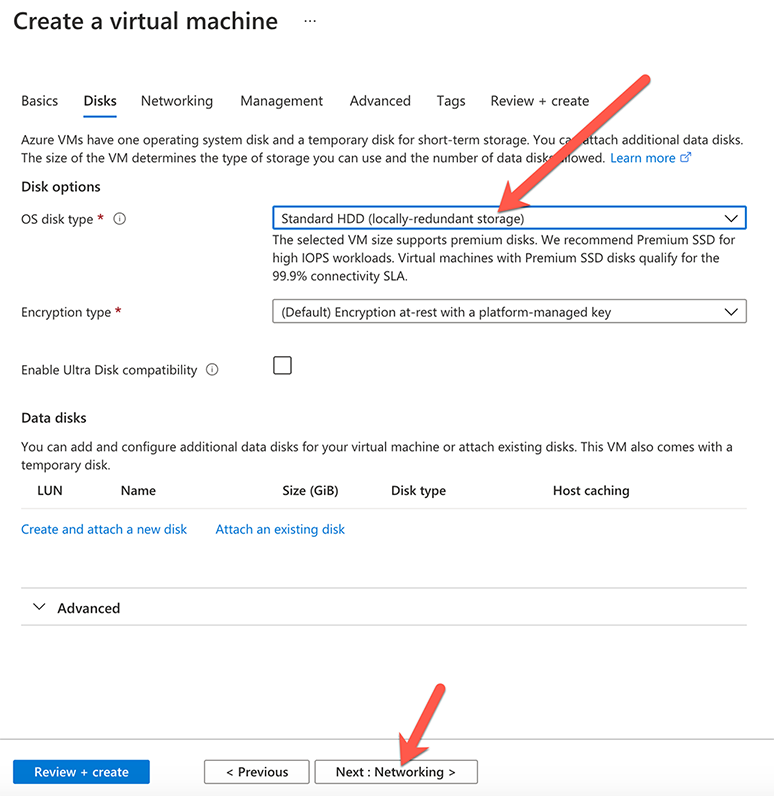
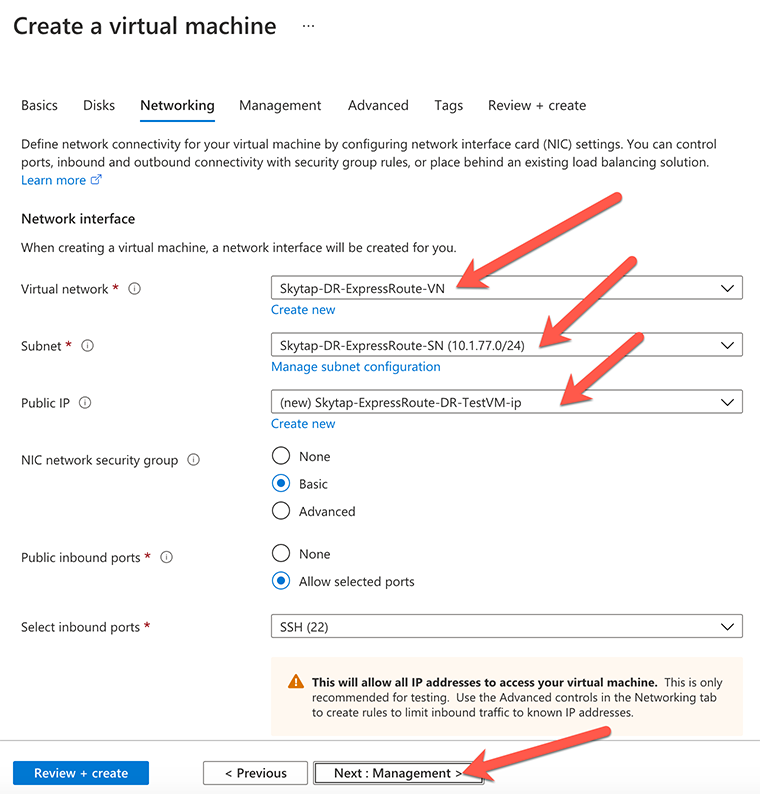
Create the test VM with these values:
Note Set Public IP to None if you don’t want access to the VM from the Internet. The VM will only have a private IP visible only from within Azure.
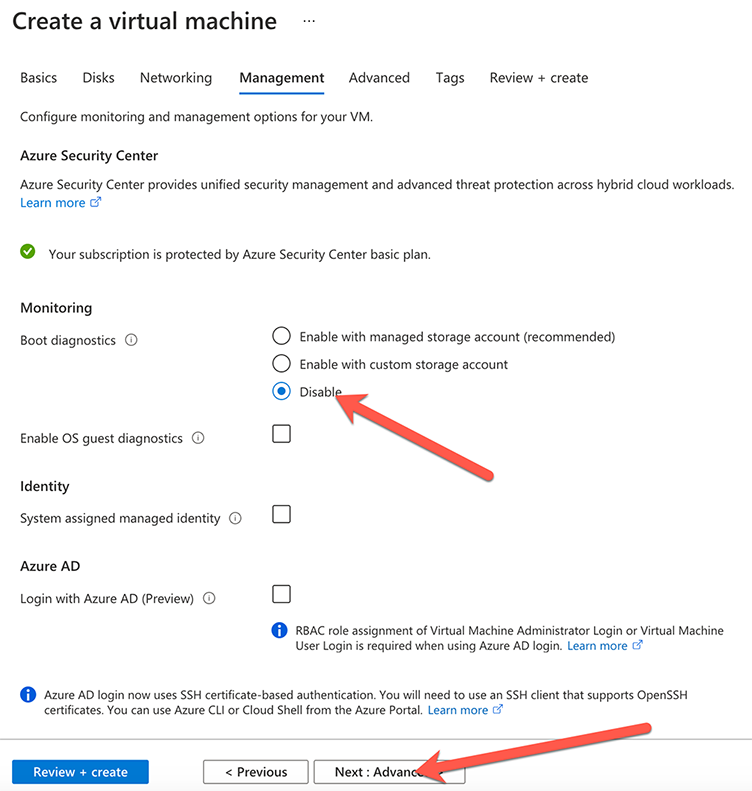
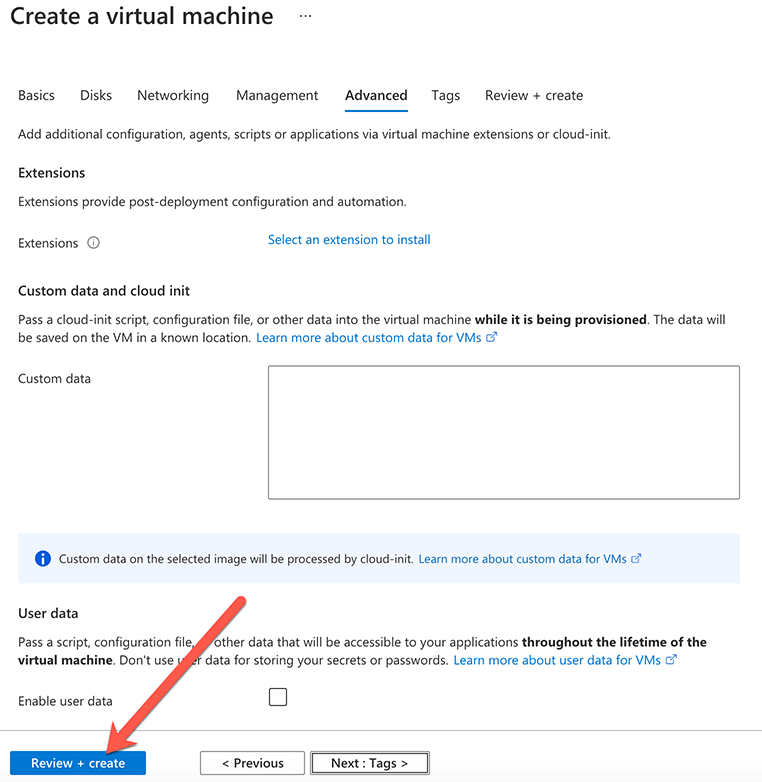
-
Click Review + create to get to the final page.
-
Click Create to create the VM in the Azure subnet.
Note It takes several minutes for the VM to be created in Azure.
-
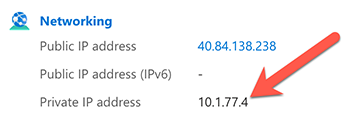
Once created, click Go to resource and make sure the status says Running.
-
On the VM details page, look for the Private IP Address:
Test end-to-end connection from Kyndryl Cloud Uplift to Azure Native
-
In the Kyndryl Cloud Uplift portal, go to the WAN definition that was created:
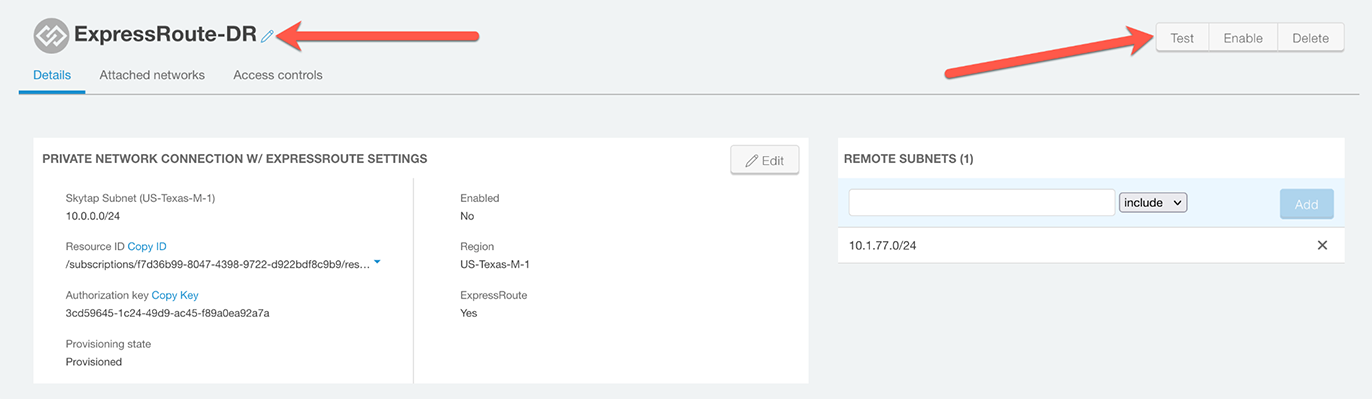
-
Click Test and enter the Private IP address from the Azure portal page. In our example: 10.1.77.4
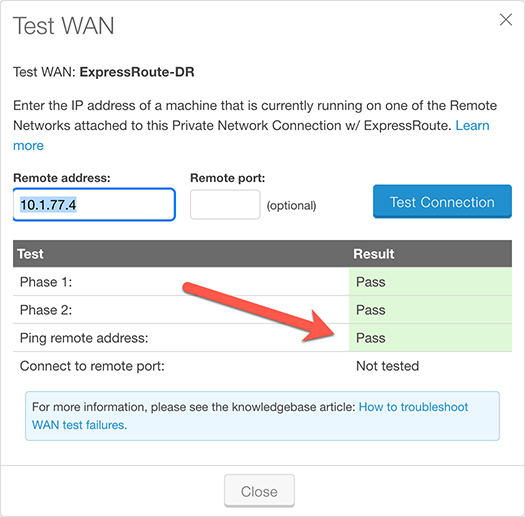
- If everything is working, you should get Pass when pinging the Azure VM from Kyndryl Cloud Uplift.
-
Enable the Express Route Connection in Kyndryl Cloud Uplift:

Once enabled, you can now attach Kyndryl Cloud Uplift environments that includes VM and LPARs to this Express Route Connection.
Appendix
Connect AIX LPAR to Express Route
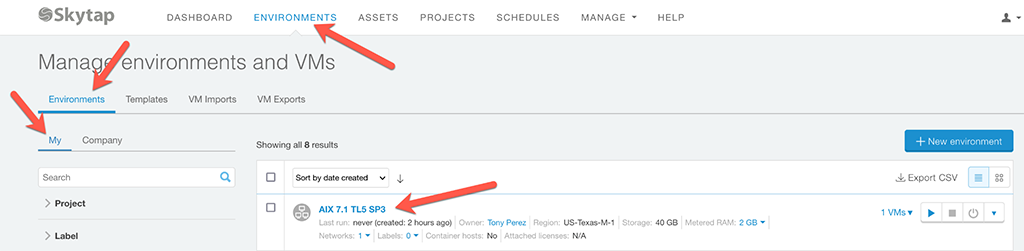
Now that the Express Route Connection is working, start the AIX LPAR in your Kyndryl Cloud Uplift Environment and attach the Express Route to it.
-
Find the original environment that you created in Kyndryl Cloud Uplift:
Once you click on it, you’ll see this page.
-
Click on the Power On button to start the LPAR.
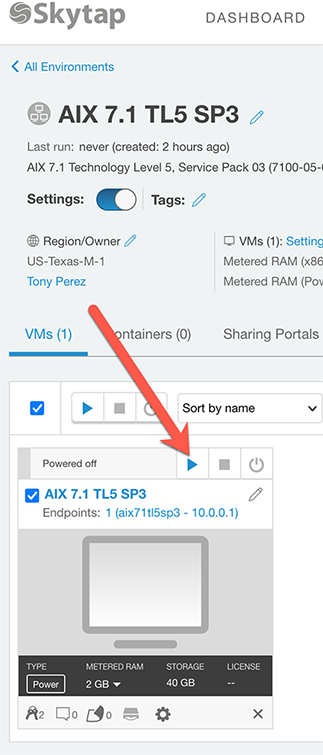
Note Once powered on, the background of the LPAR will turn green, and you’ll see some text on the little console icon.
-
Click on Network Settings
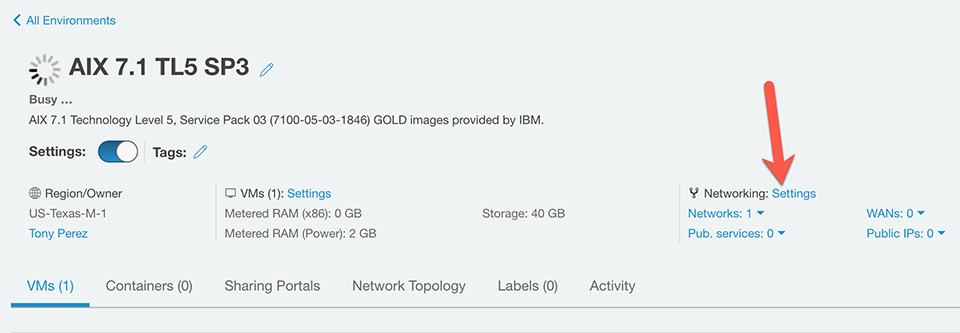
-
Then Attach to WANs
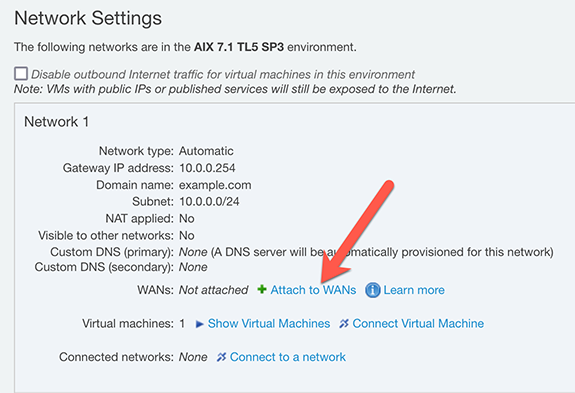
-
Select the WAN definition that was previously created:

- Click Attach, and then Connect.
- Then click Close.
-
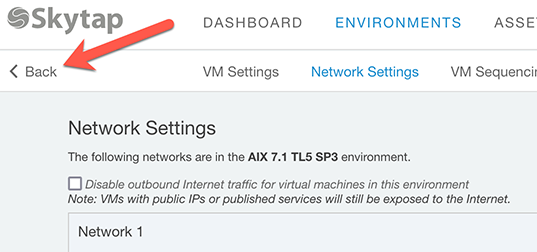
Click Back button in the upper left corner.
- Open the AIX console.
-
Click on the console icon, the terminal will open.

Note The default user and password below
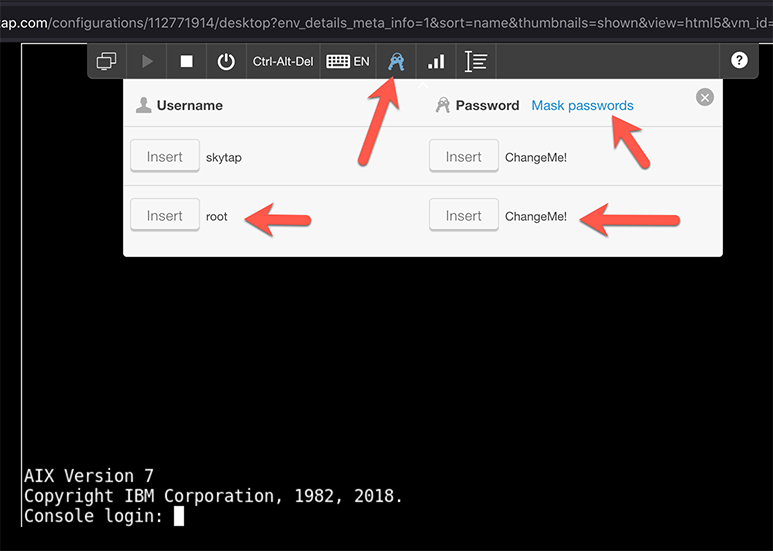
-
Finally ping the VM in Azure:
ping 10.1.77.4
Your Kyndryl Cloud Uplift AIX LPAR is now communicating with a VM in Azure Native.